2025 Guide: How to Transfer Files from iPhone to PC
 Jerry Cook
- Updated on 2023-10-27 to Transfer
iOS is the second largest smartphone operating system and Apple is the only manufacturer of iOS devices. So, even though the iPhone market is smaller than Android devices since Apple focus on premium users, they have continued to grow exponentially over the years. Even then, iPhone has always been ridiculed due to its poor compatibility with other platforms, which makes it difficult to share or transfer files to other devices cross-platform like Windows PC. But, even though transferring files from iPhone to PC isn't entirely impossible, the task itself can be quite challenging! In this article, we will tell you several methods to transfer files from iPhone 12/12 Pro(Max)/11/XR/XS/X to PC.
Way 1. The Best iPhone to PC Tranfer Solution without iTunes or iCloud
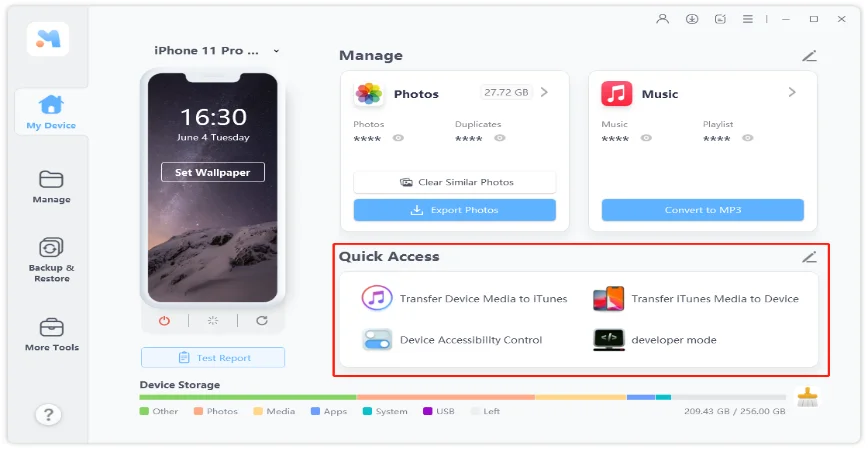
Facing trouble with transferring files from iPhone to PC using iTunes, iCloud, Windows AutoPlay or any other method? If you are, then don't worry, because here we will introduce you another method to transfer files from iPhone to PC without iTunes. UltFone iOS Data Manager is a very powerful iOS device manager that allows users to manage their iOS devices. It allows transferring files from iPhone to PC without iTunes and vice versa, backup & restore iPhone data to computer for free, repair iOS problems, and much more. To know how to transfer files from iPhone to PC without iTunes using UltFone iOS Data Manager, follow the below guide.
The Steps to Transfer Files from iPhone to PC without iTunes
- Step 1 Download and install UltFone iOS Data manager on your PC or Mac.
-
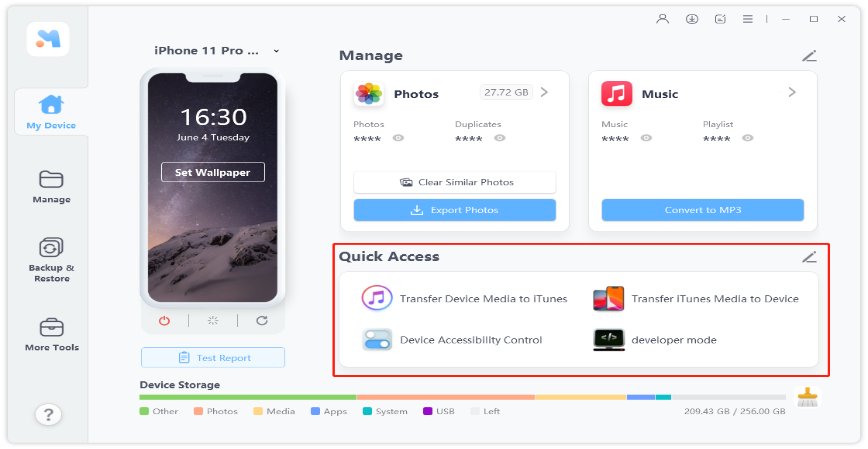
Step 2 Launch UltFone iOS Data Manager and connect your iPhone to the computer using a USB cable.

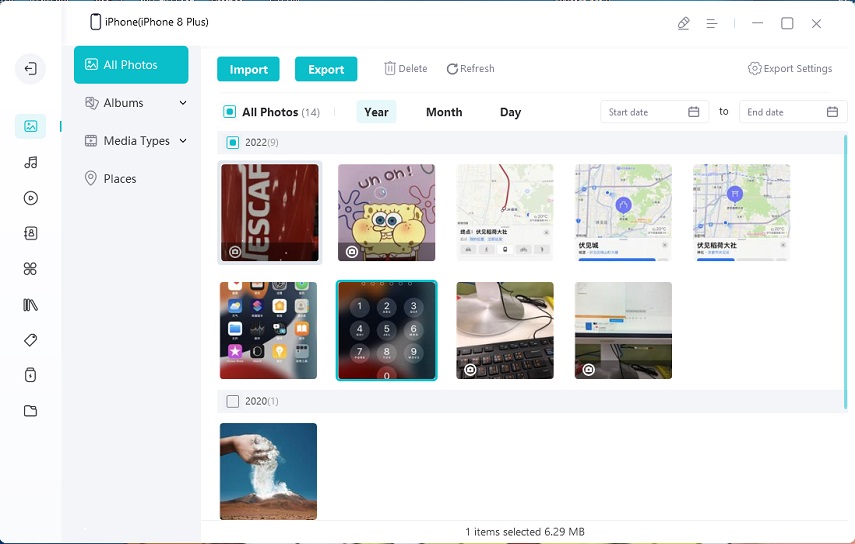
- Step 3 At UltFone iOS Data Manager home screen, go to Manage tab at the top and then select the files you want to transfer.
-
Step 4 Finally, click the Export button to transfer the files from iPhone to PC.

Way 2: How to Transfer files from iPhone to PC via iCloud for Windows
iCloud is the cloud storage and file synchronization service from Apple. It allows you to store your data on cloud servers as well as sync files like photos, videos, calendar etc. across all your devices. You can also download iCloud Windows application to sync your iCloud data with your PC. Transferring files from iPhone to PC without iTunes has become easier with the help of iCloud. Follow the below steps to know how to export iPhone photos to PC using iCloud for Windows:
- Step 1: First, check whether your iPhone is running the latest iOS platform. To check iOS platform, go to Settings > General > Software Update.
-
Step 2: Then, turn on iCloud on your iPhone. To do this, go to Settings > iCloud and then sign in to your Apple ID. Then, select which apps you want to use with iCloud.

- Step 3: Now, download iCloud for Windows on your PC and install it. Restart the computer after installing iCloud.
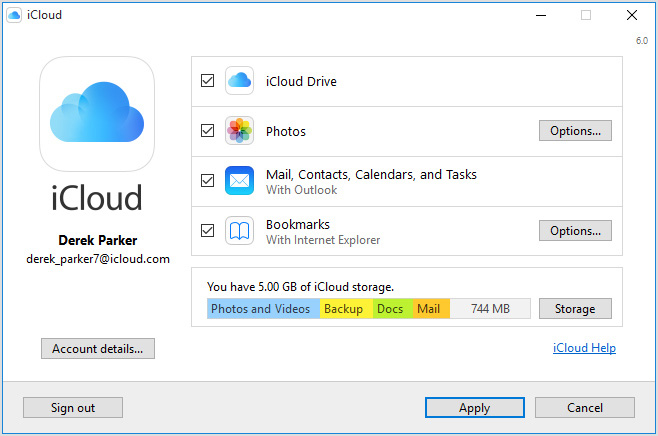
- Step 4: Launch iCloud and then sign in with your Apple ID and password.
-
Step 5: Select what you want to sync and then click Apply.

Way 3: Tranfer Files from iPhone to PC Using iTunes sync via USB
iTunes is the official iOS device manager from Apple that allows users to manage their iOS device. Users can back up their iOS device as well as restore data if any mishap occurs. It can also be used to sync data between iOS device and PC. If you want to know how to transfer files from iPhone to PC using USB using iTunes, follow the below steps -
Step 1: Make sure that you have the latest version of iTunes on your PC and open it.
Step 2: Connect iPhone to your PC using a USB cable and wait for the iPhone to be detected by iTunes.
Step 3: Now, click on the Device icon and then click Settings in the left pane.

Step 4: Select the content you want to sync and then tap Sync.
Step 5: Finally, click the Apply button and iTunes will start syncing the data. iTunes will automatically sync every time you connect your device with PC.
Way 4: iPhone File to PC Transfer via iTunes Sync with Wi-Fi
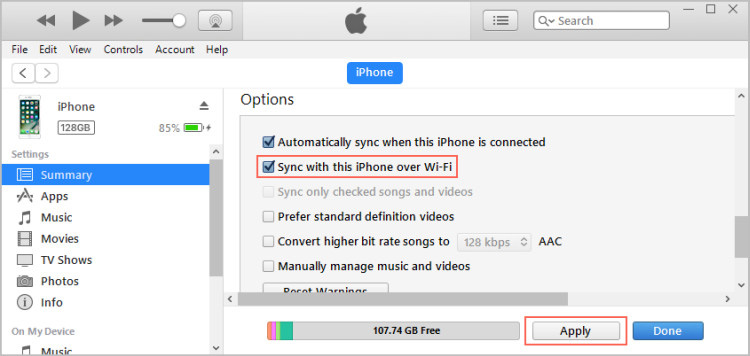
There is another method available to transfer files from iPhone to PC using iTunes via WiFi. Using this option, you don't need to connect the iPhone with PC for syncing; instead the process will be done automatically over WiFi. Though, you will still need to connect the device to the PC via USB for setting up this feature. Follow the steps given below to know how to transfer files from iPhone to PC using iTunes sync with Wi-Fi .
Step 1: Connect your iPhone to the computer via a USB cable and then launch iTunes.
Step 2: Click on the device icon and then click Summary option on the left pane.
Step 3: Now, select Sync with this iPhone over WiFi and click Apply.
Way 5: Using Windows AutoPlay
Windows AutoPlay can also be used for transferring files from iPhone to PC without iTunes. Windows AutoPlay automatically examines media files on music, photos, or video files and perform certain actions. Follow the below steps to transfer files from iPhone to PC using USB -
Step 1: Connect your iPhone to your computer via a USB cable.
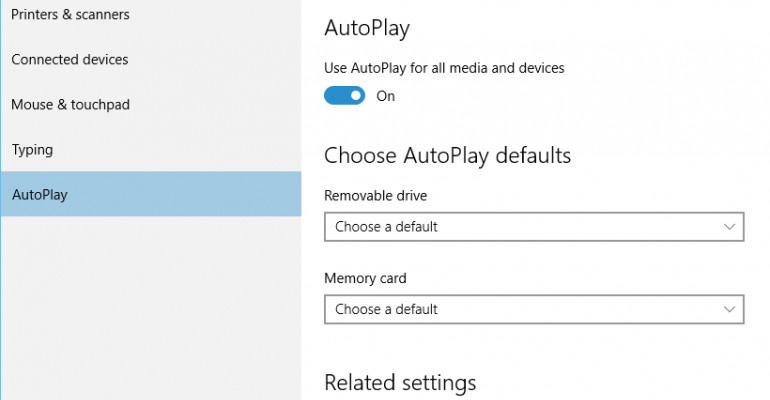
Step 2: Click on Settings menu on PC and then click Devices.
Step 3: Select AutoPlay and then select devices for AutoPlay under "Choose AutoPlay Defaults".
iPhone users have always been troubled when transferring files from iPhone to PC due to poor compatibility of iOS with other platforms. If you aren't able to transfer files from iPhone to PC, then in this article, we have given simple solutions for transferring files from iPhone to PC without iTunes, with iTunes and using third-party iPhone to PC Transfer software as the best alternative to iTunes or iCloud sync for transferring iPhone files to PC.

