How to Transfer Photos from Mac to iPhone
 Jerry Cook
- Updated on 2022-02-11 to Transfer File
When it comes to shring those beautiful moments taken and saved on your Mac with an iPhone, you would naturally hunt for a way that can transfer them safely. You are all aware that photographs and videos may be transferred from a Mac to an iPhone utilizing various methods. Most people think about using iTunes, but other options can do the job just as well. In this post, we will go through the top four methods on how to transfer photos from Mac to iPhone with or without iTunes. All of the processes have been described in layman's terms so that everyone can benefit from this post.
- Part 1. How to Transfer Photos from Mac to iPhone without iTunes
- Part 2. How to Import Photos from Mac to iPhone using iTunes/Finder
Part 1. How to Transfer Photos from Mac to iPhone without iTunes
Although iTunes can help you transfer images from your Mac to your iPhone, you may not want to do so for various reasons, including data erasing. Then, how to transfer photos from Mac to iPhone without iTunes? Using third-party iPhone transfer software, iCloud, AirDrop are all options for moving photos from your Mac to your iPhone without using iTunes.
Way 1. The Best Way to Import Photos from Mac to iPhone without iTunes - No Limits
The most common method for transferring photos from Mac to iPhone without iTunes is to use an iPhone data transfer tool like UltFone iOS Data Manager. It offers a more convenient way to manage and transfer data on iOS devices.
Some of the outstanding features include:
- Import photos from Mac to iPhone/iPad/iPod touch in one click. No data erasing.
- One click to export photos from iPhone to Mac/PC.
- Manage iPhone data (import/export/delete) without iTunes or network.
- Sync media files between iTunes and iOS device without syncing.
- Backup iOS data to computer for free.
To import photos from your Mac to your iPhone 12, follow these steps:
-
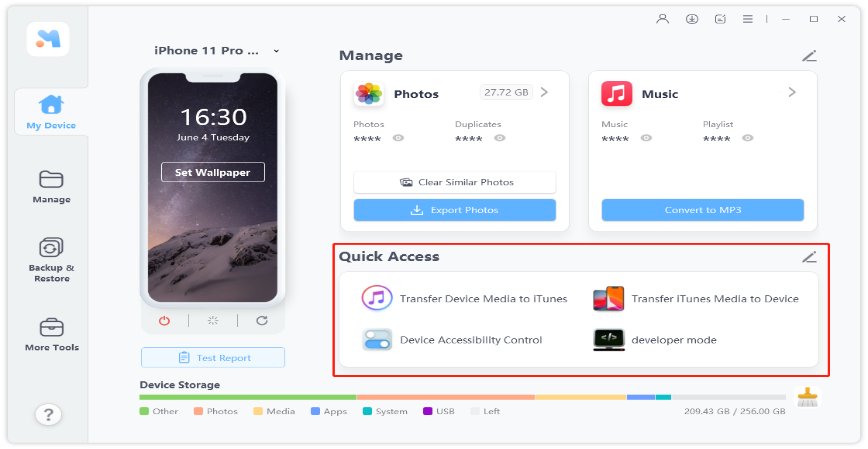
Step 1 Connect your iPhone to computer with a USB cable. Launch this software on your Mac and choose Manage tab from the menu options.

-
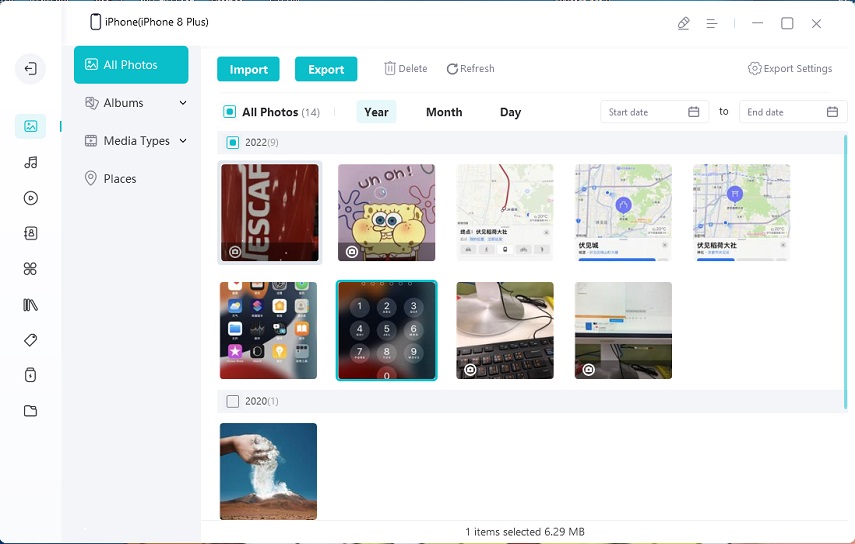
Step 2 Now, the data in your iPhone are displayed in categories. Choose Photos from the sidebar and then tap on the Import button from the top menu options. A window appears allowing you to choosing photos on your Mac.

- Step 3. Choose the photos and then click Open button in the window. The selected photos will be transferred to your iPhone Photos app.
Way 2. Sync Photos from Mac to iPhone using iCloud Photos App on Mac
Another option to get photos from Mac to iPhone is to use iCloud. When you enable iCloud Photos on your Mac, your photos will automatically be synced to your iCloud account that uses the same Apple ID. To use iCloud, you must first:
- Confirm that you have enough iCloud storage space.
- Install photos App on your device.
- Create a folder on your Mac to hold the photos you want to export.
If you've done your homework, you can sync photos from Mac to iPhone by following the steps outlined below.
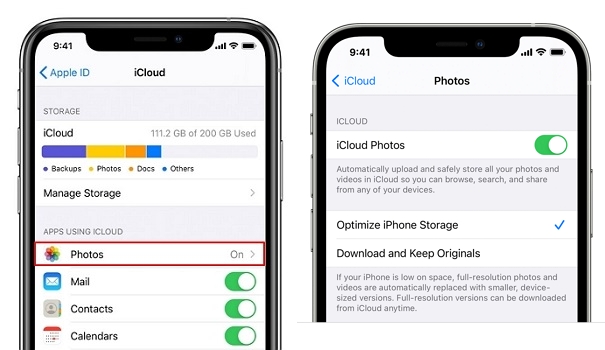
- Step 1: Go to Settings app on iPhone and click on Your Name, and select iCloud.
-
Step 2: Now go to Photos and enable it.

- Step 3: On your Mac, head to Apple Menu and tap on System Preferences.
- Step 4: Select iCloud and Sign in to your account.
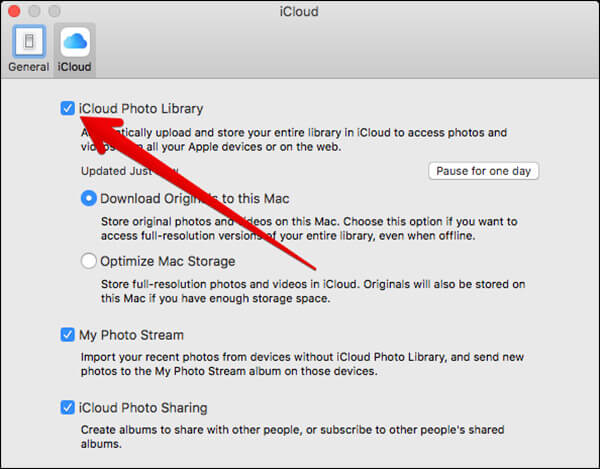
- Step 5: Now tap on Options and then switch on iCloud Photos and at last tap on Done.
-
Step 6: Finally, now wait until all the photos on Mac are synced with your iPhone device.

Way 3. Upload Photos from Mac to iPhone Using iCloud Website
If you don't want to download Photos App due to storage issues and are looking for an alternative way to move pictures from Mac to iPhone, you can do it using the iCloud Website. You can access your iCloud account via Web in no time and move photo from Mac to iPhone.
To do so, follow the steps:
- Step 1: First, make sure iCloud Photos is enabled on your device.
- Step 2: Now open iCloud.com and sign in to your Apple ID.
- Step 3: Next select Photos from the iCloud page.
- Step 4: After that, tap on Upload and select the Images.
-
Step 5: Finally, click on "Upload," and you are done!

Way 4. Move Photos from Mac to iPhone using AirDrop
With AirDrop, you can quickly move photos from Mac to iPhone. Apple has launched AirDrop back in OS X Lion (10.7), so AirDrop should work on your Mac, even though it is a little older.
AirDrop broadcasts discover and negotiate connections using Bluetooth Low Energy, enabling point-to-point Wi-Fi data transfer. This is a fast and straightforward means of transferring things like images and videos among Macs, iPhones, and iPads.
Below let's look at the steps on how do you move photos from Mac to iPhone using Airdrop.
- Step 1: First, open Finder app on your Mac.
- Step 2: Now open new tab so you can see two finder locations at a time.
- Step 3: Look for Photos you want to transfer to your iPhone.
- Step 4: In the other tab, tap on AirDrop.
- Step 5: Next, make sure your iPhone is unlocked and Airdrop is turned on.
-
Step 6: Now drag all selected photos to the Airdrop Finder Window.

- Step 7: On your iPhone, tap on Accept to save the photos on your device.
These are the four tried-and-tested methods to move pictures from Mac to iPhone without iTunes. Using UltFone iOS Data Manager allows you to transfer images from Mac to iPhone via USB cable and no network required, while the other three will enable you to share photographs wirelessly.
Part 2. How to Import Photos from Mac to iPhone using iTunes/Finder
When it comes to importing media from a Mac to an iPhone, iTunes is widely regarded as the most popular option. This method may be challenging for inexperienced users. So, in this section, we'll go over how to import photos from Mac to iPhone using iTunes/Finder. To get the best results, please follow all of the steps strictly.
1. Sync Photos to iPhone on macOS Catalina or Above
- Step 1: First, Launch Finder and attach your iPhone to your Mac.
- Step 2: Make sure to unlock your mobile device.
- Step 3: Now, in Finder, select your iPhone and select the category.
- Step 4: Now check the Sync category (Photos here) and select the files you want to import.
- Step 5: Next, tap on Apply to start importing the files.
-
Step 6: When it's finished, open the Photos app on your iPhone to review the things.

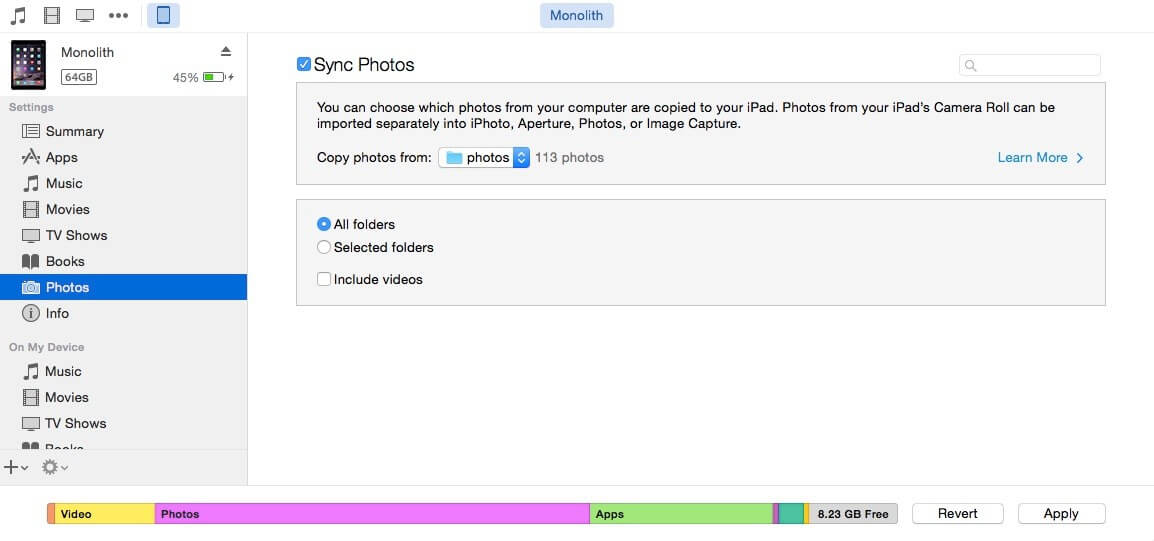
2. Sync Photos from Mac to iPhone with iTunes
- Step 1: First, connect your iPhone to Mac with a USB cable.
- Step 2: Once iTunes is opened, tap on Device Icon and select Photos.
- Step 3: Now check Sync Photos and select the pictures.
-
Step 4: Finally, tap on Apply to start syncing photos.

Wrap It Up
To sum up, if you have a good network, you can use Airdrop or iCloud to move photos to iPhone from Mac. If you don’t want to use the wireless methods due to the reasons that they are time-consuming and can be interrupted easily, UltFone iOS Data Manager is a good choice to manage and transfer iOS data. With it, even if you have no prior experience with data transfer, you can easily transfer images to your iPhone.

