How to Downgrade from iOS 14 Beta without Losing Data on Mac
If you install iOS 14 beta and now want to remove it, you should know that all data in your iPhone/iPad will be erased after downgrading. Then, is it possible to downgrade from iOS 14 beta without data loss on Mac? Yes, there is. Follow this instructions to downgrade from iOS 14 and iPadOS 14 beta without data loss on Mac. If you have a Windows computer, you can refer to here to learn how to downgrade iOS 14 beta on Windows.
Step 1. Back up your device data on Mac before downgrading
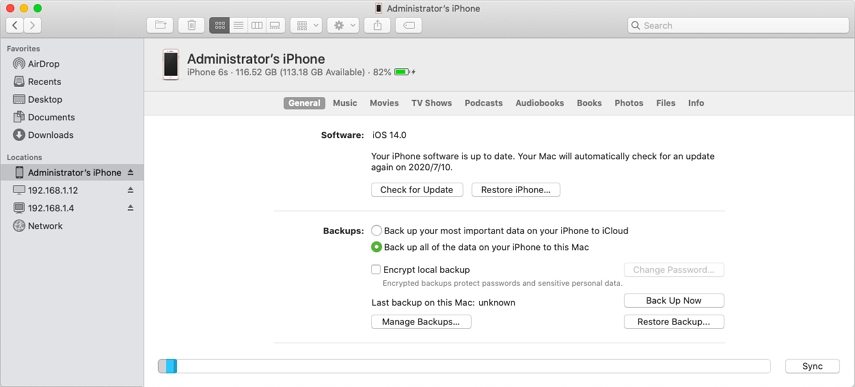
Connect your device to computer via USB cable. For macOS 10.15 or above, please open Finder on Mac, and find your device in Locations section. For other macOS systems, please backup your device using iTunes.
Step 2. Turn off Find My iPhone on your device
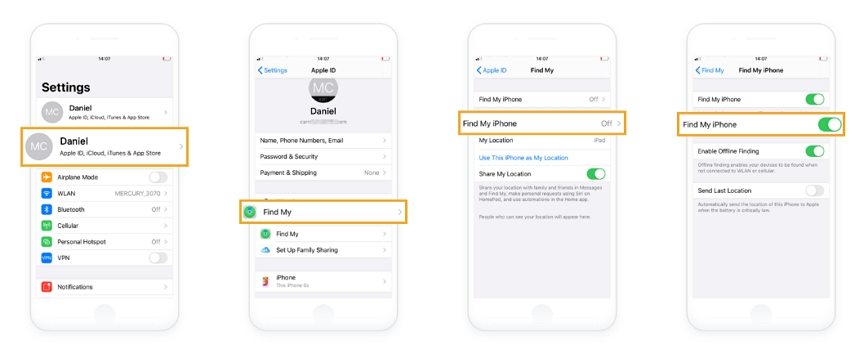
Prior to downgrade iOS 14 beta, please turn off Find My iPhone by going to Settings > Your Profile > Find My > Find My iPhone. Turn off it if it is enabled.
Step 3. Start Downgrading
Please download UltFone iOS System Repair, choose “Repair Operating System” function, and then “Deep Repair”.
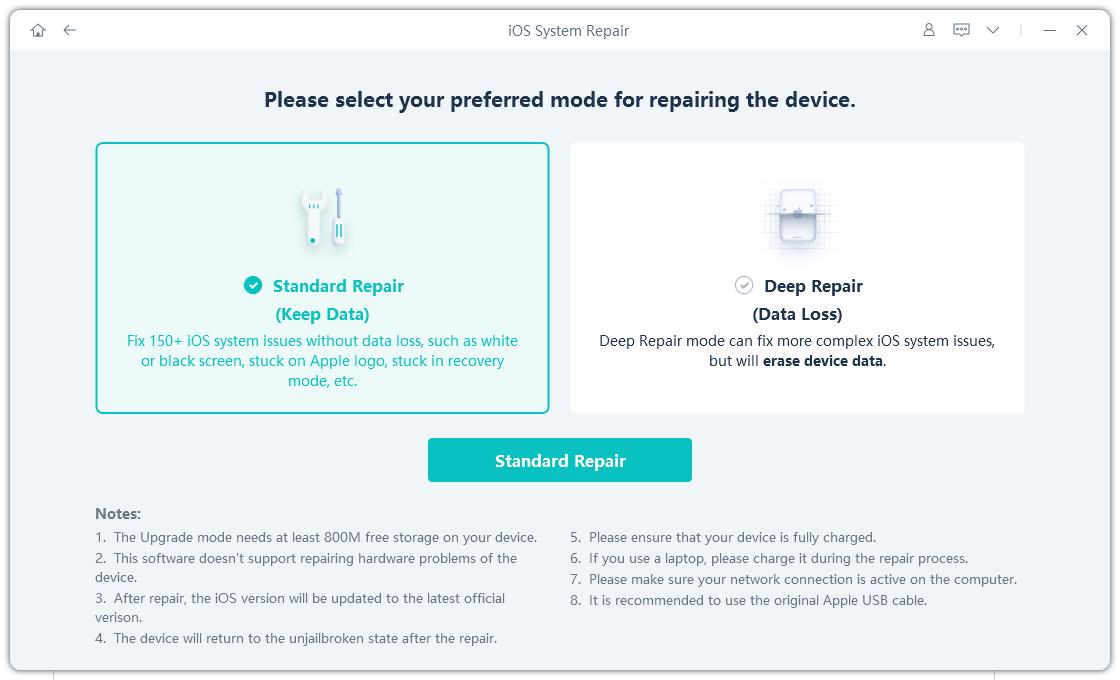
Note: Using Deep Repair to repair and roll back to iOS 13 will delete data and settings in your device.
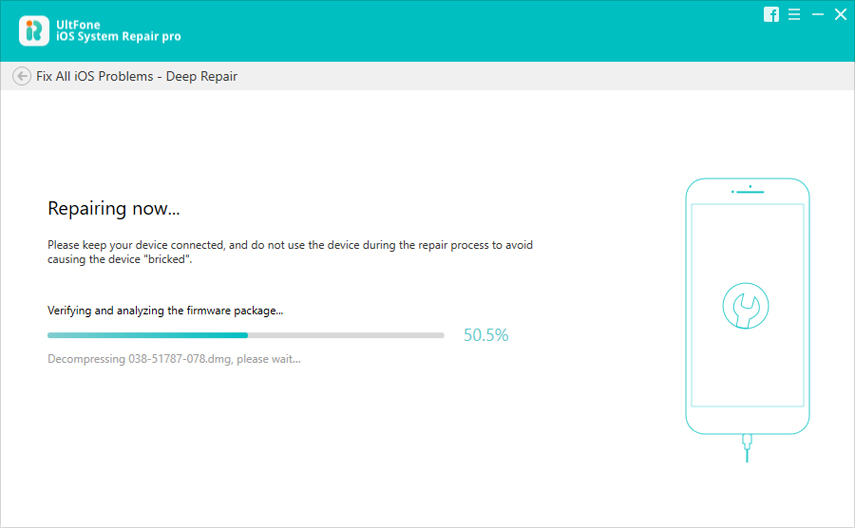
Download the firmware package for iOS 13 to start downgrading iOS 14 beta.
Step 4. After repairing and downgrading successfully, please find and open the backup file to change info.plist info.
1. Find backup file
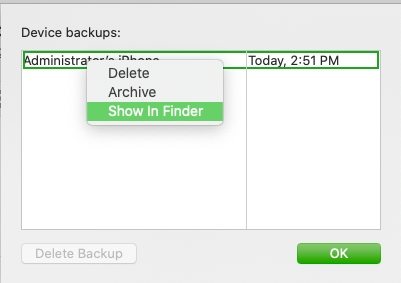
On macOS 10.15 and above: Connect your device to computer, and open Finder. Find your device in Locations, click Manage Backups button. Find the backup file you created previously.
Right click this backup file and choose Show in Finder option.
2. Locate info.plist file from the backup details.
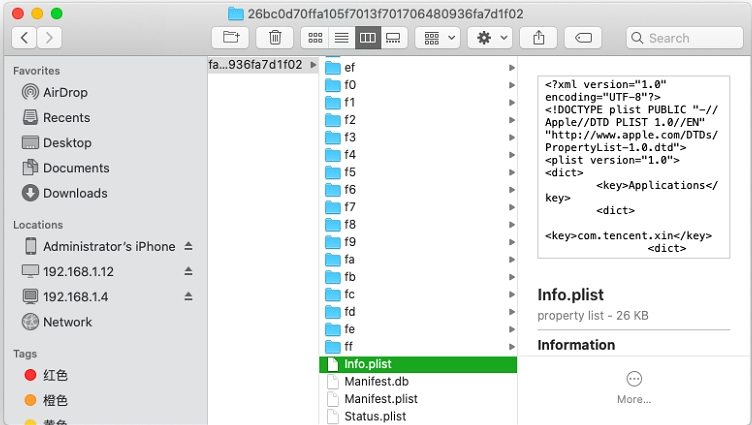
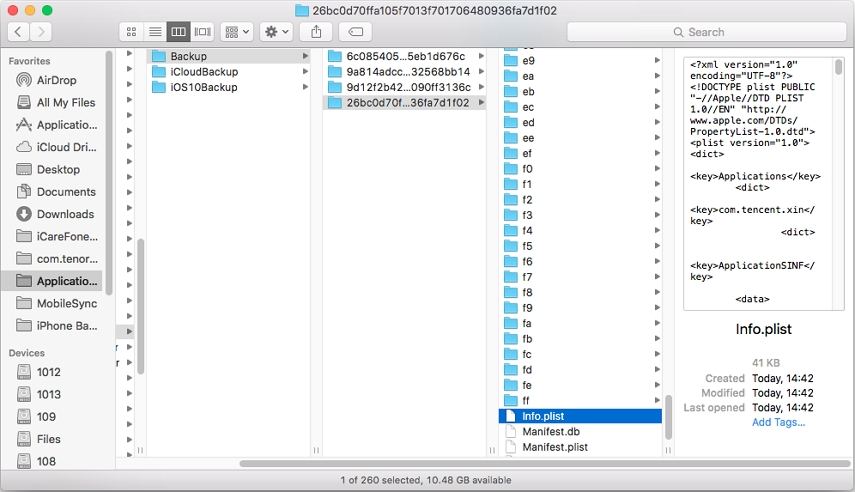
Tip: If your Mac is under macOS 10.15, go to ~/Library/Application Support/MobileSync/Backup/ to find the backup file and info.plist file.
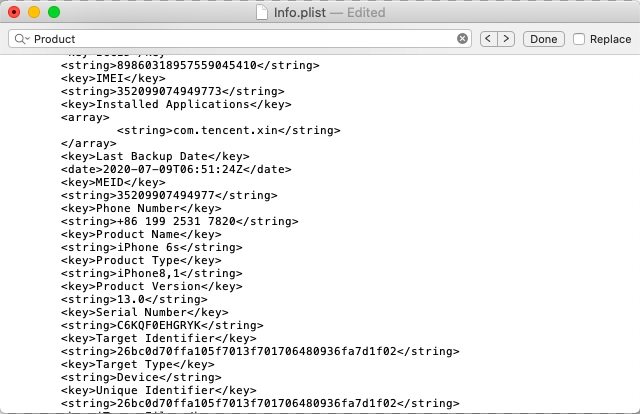
3. Open the info.plist file with TextEdit, search for “Product Version”, and change iOS 14 to iOS 13. Save this document and exit.
Step 5. Restore data from backup
If your Mac is macOS 10.15 and above, connect your device to computer with USB cable, and open Finder > Locations to find your device. Click Restore Backup…to restore your device from the backup file you have just changed the info.plist file.
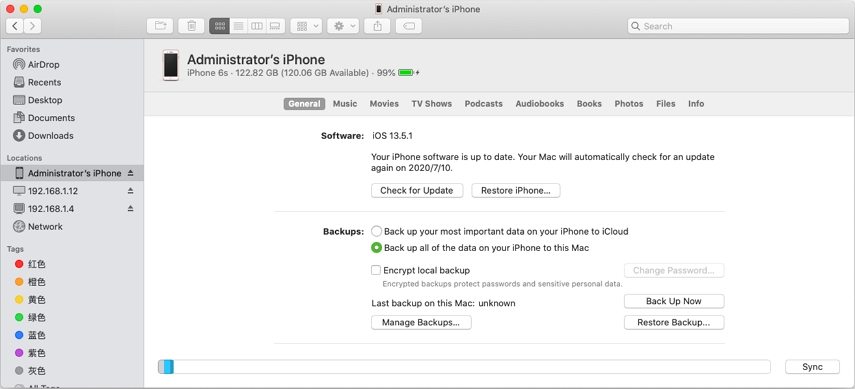
If your Mac is under macOS 10.15, please open iTunes on computer and click Restore Backup…to restore your device from the backup file you have just changed the info.plist file.
That is it. After these steps, your iOS device has rolled back to iOS 13 without losing data.
