How to Reinstall Mac OS without Losing Data
 Jerry Cook
- Updated on 2020-08-07 to Mac Tips
Users are often forced to reinstall their system OS, but doing so puts the data at risk. Whether you are facing firmware issues, startup errors, malware attack, or OS corruption, deleting the OS and reinstalling it is the right choice. So, here we have a guide that would help you reinstall macOS X without losing data. And it is not just OS X, the reinstallation process for other versions can be carried out similarly as well.
Let’s dig deeper and find out what you can do here.
- Part 1. Can You Reinstall Mac OS Without Losing Data?
- Part 2: Preparations To Reinstall Mac OS Sierra
- Part 3. Guide to Reinstall OS X Without Losing Data
-
- Part 3. Guide to Reinstall OS X Without Losing Data
Part 1. Can You Reinstall Mac OS Without Losing Data?
In general cases, when you want to reinstall mac os high Sierra without losing data, it is an easy task. The OS reinstallation process is carried from the recovery menu, and hence it doesn’t erase data from your device. However, it is not possible for everyone.
Most users don’t decide; instead, they are forced to reinstall macOS due to some issues with the macOS. The common reason why people had to reinstall OS involves:
- If your system has firmware related issues, you won’t be able to carry out operations, and the system will malfunction. Hence, reinstalling macOS is the only option.
- Issues with the bootstrap program can only be resolved with OS re-installation only.
- In case the Mac data gets corrupted, to troubleshoot the problem, you’ll have to reinstall OS.
- A serious malware or virus attack can infect your system’s core function that can only be fixed after reinstalling the operating system.
Other issues like improper installation of macOS or corrupted version or interrupted installation will require you to carry out the process again. In such scenarios, your device data will be at risk. Therefore, we recommend creating a backup of your data so that you can restore it later.
Part 2: Preparations To Reinstall Mac OS Sierra
If you want to know how to perform Mac reinstall os without losing data, then you need to make several preparations for it. The crucial things you need to consider are given here.
- The process will take around 30 minutes to 3 hours. The exact time might differ according to the macOS version you are trying to install.
- To ensure that the reinstallation process is carried out without a hitch, plug your Mac to a power source and charge it.
- There is a chance that your system will overheat and restart during the reinstallation. So, make sure that you keep it away from direct sunlight or other heat sources.
- Always consider the possibility of data loss during and after reinstallation. So, the first step should always be creating backup.
- Disconnect attached USB drives and other peripheral devices.
- Reinstallation requires downloading patches and system updates. Hence, you’ll need a stable internet access for a seamless update.
After you’ve taken care of the above things, it’ll be easier to reinstall OS X, Sierra, High Sierra, and other versions as well.
Part 3. Guide to Reinstall OS X Without Losing Data
We have narrowed down the steps you need to follow. Be careful, and you’ll be able to save your data from getting lost.
Step 1. Backup Files on Mac
As you proceed to reinstall Mac OS X without losing data, the first step is backing up the data. There are many ways you can choose to backup Mac data such as iCloud, Time Machine, Google Drive, OneDrive, Dropbox, or using external hard drive. Here, we’ll focus on backing up data using Time Machine.
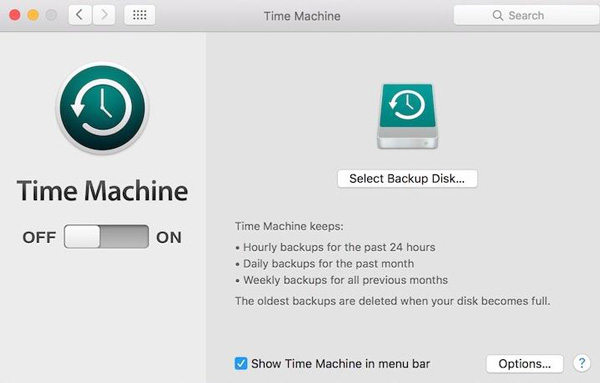
- 1. Connect your system to a data storage media and launch Time Machine from Menu > System Preferences > Time Machine.
-
2. Hit the Select Backup Disk option and manually choose the location where you want to save the backup.

-
3. The available location for backup will appear, and you can pick the one you like. Also, don’t forget to check the “Encrypt Backups” option. You can also click on “Options” and enable automatic backup feature.

-
4. Confirm the backup and wait until you see the “Backup Complete” message.

Step 2. Start up from macOS Recovery
Now, the next step is booting Mac in recovery mode. The Mac Recovery Mode will provide you the module for reinstalling macOS.
- 1. Start by restarting your system, and when it does, press the Command + 4 keys together to enter the Recovery mode.
-
2. The Utility window will open up, and you will see the Reinstall macOS option. Select it and proceed as instructed.

Carry out the steps carefully as the system guides you and stay connected to fast internet. One minute detail to pay attention to is that if you want to upgrade your current macOS version, then you need to press Option + R key combination.
Step 3. Reinstall macOS Without Losing Data
In this step, we’ll focus on the part where you can reinstall macOS Sierra without losing data. There is a basic drill that you have to follow for reinstallation, but choosing the right options will ensure that the data doesn’t get erased.
-
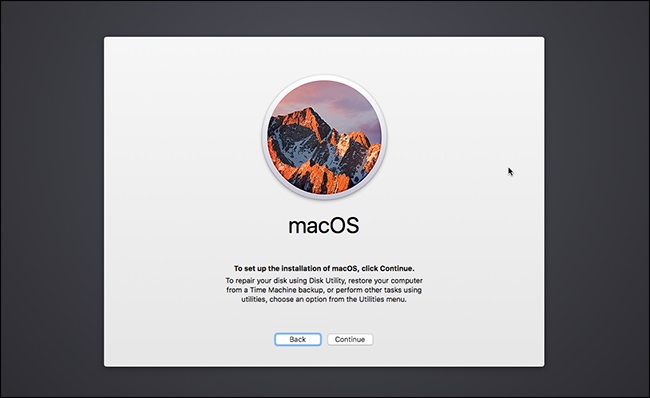
1. As you hit the Reinstall button, you will get a confirmation pop up to brief you about the process. Hit the Continue button to move forward.

-
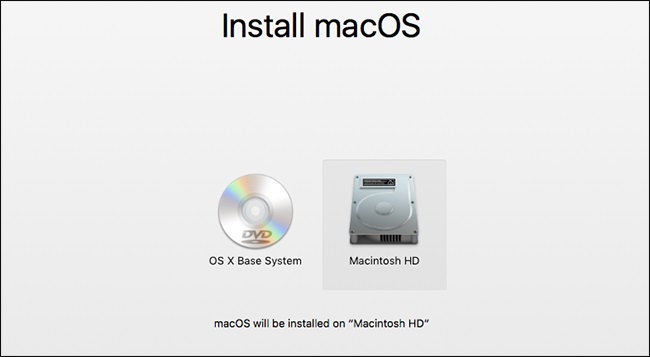
2. Next, you’ll get a prompt regarding the disk you’d like to choose for OS installation. Pick the inbuilt disk and initiate the process.

-
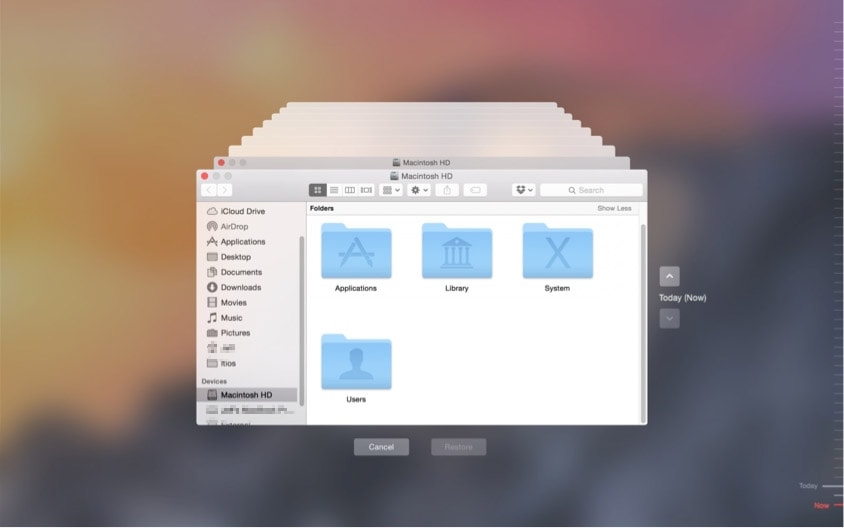
3. Let the macOS Utility handle the task and sit back. Wait patiently until the process finishes, and after the OS installation, restore data from Time Machine backup.

And that’s all you need to do for a safe and secure macOS reinstallation.
FAQs about Reinstall Mac OS
1. What does reinstall macOS mean?
Reinstalling macOS means starting your system with a clean copy of the Operating System, wiping out any malware/bugs/viruses and fix system problems as well.
2. How to recover lost data after reinstalling macOS?
If you’ve accidentally erased your Mac data during reinstallation, then we recommend using UltFone Mac Data Recovery. The main features of the software involve data recovery from Mac-based storage devices. As the software is built with the latest technology, it guarantees 100% recovery and supports all file types.
Get your hands on UltFone Mac Data Recovery and use the guide below to retrieve every single bit of data.
-
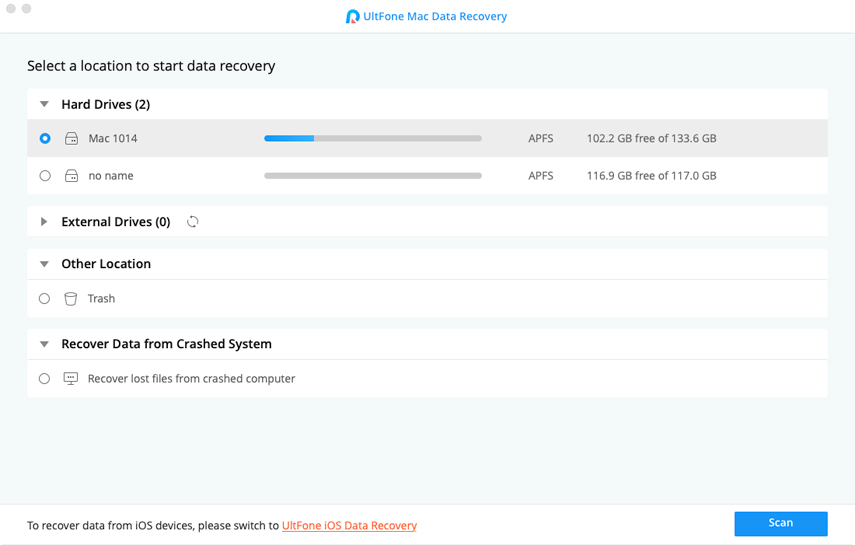
Step 1: Launch program and the available hard drive and partitions will be displayed on the screen. Specify the location and hit the “Scan” button.

-
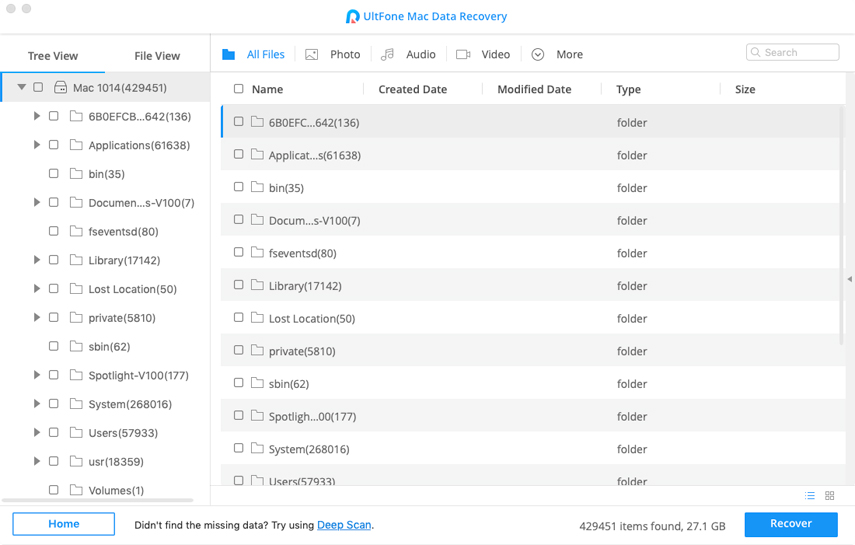
Step 2: This Mac data recovery tool will perform a quick scan of the drive and display the data in a Tree View. You can filter the scan results as per requirements to ease up data selection.

-
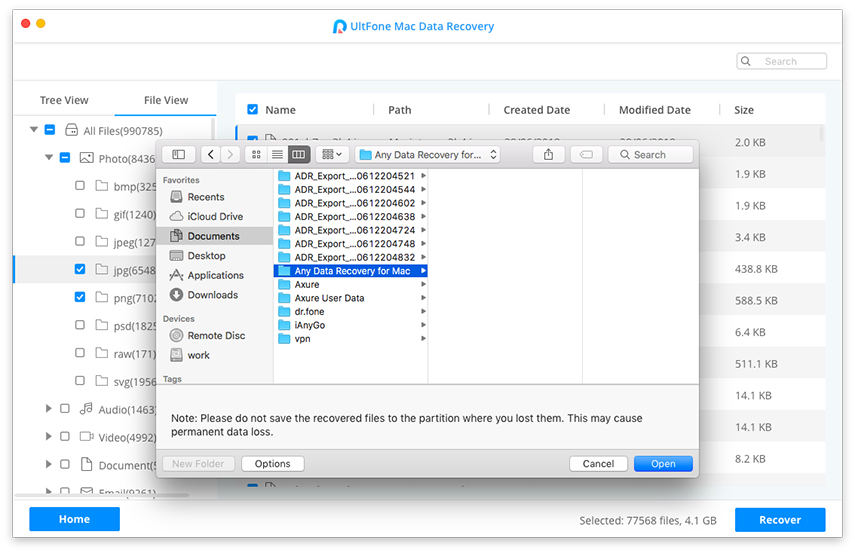
Step 3: After selecting all the files for recovery, hit the Recover button and specify the location where you want to keep the restored data.

The recovery will finish up in a while, depending on the amount of data, and you’ll have everything back as it was.
3: How To Erase Mac Hard Drive?
Unless reinstalling macOS without losing data is your concern, you can carry out the process in a usual way. Many users choose to erase Mac Hard drive in such conditions. Do it by following the steps below.
-
Step 1: Restart Mac and enter Recovery Mode. Choose the Disk Utility option and open the menu.

-
Step 2: In the window, you will see the Erase tab. Click on it, and the available drives will appear on the left side panel.

Select the drive and hit the Erase button to delete all data from your system.
A Last Word
That’s it on how to reinstall macOS without losing any data. We hope that this article comes in handy when you want to reinstall OS on your Mac without erasing everything. And just in case, if the data gets deleted, you’ll still have the support for UltFone Mac Data Recovery.

