How to Fix an iPhone 13/7 That is Not Ringing
 Jerry Cook
- Updated on 2021-10-15 to iPhone 7 Tips
One of the primary reasons why you missed important calls is because your iPhone isn't ringing. This can be a very maddening problem. Well, there could be several reasons why an iPhone won't ring and the good news is that this problem is easy to resolve. Thus, if your iPhone 7/7 Plus isn't ringing when you get calls or messages, continue reading. In this post, we're going to walk you through every possible method you can try to get iPhone 13/7 not ringing problem fixed.
- Part 1. Why is My iPhone 13/7 Not Ringing When I Get Calls?
- Part 2. 8 Ways to Fix iPhone 13/7 Does Not Ring Problem
- Part 3: Seek More Help
Part 1. Why is My iPhone 13/7 Not Ringing When I Get Calls?
If your iPhone 13/7 isn't ringing, then there could be one of the following culprits:
- A broken speaker.
- The mute or Ring/Silent switch is enabled.
- Do Not Disturb is enabled.
- You've silenced unknown callers.
- You've blocked the particular phone number.
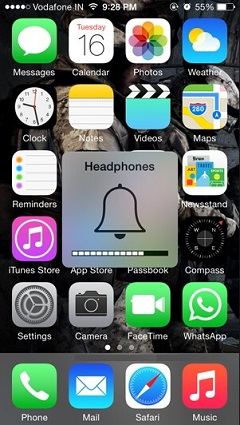
- Your device is stuck in headphone mode.
Part 2. 8 Ways to Fix iPhone 13/7 Does Not Ring Problem
Your iPhone 13/7 does not ring. No worries!! No matter what causes the problem on your iPhone, try the following ways that can probably help you fix the problem.
1. Check the Ring/Silent Switch
The Ring/Silent Switch on the iPhone is used to turn the "ringer" on and off. And if this switch is turned to silent, then your device won't ring. Thus, the first thing you must check is your Ring/Silent switch to get the problem fixed.
Below is how to check Ring/Silent Switch:
- Take a glance at your Ring/Silent switch that's located on the left side of your device.
- Your device is on silent if you can see a small and orange line as the switch is pulled away from the device screen.
-
To turn on your ringer, all you need to do is to pull the switch towards the device screen.

2. Turn the Volume Up
Even if you're able to hear other sounds on your device, your device may not be ringing as the ringer volume is set different from the volume of the other sounds of your device. Thus, while the rest of the sounds your device makes may be louder since you're turning up your device's volume, your ringer volume might be stuck on very low. So, your iPhone 13/7 will not ring. To fix the problem, simply turn up your device ringer volume:
- On your iPhone, open "Settings".
- Go to "Sounds & Haptics".
Using your finger, move the slider to the right to turn up your ringer volume.

3. Make Sure that Do Not Disturb is Turned Off
When Do Not Disturb is enabled, all incoming calls, alerts, and notifications will be silenced. So, ensure by Do Not Disturb is turned off by the following the below steps:
- 1. Go to the "Settings" app on your iPhone.
- 2. Click "Do Not Disturb".
-
3. Here, turn off the Do Not Disturb and that's it.
If the switch next to Do Not Disturb turns to grey, then it means that the feature is turned off.

4. Check Whether Your iPhone 13/7 Is Stuck in Headphones Mode
You have an iPhone, so you probably use it to listen to songs through headphones on your commute or while doing exercise. Usually, as soon as when you unplug your headphones, your iPhone will begin routing music back via the speakers. But, there are times, your iDevice can get confused and continue to function as if headphones are plugged in even in the case when they're not.
If your iPhone 13/7 is stuck in headphones mode, then you could encounter iPhone 13/7 not ringing on incoming calls problem. To fix the issue, you need to ensure that your iPhone 13/7 isn't stuck in headphones mode by following the below steps:
- One quick way to check if your iPhone is stuck in headphones mode - press the volume buttons of your iPhone. If the alert pops up that says "Headphones", then your device is in headphone mode.
- Your device can be tricked into believing that headphones are plugged in if there is lint, debris or gunk in the Lightning/charging port. So, use a flashlight to check your lightning port/headphone jack for debris.
If you see that there’s something stuck in the port, then clean it out using a toothbrush.

5. Restart Your iPhone 13/7 and Test Ring
It could be the case that your iPhone 13/7 not ringing only vibrating due to some minor software glitches on the device. In such cases, a simple restart on the device could fix the problem. So, follow the below steps to learn how to restart your iPhone 7:
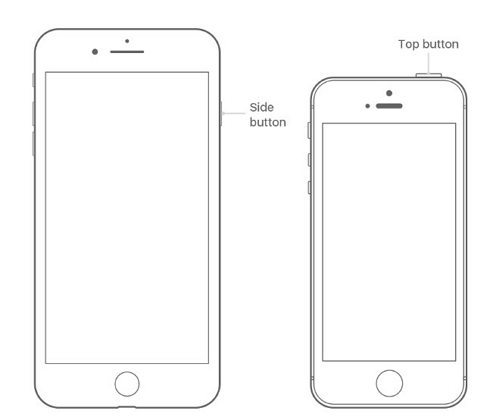
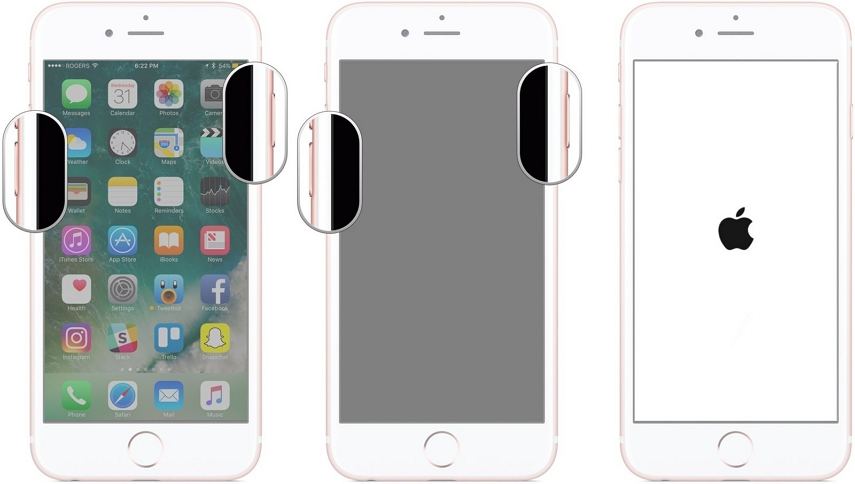
- Press and hold down the Side button until you see the power off slider.
- Then, drag the slider to turn your device off.
-
In a while, press and hold down the Side button until you see the Apple logo.
Once turning the device back on, test the ring by going to your device's Settings>Sounds & Haptics or Sounds>Ringtone>Try a new ringtone.

6. Disconnect Your iPhone from AirPlay Devices
Wondering why is my iPhone 13/7 not ringing? The culprit could be an AirPlay device. Disconnect your iDevice from AirPlay devices to ensure that your iDevice isn’t streaming audio through another device like Apple TV rather than your iDevice speaker. Sometimes, your iPhone 13/7 will automatically reconnect to AirPlay devices that you have used before.
Below is how to disconnect your iPhone from AirPlay Devices:
- Open the Control Center by swiping up from the bottom of the screen.
Click the “AirPlay” icon which looks like a TV.
If your iPhone 13/7 is connected to an AirPlay device, then the AirPlay icon turns to blue and you’ll see the name of the device (like Apple TV) next to the AirPlay icon.
If you're connected to an AirPlay device, then click "Turn off AirPlay Mirroring".

7. Disconnect Your iPhone from Bluetooth Devices
Disconnecting your iPhone from Bluetooth devices is a vital troubleshooting step to diagnose iPhone 13/7 only vibrating not ringing problem. Generally, although it seems like an iDevice isn’t playing sounds or ringing at all, the iDevice is connected to a Bluetooth device like headphones or external speaker and the sound is playing from that device and not the iDevice.
Below is how to disconnect your iPhone from Bluetooth devices:
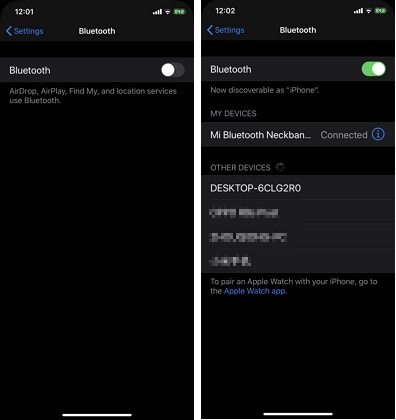
- Open the "Settings" on your device.
- Click "Bluetooth".
Click the switch next to "Bluetooth". You'll know that Bluetooth is disabled when the switch turns to grey.

8. Update Your iPhone 13/7
Have you updated your device? It might be possible that outdated software is the culprit behind facing an iPhone 13/7 not ringing just vibrating problem. So, follow the below steps to update your device to the latest iOS version available:
- On your iPhone, go to "Settings".
- Then, tap "General"> "Software Update".
- Finally, tap "Download & Install" if any updates are available.
Part 3: Seek More Help
What if nothing works to help you fix iPhone 13/7 not ringing when locked problem? So, what to do now? It could be the case that there's something wrong with your iOS system and you need to repair it to get the problem fixed.
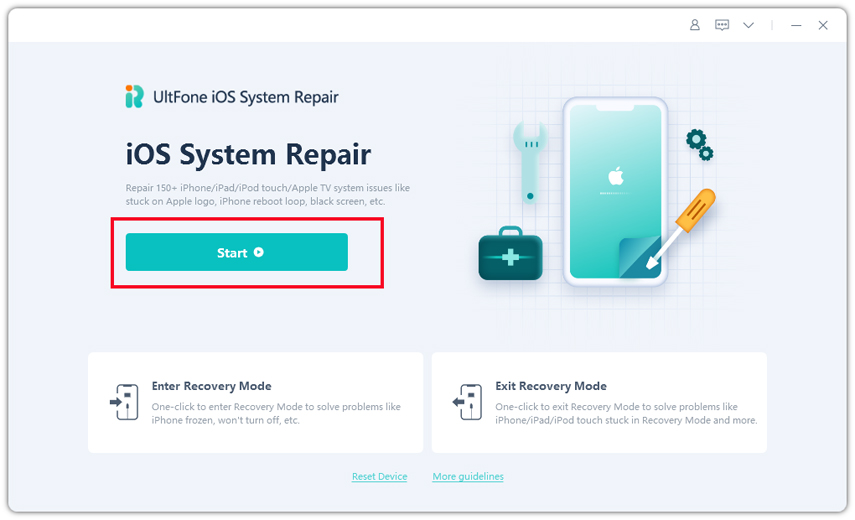
For repairing the iOS system, you can simply turn to the best iOS repair tool - UltFone iOS System Repair. This tool comes handy to repair iOS like a pro without taking the assistance of experts. You can use it not just to fix not ringing problem on your iPhone, but other common issues also such as stuck in the Apple logo, etc. The great thing is that it helps to fix iOS issues without causing any data loss.
So, go ahead and download Any iOS System Repair on your computer. Then, follow the below steps to learn how to use it to fix your problem in no time:
1. Run Any iOS System Repair and connect your iPhone 13, 7 or 7 Plus to the computer. Then, click the "Repair Operating System" feature from the main interface of the software.

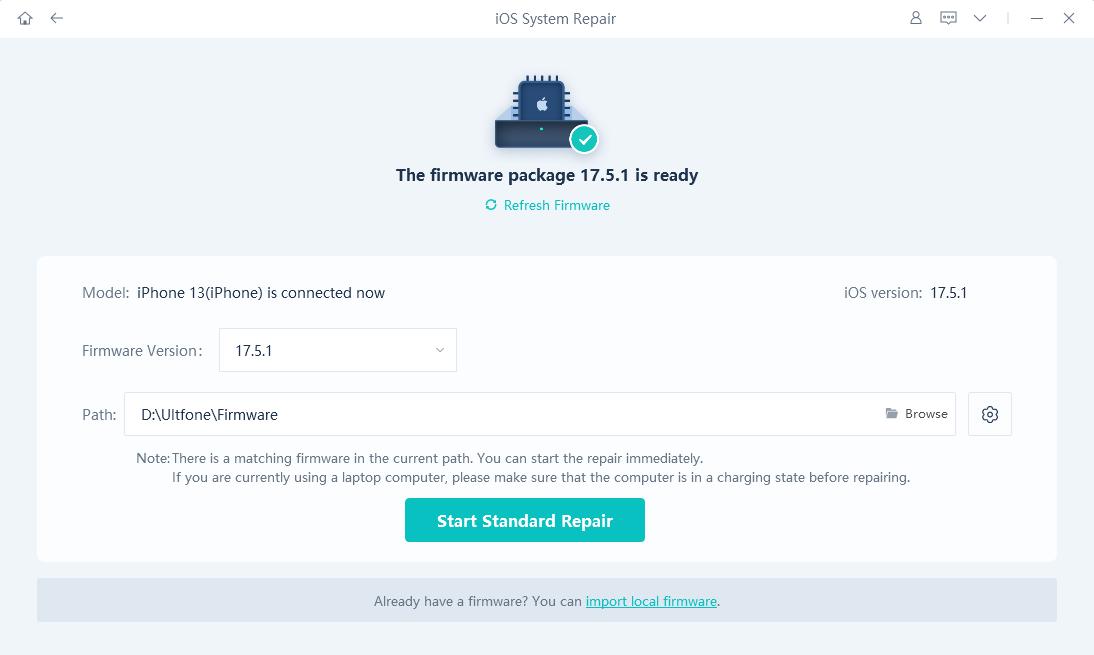
2. Once you hit the "Fix Now" button, the software lets you download the appropriate firmware package needed to repair your device system.

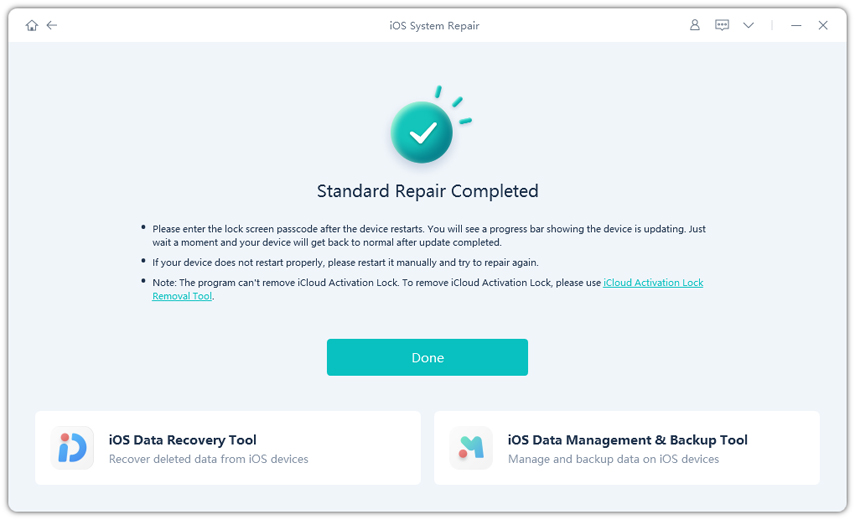
3. Then, finally, click "Repair Now". Wait until the software repairs your operating system.

Wrapping Up
That's how to fix an iPhone 13/7 that's not ringing. It's quite a frustrating problem, and we hope that the solutions mentioned-above have helped you to address and fix it. However, if the common workarounds are of no benefit to you, then try UltFone iOS System Repair to repair your iOS system.


