How to Go Back to iOS Setup Assistant in iPhone 15/14/13/12
 Jerry Cook
- Updated on 2023-12-29 to iPhone
The setup assistant is a built-in feature in iOS that guides you through setting up a new iPhone. The iOS setup assistant will run when you upgrade or program a new phone. However, if you delete the backups from iCloud from the previous phone, you can only turn it on by running the setup assistant. However, not all users know how to get to iOS setup assistant iPhone 14/13/12 screen. You can relax because we will tell you the best way to return to the iPhone setup screen. That will let you remove the bugs you are experiencing on your phone.
- Part 1: Preparations before iOS Setup Assistant
- Part 2: Backup Your iPhone with One Click for Free
- Part 3: How to Go Back to iPhone Setup Assistant? [Step-by-step Video Guide]
- Part 4: How to Transfer/Restore Data in iOS Setup Assistant from Android/iOS/Apple Watch?
Part 1: Preparations before iOS Setup Assistant
The crucial things you need for setup assistant in iOS are:
- First off, update your iOS to its most recent version.
- Keep a solid WiFi connection.
- Have an Apple ID and its password. However, if you don't have one, you can make another one easily.
- You might require data from Apple's payment card (debit or credit card) during setup.
- A backup of your past device data is also needed. But if you don't have space on your iPhone iCloud/Quick Start/iTunes app, move to Part 2 to use UltFone for free.
- Yet, in the Mac series, there is a slight difference in the accessibility features.
Note: The Apple Watch shows a slight contrast because you can not get it in phones below the iPhone 6 models.
Part 2: Backup Your iPhone with One Click for Free
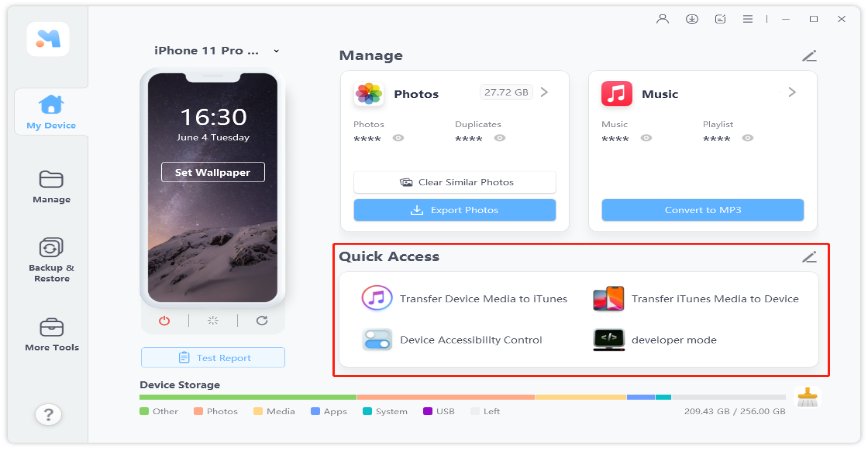
Before returning to the iOS setup assistant, you need to back up your iPhone said in Part 1. But what if there isn’t enough space on your iPhone? UltFone iOS Data Manager will help you solve the problem. It can back up your iPhone to Windows/Mac computer for free.
- Backup/restore/transfer iPhone data without iTunes
- Run a diagnostic test for your iPhone/Take a screenshot without Home button
- Works with iOS/iPad 15 and the all-new Android OS 12.
- One-click to export photos from iPhone/iPad to computer
Steps to Backup iPhone for Free:
-
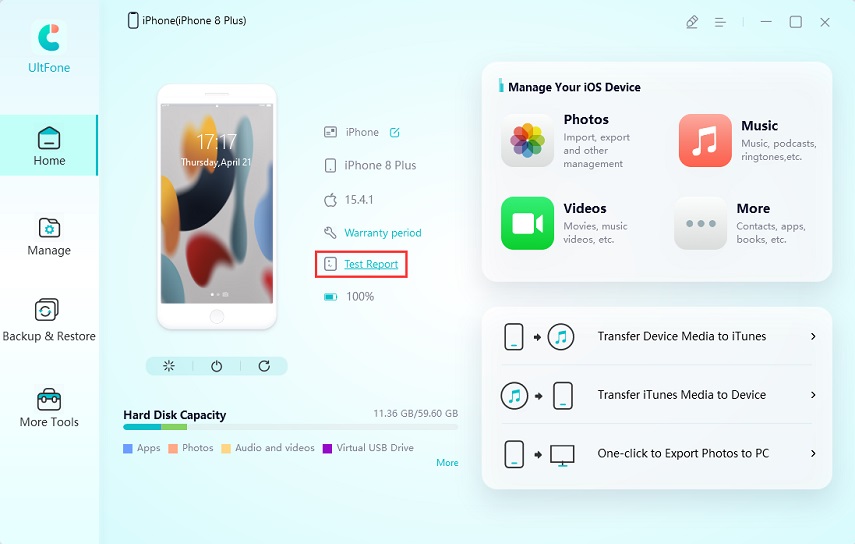
Step 1Download, install and launch the UltFone on your computer, and connect your iOS device to this system through a USB cable. Then tap the “Backup & Restore” button.

-
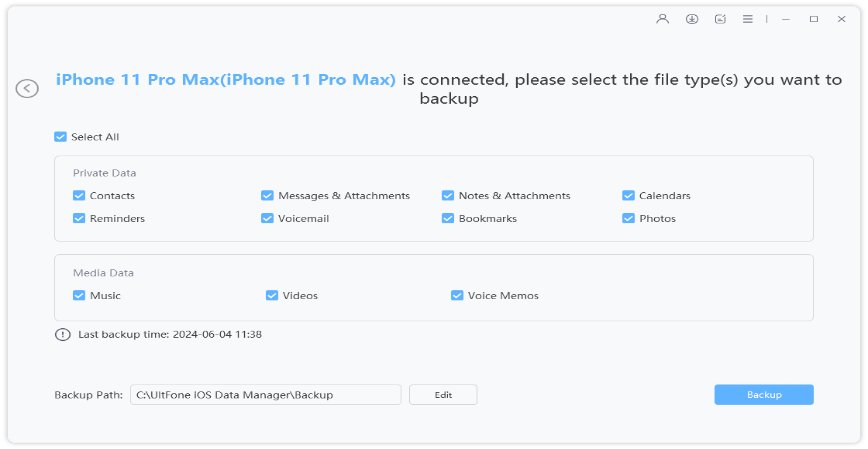
Step 2Select all/some file types that you want to backup. Then hit on the “Backup” option on the right bottom corner.

-
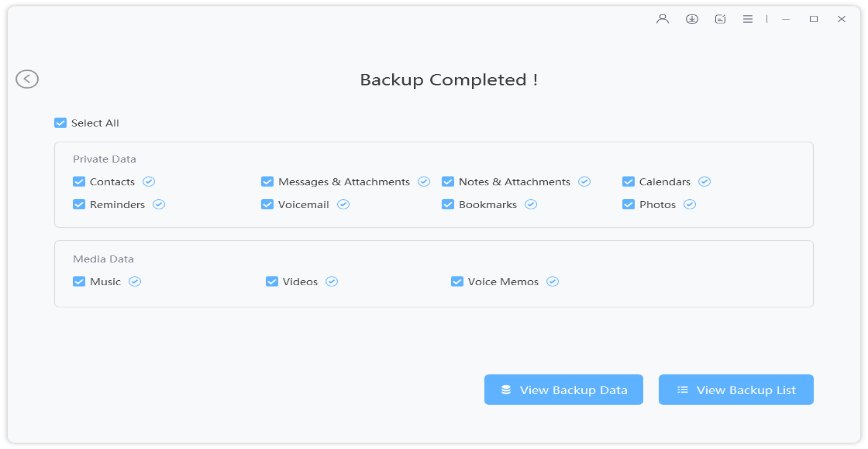
Step 3 Now your iPhone is backed up successfully. Move to the next step to know how to go back to the iOS setup assistant

Part 3: How to Go Back to iPhone Setup Assistant?
Video guide to go back to iPhone setup assistant
Now that you know the meaningful steps you need to take before returning to your iPhone setup screen, here are the steps you must follow to know where to find iOS setup assistant:
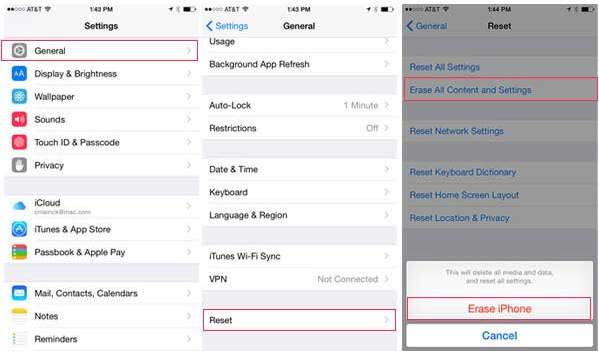
- Step 1: Go to Device Settings.
- Step 2: Tap on General. Select the Reset tab.
- Step 3: On the following page, tap on the Reset choice.
Step 4: Choose the "Erase All Content and Settings" option from the given ones.

- Step 5: Enter Apple ID credentials once your iPhone device requests you do so.
- Step 6: Then, affirm the erasure process on your device.
- Step 7: Presently, wait for the process to complete. Just calmly trust that your device will wrap up the process. However, it relies upon the amount of data you have on your phone.
- Step 8: When everything is finished, you will then be on the iPhone setup screen immediately. That's how to locate iOS setup assistant.
Then on the setup screen, feel free to enter every one of the important things you want to do on your device. That is the most straightforward way how to turn on iOS setup assistant. Also, presently, you can transfer text messages from Android/pc to this device.
When you are finished erasing the data that you have on your iDevice, then, at that point, you can decide to set up your iPhone device as a new one. Also, you can restore your backup document on your iDevice to get your data back.
Part 4: How to Transfer/Restore Data in iOS Setup Assistant from Android/iOS/Apple Watch?
Restore Data (From iOS to iOS)
Step-by-step directions are given underneath on how to transfer data between two iOS devices:
- Step 1: Hold the Power button on your iOS until you see the Apple logo on your screen.
- Step 2: After turning it on, the HELLO word will show in different languages. Pick your language by sliding anyplace from left to right.
- Step 3: Presently, select the country you are living in. When you do so, continue to another step by picking WiFi or mobile data.
- Step 4: Another screen will want you to share your location. It ultimately depends on whether you share it or not. Presently back up your files from iCloud/and iTunes/QuickStart.
- Step 5: At last, you can sign in with your Apple ID or create a new one. Click "Agree" to accept the agreement and pick the "Send by Email" option.
- Step 6: Utilize the "Find My iPhone" choice from the iCloud account. Set up iMessage, Facetime, screen lock, or Apple ID password to secure your device.
- Step 7: You don't have to tap the "Don't Add Passcode" option to safeguard your data. Set an iCloud Keychain for your iPhone.
- Step 8: You can utilize "Siri" to assist with assessing the iPhone by asking it in your voice.
- Step 9: Allow Apple to share Application Analytic data with the developers.
- Step 10: Pick a screen perspective on your iPhone from Standard and Zoom, whichever makes it easy to see symbols, text, and other details on the screen.
Restore Data (From Android to iOS)
- Step 1: In the first place, set up your iOS settings.
Step 2: Tap the "Move Data from Android" option and select the "Move to iOS" option as soon as it appears on your Android device. In any case, download the application from Google Play Store to Move to iOS.

- Step 3: Tap "Proceed" on Android and iOS and click the "Agree" and "Next" buttons on your Android phone. Share the code from your Android device to your iPhone.
- Step 4: With the peer-to-peer connection of WiFi, one can undoubtedly transfer the data before entering the code. Transfer data from your Google record to your new Apple device.
- Step 5: Before following the steps above, click on "Continue Setting Up iOS".
- Step 6: Then, at that point, sign in with your Apple account or make a new one.
- Step 7: Now you can open your iOS device, and that's how iOS setup assistant iPhone 14/13 Pro works.
Restore Data (From Apple Watch)
- Step 1: Turn the Bluetooth On in your Apple Watch and iPhone and keep both of them close until the process closes.
- Step 2: Click and hold the Watch button until you see the Apple logo. Wait and match your devices.
- Step 3: A message asking you to use your iPhone to set up this Apple Watch will appear on your screen. Click "Proceed".
- Step 4: Place the iPhone close to the Watch. Then, at that point, match it physically by adhering to the given steps.
- Step 5: Press the "Restore from Backup" button and sign with your Apple ID for additional steps.
- Step 6: Turn on Find My Location, WiFi, Siri, Location, your Watch's text size, etc.
- Step 7: Make a Passcode for Apple Pay, or you can bypass this step.
- Step 8: While Syncing the Apple Watch, hold on until the "Digital Crown" shows up.
Conclusion
We hope the step-by-step methods above could help you with iOS setup assistant iPhone 14/13/12. If your device is beginning to get bugs, you can fix it by returning to the iPhone setup screen. Yet you can give your iPhone a new beginning again. However, before doing this on your iPhone device, you need to back up each important data you have on your device. UltFone iOS Data Manager can offer you a helping hand to back up data selectively.

