How to Fix an iPhone 13 That Not Connecting to Wi-Fi
 Jerry Cook
- Updated on 2021-10-09 to iPhone
Recently iPhone users are reporting that - my iPhone 13 is not connecting to Wi-Fi. And this problem has become prevalent for many users. Hence, it is our duty to help those users resolve issues like this. Not being able to connect to the Wi-Fi can be very frustrating as most people have a limited data plan. When a user's iPhone 13 won't connect to Wi-Fi, they can't perform updates; downgrade the files, stream content, and so much more.
Today, we focus on helping the users whose iPhone 13 won’t connect to Wi-Fi with simple and easy solutions. Let's take a look at them.
Part 1. Why Can't My iPhone 13 Connect to Wi-Fi?
Before we get to the solution, knowing the reasons behind iPhone 13 not auto-connecting to Wi-Fi is also crucial. Let's review them first.
Cause 1. You are Out of Range
The first reason for failure to connect with the Wi-Fi can be the router or your range. If the router is off, it is impossible to connect to the Wi-Fi. Likewise, when you are out of range, it won't be possible to make a stable connection because the range issue will keep on disrupting the connection. So, make sure that your router is on, and you're within range.
Cause 2. Incorrect Password
The second reason behind interruption can be an incorrect password. If you have saved the password, but someone else recently changed the password, it will give an error when you try to connect with the Wi-Fi.
Cause 3. Check for issues with your Wi-Fi network
If the iPhone says no internet connection, then see if your data connection plan is still active or expired. There can also be some problem with your account or billing cycle or service provider. Get in touch with the service provider and make sure that your account and services are active.
Cause 4. Software Errors
The problems with Wi-Fi can also be caused due to software errors. It includes incorrect settings, software bugs, malware, faulty updates, rogue & misbehaving apps, etc. Hence, it will affect the connectivity functions of your iPhone 13.
Part 2. Possible Solutions to Fix iPhone 13 Won’t Connect to Wi-Fi
Here is the list of solutions that will work effectively to fix the Wi-Fi connectivity issues.
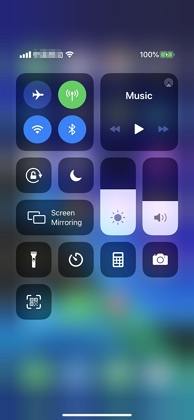
1: Toggle Wi-Fi Off and Back On
The first action to take when iPhone 13 is not connecting to Wi-Fi is to turn off the Wi-Fi. Keep it off for a couple of minutes and then turn on the Wi-Fi again. Then try connecting the device again and see if the problem is fixed or not.
2. Forget This Network and Then Reconnect
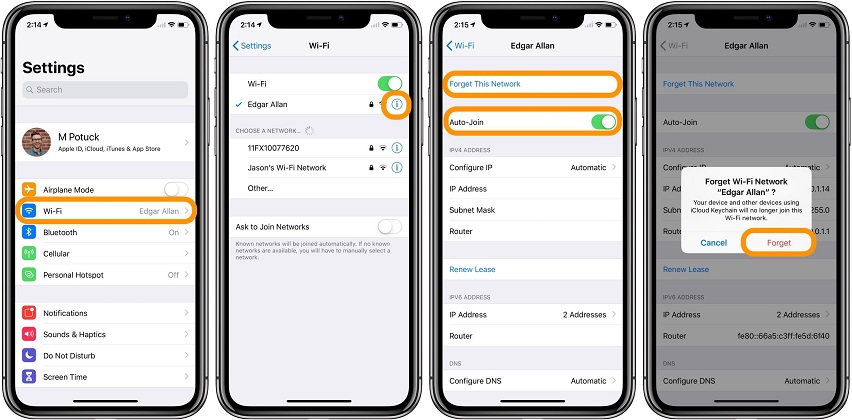
When the iPhone 13 is not connecting to Wi-Fi says incorrect password, try forgetting the network. There is a possibility that the network is corrupted and needs to be reset again. To do this, follow the steps below:
- 1. Open Settings > Wi-Fi > Turn on. Connect with your usual network and click on the "i" icon.
2. Click on the "Forget this Network" and confirm the action by tapping on the Forget option again. Exit the app, and if you want, you can forget all the available networks.

- 3. Restart your iPhone and again open Wi-Fi settings. Scan for the available Wi-Fi network, and when your network name appears, tap on it.
- 4. Select option Join or Connect and enter the wireless network passcode to establish the connection.
3: Reset Network Settings
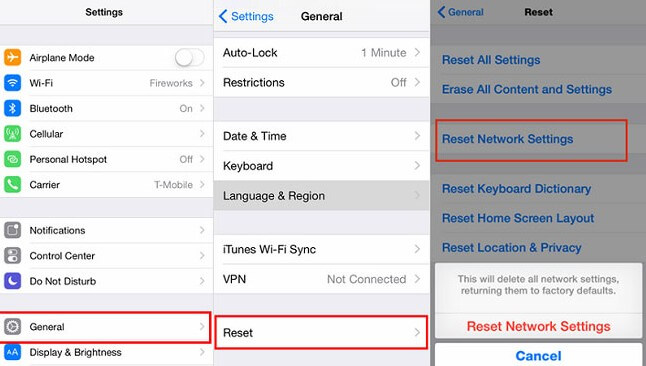
One other thing that can help when the iPhone is not recognizing Wi-Fi password is a network settings reset. It is a possibility that some other app settings are causing trouble in connectivity. To reset the settings follow the steps:
1. Head to Settings > General> Reset > Reset Network Settings.

- 2. Confirm the reset by entering your device passcode, if prompted and wait for the reset to finish.
After reset, your iPhone will reboot, and hopefully, the problem will be resolved.
4. Restart Your iPhone 13
If the problem is random and caused by a software bug, it can be eliminated by restarting your iPhone 13. In usual cases, when the iPhone 13 can't connect to Wi-Fi, a simple restart must be tried.
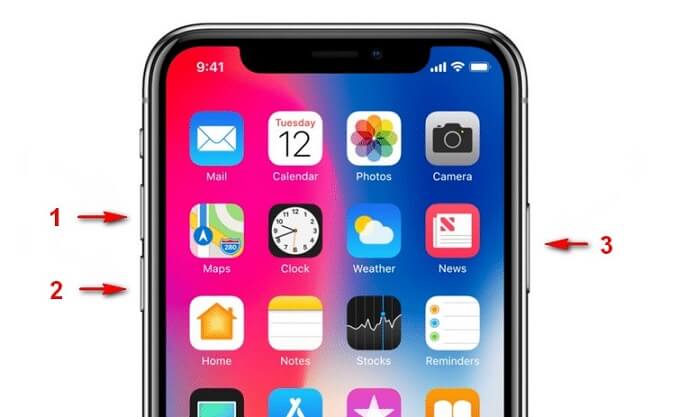
To do this, press and hold down the volume up or volume down button and side button until you see the power-off slider. Then slide it to the right side and shut down your iPhone. Wait for a few minutes, restart iPhone, and try to connect with the Wi-Fi.
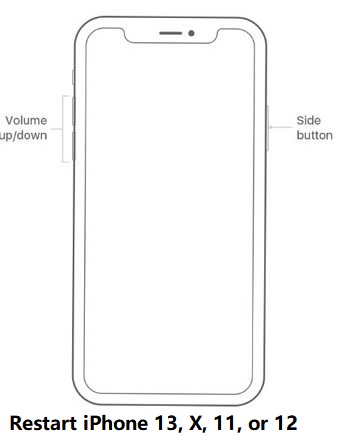
To power on your iPhone 13, press and hold down the Side button until the Apple logo appears.
5. Repair iOS to Fix iPhone 13 Not Connecting to Wi-Fi
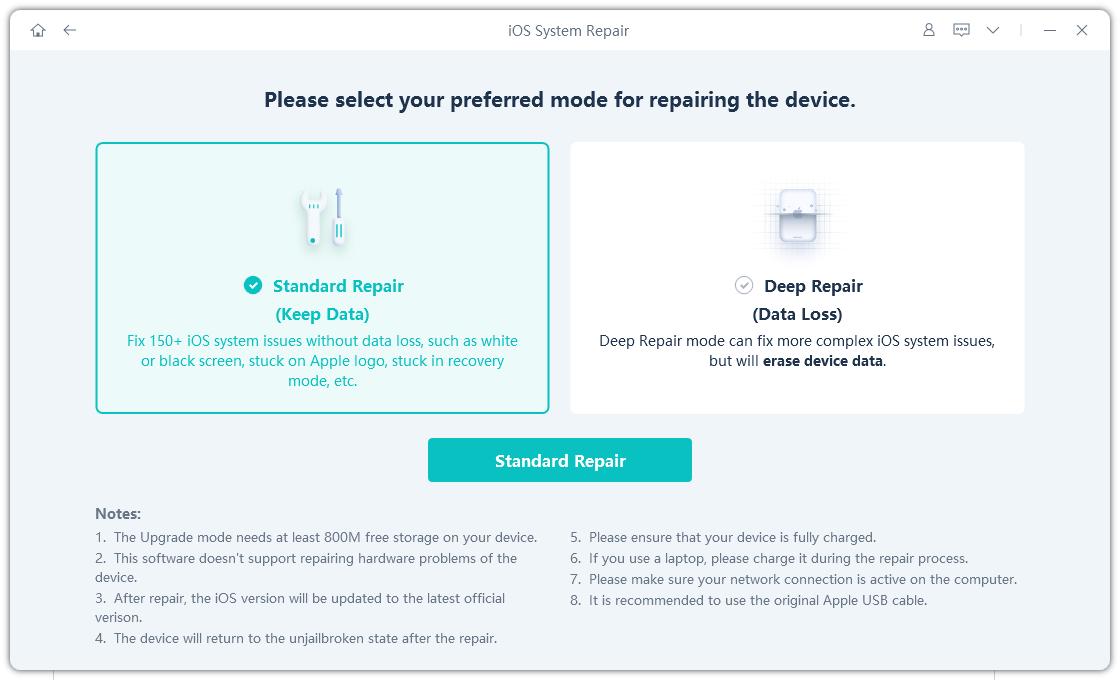
When no other solution works out, and the iPhone 13 won't connect to 5GHz Wi-Fi, you need to rely on the best tool. In most cases, the Wi-Fi connectivity problem is often linked with software errors, and hence, users need a tool that specifically fixes software related problems. Hence, you can rely on UltFone iPhone System Repair as it can repair the system software with just a few clicks. Moreover, the problem will be resolved without any data loss.
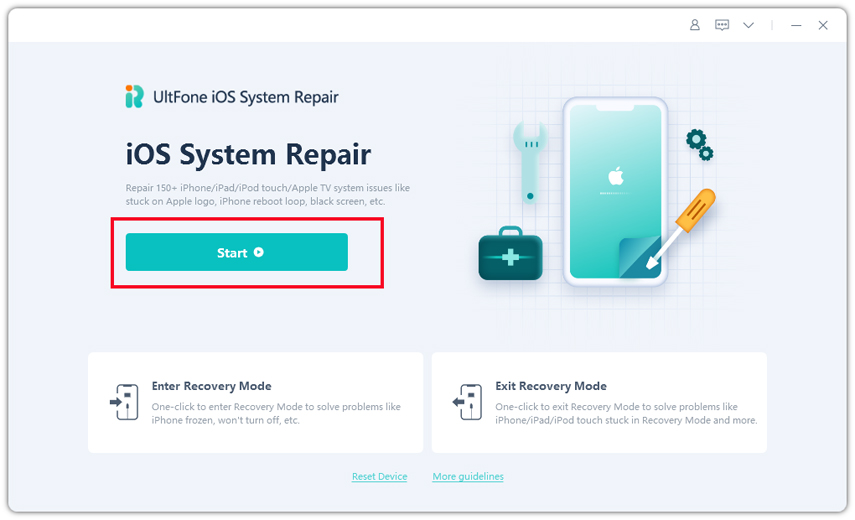
Get your hands on this iOS System Repair tool from the official site and finish the setup. Once the application is ready for use, follow the steps below:
Step 1 At first, launch the software and connect your iPhone 13 to computer. Choose the Repair Operating System to fix all iOS problems and tap on the Fix Now button.

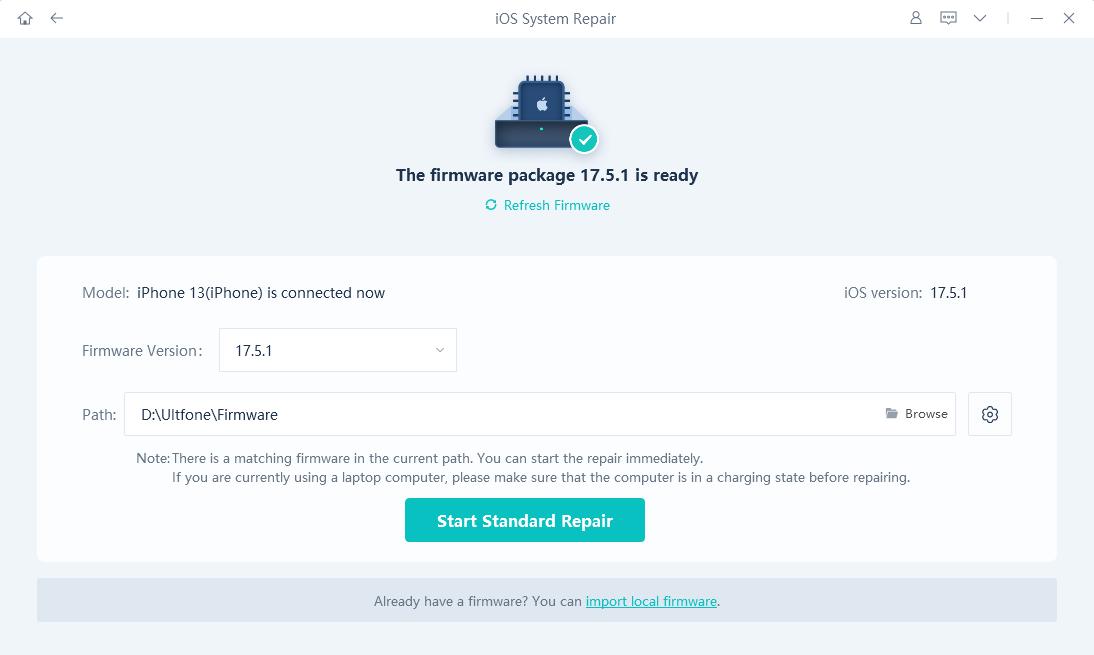
Step 2 The software will detect the device information and provide you a firmware package file that is specifically suited for your iPhone x and version. Hit the Download button and start the process.

After downloading the firmware, the software will also verify it to make sure that it is compatible with your device.
-
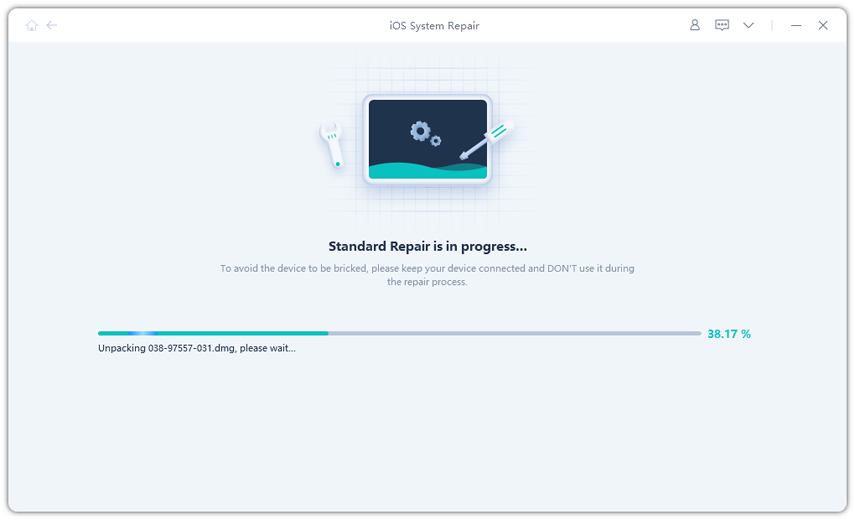
Step 3 Finally, when the file is ready, tap on the Repair Now button and wait for the process to finish. While the process is on-going, keep your iPhone connected.

Once the repair is done, the software will notify you, and the device will reboot. After reboot, the Wi-Fi problem will be resolved, and the iPhone will connect to the network of your choice. And the best thing is that the whole process is carried out without causing any data loss.
6. Factory Reset iPhone 13
At last, if you see no other way to fix the Wi-Fi connectivity issue, try resetting the device to factory defaults. With this method, the iPhone 13 won't connect to Wi-Fi issue will be resolved. However, you might end up losing your data. Hence, it is recommended to backup your device before you attempt to reset it to factory settings.
- 1. Open Settings > go to General Settings >Scroll down and find the Reset option.
- 2. Choose Erase All Content & Settings option and confirm the action by entering the passcode.
When the reset finishes, you will have to set up your device again. Luckily, you can restore the data and settings using iCloud or iTunes backup, and the Wi-Fi will also start working.
The Bottom Line
From now on, whenever someone says- why can't my iPhone 13 connect to Wi-Fi, you can help them. With the list of the solution provided here, you can guide others to resolve the connectivity issues as quickly as possible. And if nothing else works, then we recommend using professional iOS System Repair tool as it is a guaranteed solution for software related errors.


