How to Fix iPhone Cellular Update Failed iOS 14/15/16
 Jerry Cook
- Updated on 2022-08-31 to iPhone
Hi everyone ! I updated iOS 16 this morning and my network stopped working . The phone is only working with wifi . Any ideas?
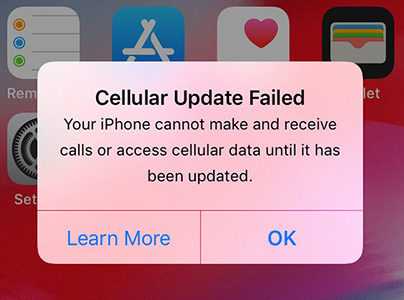
There are many users who have reported that their iPhone 7 cellular update failed, receiving "an update required to use cellular data on this iPhone" error, and now they can’t use mobile data. The situation can be very frustrating if it doesn’t get fixed right away. Because of the failed update, you won’t be able to make calls or send text messages. Hence, it is vital that you look for some simple ideas that will be helpful to fix the iPhone failed cellular update issue.
In this guide, we have gathered the 9 most effective ways to fix the problem. Try the fixes one by one and see which one resolves the error.
If You Have An iPhone That Has Cellular Update Failed Error
While the other iPhone models have been experiencing this issue due to some settings or bugs, iPhone 7 has another reason for this issue. It has been found that some of the iPhone 7 models have a hardware defect. That’s the main reason why the cellular update failed on iPhone 7 is most common. You can take your device to Apple Repair Center and get the hardware fixed. Apple Inc has even started a program so that users can quickly get the problem fixed without any expense. Check here to learn more: https://macreports.com/iphone-cellular-update-failed-error-fix/
How to Fix Cellular Update Failed on iPhone 12/iPhone 11/11 Pro/XR/XS/X/8
Now, we will discuss the ways that are potent to fix the cellular update failed error. Let’s explore them.
- Way 1. Turn off Wi-Fi-calling and Voice LTE
- Way 2. Turn Airplane Mode On And Off
- Way 3. Disable Your Dellular Data and Then Enable It Again
- Way 4. Update Your iPhone
- Way 5. Reinstall the SIM card on your iPhone
- Way 6. Check and Update Carrier Settings
- Way 7. Reset Network Settings
- Way 8. Reinstall iPhone System to Fix Cellular Update Failed Error
- Way 9. Restore iPhone to Factory Settings
Way 1. Turn off Wi-Fi-calling and Voice LTE
The first and foremost thing to try out is turning the Wi-Fi calling and LTE feature off. While this is not a legit solution, but this fix has worked for some users. So, it is worth a try as an attempt to fix the cellular update failed issue.
-
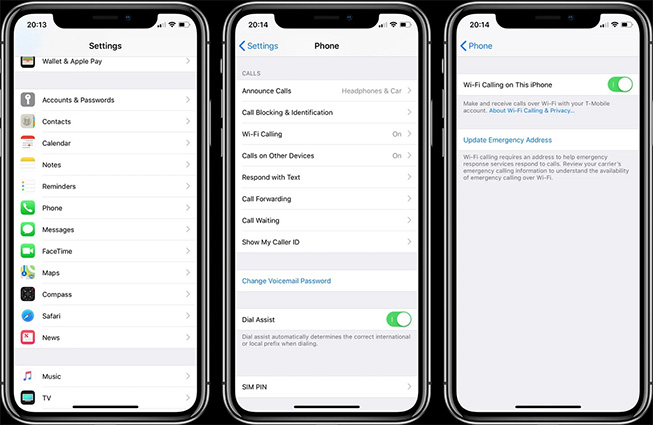
1. Open the Settings app and select Cellular/Phone option. There you will find the Wi-Fi calling feature. If the feature is enabled, toggle the bar of “Wi-Fi Calling on This iPhone” and disable it.

Turn off WiFi calling -
2. Now, again, go back to the Cellular/Phone settings and select the Cellular Data Options. Click on “Enable LTE” and switch the settings to “Data Only” to turn off the Voice LTE feature.

Exit the app and see if you are able to update the settings or not.
Way 2. Turn Airplane Mode On And Off
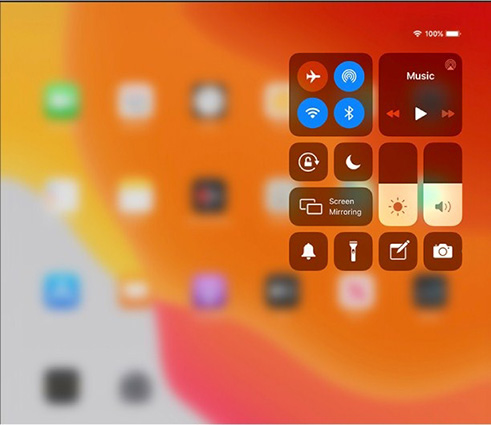
Moving on to the next way users can try to fix the iPhone cellular update failed issue is by turning the Airplane mode on and off. This method can be used to correct minor cellular connection issues.
- 1. Open the Settings app and select Cellular/Phone option. There you will find the Wi-Fi calling feature. If the feature is enabled, toggle the bar of “Wi-Fi Calling on This iPhone” and disable it.
-
2. Now, again, go back to the Cellular/Phone settings and select the Cellular Data Options. Click on “Enable LTE” and switch the settings to “Data Only” to turn off the Voice LTE feature.

Way 3. Disable Your Dellular Data and Then Enable It Again
Another quick and easy way to resolve the issue of cellular update failed on iPhone 7, and other models as well are by disabling the Cellular data. There is a chance that your Cellular network provider is having some issues with the connection. So, it might get fixed when you disable and reconnect.
-
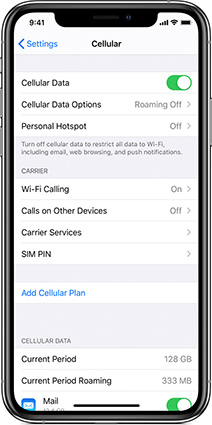
1. Open Settings > Cellular and simply toggle the bar to turn off Cellular Data.

Wait for a little while and enable it by toggling the bar again. See if the problem is fixed, and you can update cellular settings or not.
Way 4. Update Your iPhone
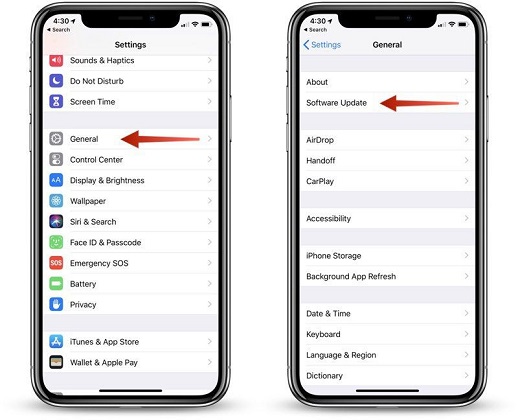
One reason you might be seeing the “iPhone 7 cellular update failed” message is a pending software update. So, before you freak out with the error, don’t forget to check the software update. Follow the steps:
Open Settings > General > Software Update and see if an iOS update is available for your device. Click on the “Download & Install” option to get the update and install it right away to fix the problem.
Way 5. Reinstall the SIM card on your iPhone
In some scenarios, the cellular update failed on iPhone error appears when the SIM card is not inserted properly. So, you must ensure that the SIM card isn’t loose or damaged. Take it out and look for any visible signs of damage. If it’s fine, then carefully place the SIM on the tray and slide it inside the iPhone.
Lock the SIM tray and try to connect to cellular data once again.
Way 6. Check and Update Carrier Settings
The Carrier Settings are the ones that work on improving the iPhone’s ability to connect to the cellular networks. So, there is a possibility that the reason behind the iOS 16 cellular update failed is a pending Carrier update. Check for the update by following the steps below:
Open Settings > About, and you will see a pop-up message if there is an update available for your device.
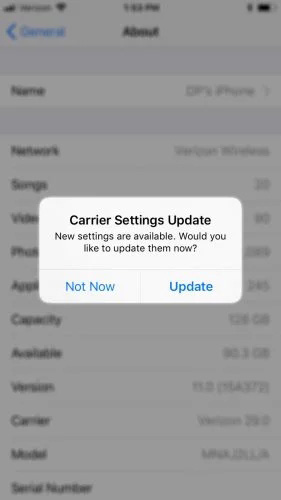
Click on the Update option and then again make an attempt to connect your device to the cellular network.
Way 7. Reset Network Settings
When the problem lies with network connection, then you can simply reset network settings of your iPhone. The reset will keep the device data intact while changing all settings to default. This way, whichever settings that might be interrupting the network and causing the cellular update failed on iPhone XR will be fixed.
Open Settings > General > Reset > and select the “Reset Network Settings” option. Confirm the reset and let the device finish the process.
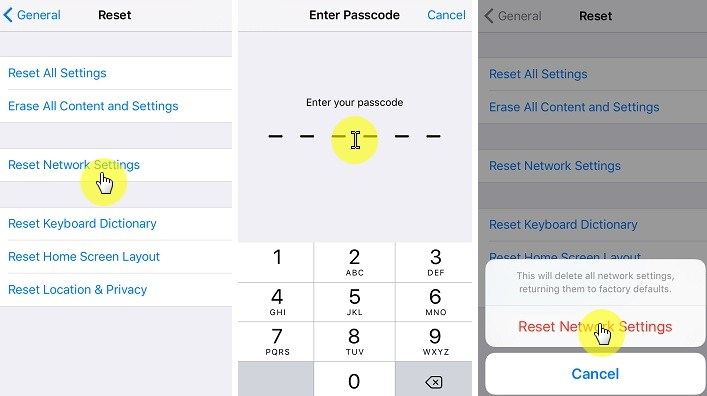
Once the reset is completed, see if you are able to connect to cellular data or not.
Way 8. Reinstall iPhone System to Fix Cellular Update Failed Error
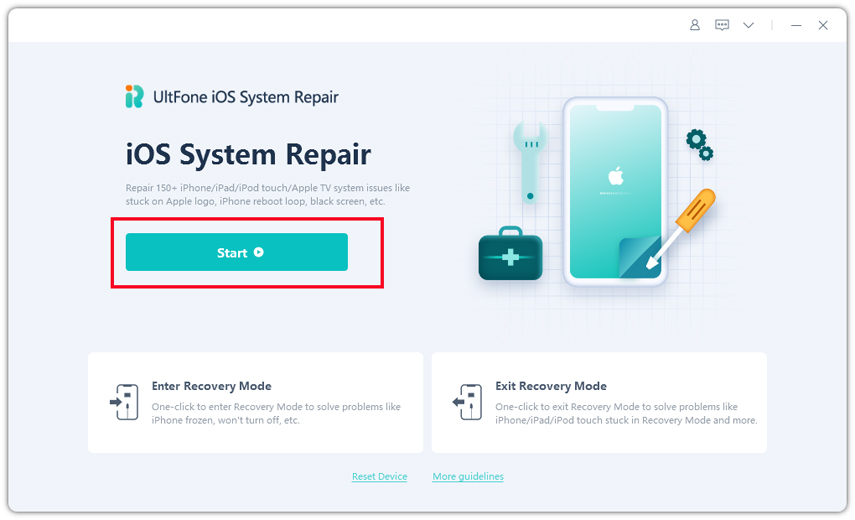
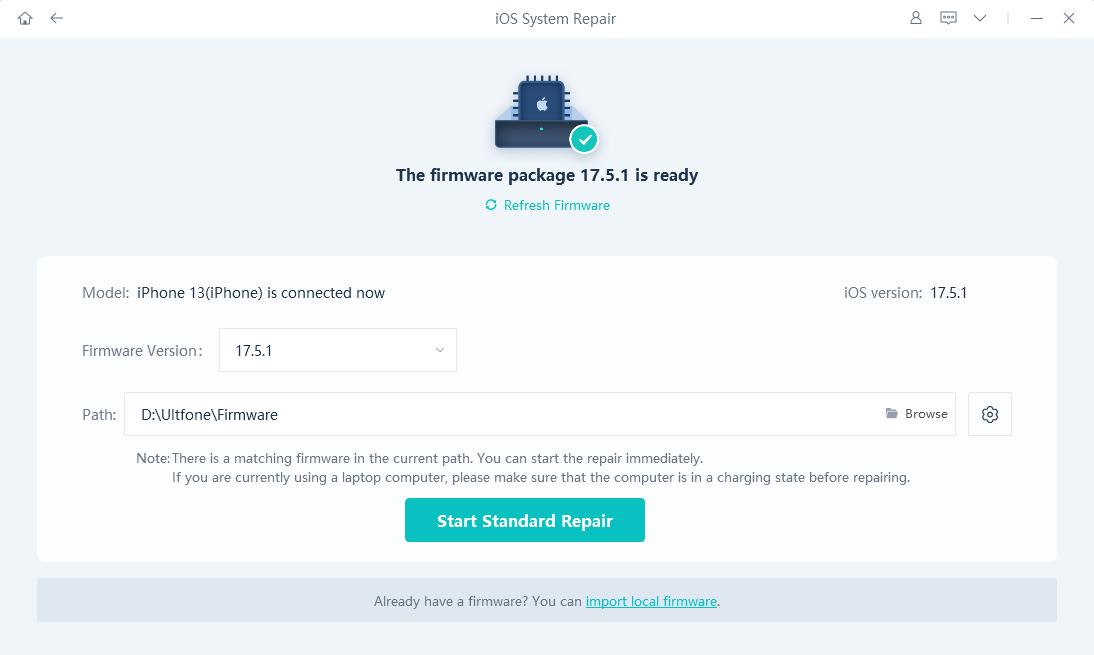
Instead of going through all this hassle to resolve the cellular update failed on iPhone 7, you can rely on UltFone iOS System Repair to repair the iOS system. Sometimes, users can’t figure out the best way to software related issues on their devices. That’s why a professional recovery tool exists so that the perfect solution to all your problems is only 1-click away. You can use the Repair Operating System feature of the software to ensure that the issue is resolved.
Just download the software on your system and follow the guide below to fix your iPhone.
Step 1 Launch the program and connect your iPhone with the system. From the main interface, select the “Repair Operating System” mode and click on the “Fix Now” to initiate the process.

Select repair operating system Step 2 Before the repair process, you will have to download a firmware package suitable for your device. Click on the “Download” button and wait for the download to finish. To pace up the process, make sure that you are connected to a stable and fast network.

Download the firmware file Note: If you already have the firmware file for your device, then you can directly import it.
Step 3 As soon as the file is ready for use, the repair process can be started. Hit the “Repair Now” button and the software will resolve all the issues on your device.

Repair device
When the repair is done, your iPhone will reboot, and the Cellular data will work. And the best thing is that you won’t even lose any data during the repair.
Way 9. Restore iPhone to Factory Settings
When nothing seems to work to fix the cellular update failed error, the last resort will be restoring your iPhone to factory settings. To do this, follow the steps as:
Go to Settings app and open General > Reset > Erase All Content & Settings option. You will be prompted to enter the device passcode to confirm the reset.
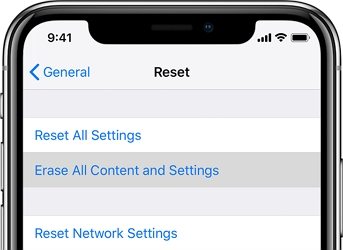
This will restore the iPhone to factory settings and direct you to the setup screen. You can retrieve your device data using iTunes or iCloud backup, and the problem will be fixed for sure.
Conclusion
Now you know 9 easy and quick ways to resolve the cellular update failed on iPhone error. While all the methods have a slight possibility, it is UltFone iOS System Repair that provides a 100% guarantee to fix the update issue without causing data loss. So, we suggest you to use the professional tool to resolve such issues on your iOS devices.

