Knowing Everything About iPhone DFU Restore
 Jerry Cook
- Updated on 2021-08-11 to iPhone
Have you ever typed this in a browser search:
How can I restore my iPhone without iTunes in DFU mode
Most people face challenges to resolve the working problems on your iPhone. Typically, many problems can be fixed with a simple restart. But when the challenges are hard, you have to use the DFU mode to fix them.
In this article, you are going to learn to use the iPhone DFU mode restore feature and how it will be helpful for you.
- Part 1: What Is a DFU Restore?
- Part 2: Does DFU Restore Erase Everything?
- Part 3: How to DFU Restore iPhone?
- Part 4: How to DFU Restore without iTunes?
Part 1: What Is a DFU Restore?
Starting by the definition, DFU stands for Device Firmware Update. This mode is used when the device is stuck and it is not working properly. But people get confused when the terms get slightly changed to DFU restore. So, what is a DFU restore?
The DFU restore will reload the software and the firmware of your iOS device. Just keep this in mind that the DFU restore is deeper than recovery mode. You can use this mode under the following circumstances:
- Downgrading the version of your iOS devices if it is damaged or the apps not working properly.
- To jailbreak the device or un-jailbreak of it.
- Remove an expired beta version of the iOS.
- To fix an iPhone that won’t turn on past the Apple logo.
To fix problems like this, you will have to use the DFU mode. The DFU restore on iPhone 11/XS/X/8 or on any other model will work the same. But as you are performing a jailbreak using the DFU restore, it will violate the warranty and cause you some real troubles.
Part 2: Does DFU Restore Erase Everything?
We have already established the fact that DFU restores is a little bit complicated than the recovery mode. But as the users perform the restore, they are often worried that they might lose their device data.
So, the main question is “does DFU restore erase everything”. Well, the answer is yes. The data will get deleted and you will have to restore the data during the setup or later. You can use the iTunes and iCloud backup feature to backup the device first and then use any of those backups to recover your lost app and device data.
Part 3: How to DFU Restore iPhone?
When you are restoring iPhone in the DFU mode, you will have to follow different steps for different models. Here we have explained what you have to do on your particular iPhone.
- For iPhone 6 and older:
Connect your iPhone to a computer using a USB cable and hold the home button and the lock button. Wait for almost 8 seconds and then release the Lock button. If the apple logo appears on the screen that means you held the logo longer than you should. As a result, you need to perform the steps again.
- For iPhone 7 and 7 Plus:
Connect your iPhone to the computer in which iTunes is installed and press the Volume down button and the Side button at the same time. Wait for 8 seconds and let go of the Side button. iTunes will notify you that a device in DFU mode is detected.
- For iPhone 8 and later models:
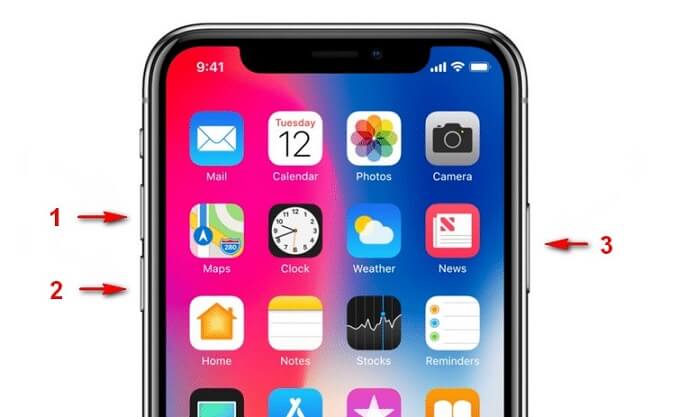
Again connect your iPhone with the computer, quickly press the Volume up button and release it. Then quick press the volume down button and release it. Now hold the side button until the screen turns to black. After that, hold the side button and the Volume down button for 5 seconds. You can release the side button and iTunes will detect the iPhone in DFU mode.
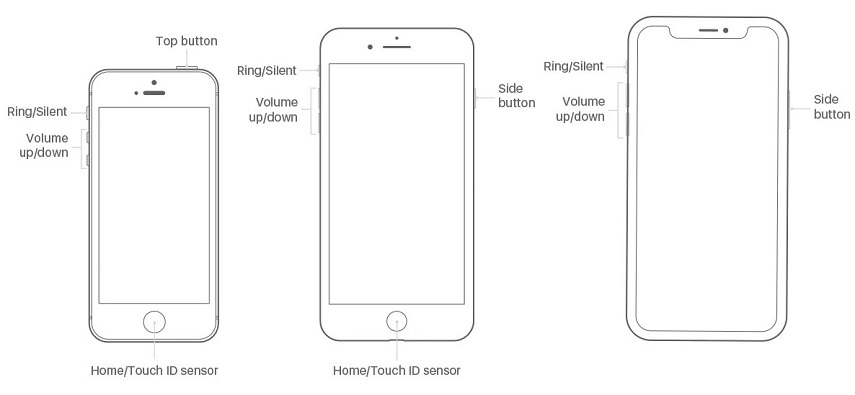
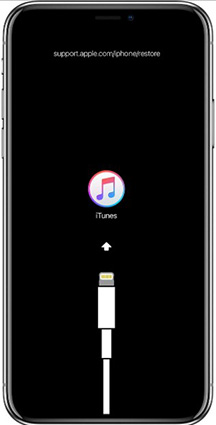
Keep this in mind that the black screen is the mark that the DFU mode is on. If you see the Apple logo or the Connect to iTunes logo on the screen, it means that you messed up the steps and have to follow them again.
You will need the DFU to restore IPSW file to enter the true hardware DFU mode. But this mode is much more advanced and it should be used only by the people who know to operate the mode.
Part 4: How to DFU Restore without iTunes?
If the iPhone DFU restore failed, you will be glad to know that you can even perform a restore without using iTunes. There is an alternative if iTunes is not working. You can consider using the iOS system repair tool. This software is perfect to fix over 50+ working issues on iOS devices. And the good thing is that you don’t need the help of iTunes to do that.
Some people don’t realize that if they perform iPhone DFU restore without an update, then the software will be updated prior to the restore and it will take forever to fix the problem. But UltFone iOS System Repair has eliminated this time-consuming process and made everything easier for iPhone users.
Here is the step-by-step guide that you need to follow to fix the iPhone which is stuck in DFU mode:
- Step 1 Run the program on your system and connect your iPhone which is stuck. From the home screen, select the Repair Operating System option to fix all iOS problems.
- Step 2 Tap on the Fix Now option to start the repair process. You can use either Standard mode or the Deep Repair mode when you are trying to fix the software issues. Keep this in mind that standard mode won’t touch your device data but Deep repair mode will erase everything.
- Step 3 Before you start the repair, the software will prompt you to download a firmware package suitable for your device. Wait as the package is downloaded.
- Step 4 As soon as the download finishes, click on the Repair Now button and UltFone iOS System Repair tool will fix your device as soon as possible.
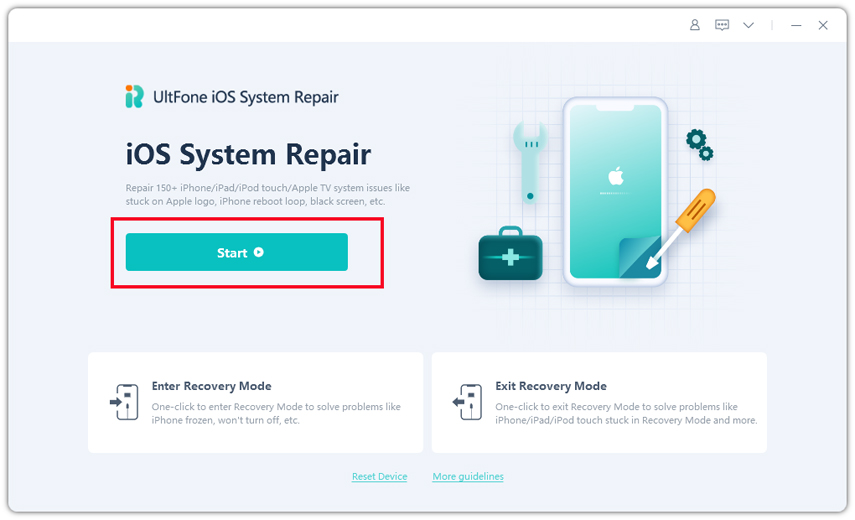
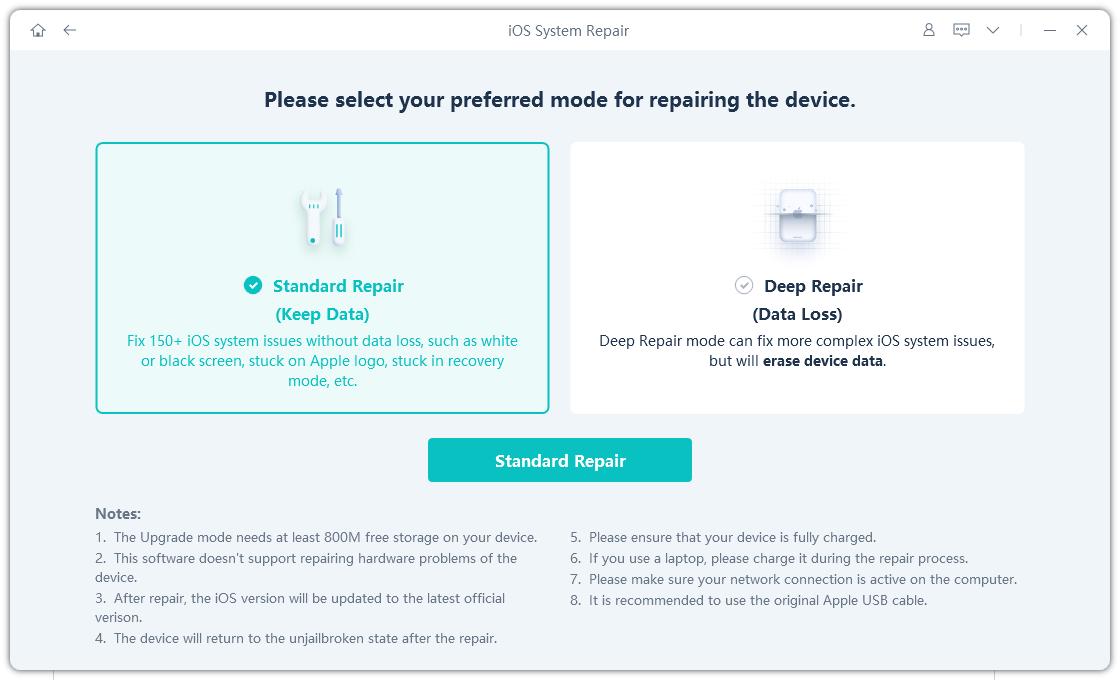
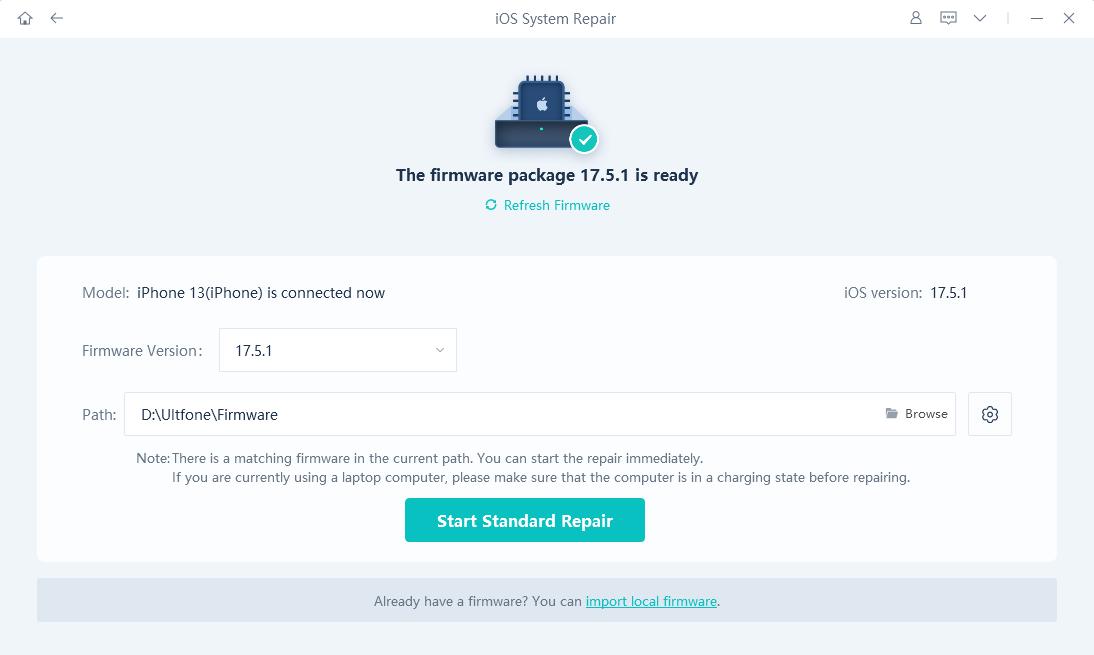
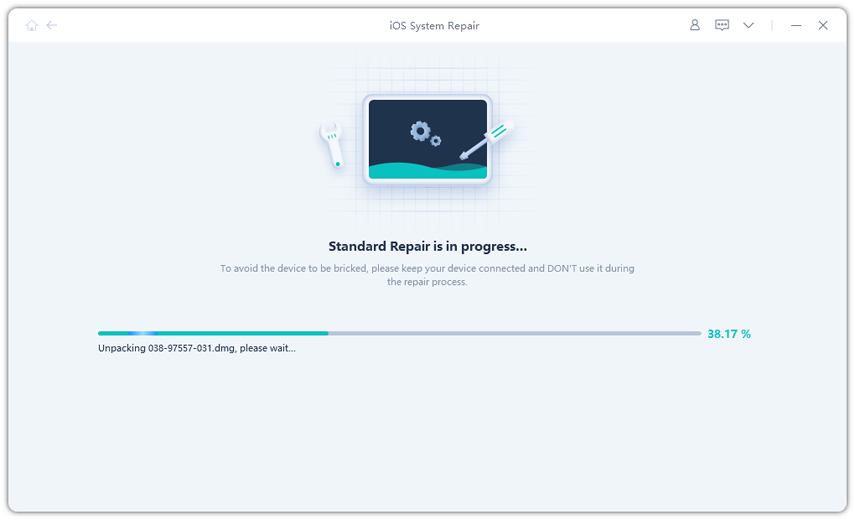
The software will notify you that the repair is done and your iPhone will reboot. From now on, your device will function normally.
Conclusion
Now you know how to perform iPhone DFU restore without iTunes and with iTunes. So, the next time when someone asks you to help fix the working problems, you have the right answer to tell them. Or you can simply recommend using UltFone iOS System Repair as it can fix your device problems without deleting any of your data. Therefore, it is the perfect iPhone DFU mode tool which is accessible to all the iOS users.

