iPad DFU Mode: How to Enter and Exit
 Jerry Cook
- Updated on 2023-06-19 to iPad
In this article, you will gather up the knowledge of how to put iPad in DFU mode and how to get iPad out of DFU mode. But before we get to the process, it is important that we learn what iPad DFU mode is and how can we use it. Moreover, we are also going to learn the methods that would help the users to get fix the iPad stuck in DFU mode.
- Part 1: What is an iPad DFU Mode
- Part 2: How to Put iPad in DFU Mode
- Part 3: How to Fix When iPad Stuck in DFU Mode?
Part 1: What is iPad DFU Mode
The word DFU stands for Device Firmware Upgrade and the mode signifies a mode which allows the device to restore from any state. The DFU mode is the section where the BootROM accepts the iBSS and gets burned into the hardware. When an iPad is in DFU mode, the screen is completely black. Usually you need to put iPad in DFU mode for jailbreak or iOS problems fix. Let's get started to the procedure.

Part 2: How to Put iPad in DFU Mode
The steps are different on iPad with Home button and without Home button.
How to Put iPad Pro 12.9 in DFU Mode (without Home button)
- Step 1. Connect your iPad Pro 2018 to your PC or Mac.
- Step 2. Quickly press and release the Volume Up button.
- Step 3. Quickly press and release the Volume Down button.
- Step 4. Press and hold the Side (Top) button until the power off slider appears. And drag the slider to power off your iPad.
- Step 5. Press and hold the Side button for 3 seconds.
- Step 6. While holding the Side button, press and hold down the Volume Down button.
- Step 7. Press and hold both Side and Volume Down buttons at the same time for 10 seconds. Note that if the Apple logo appears in this steps, it means you've hold the two buttons for too long, just try again.
- Step 8. Release the Side button but continue holding the Volume Down button for 5 seconds.
If the iPad's screen remains black, it means your iPad Pro is in DFU mode successfully.
How to put iPad in DFU Mode (with Home button)
If your iPad has an Home button, please follow the steps below.
- Step 1. Connect your iPad to your PC or Mac.
- Step 2. Run iTunes on your computer.
- Step 3. Quickly press and release the Volume Down button.
- Step 4. Press and hold down the Side (Top) button until the power off slider appears. Drag the slider to power off your iPad.
- Step 5. Press and hold the Side button for 3 seconds.
- Step 5. While holding the Slide button, press and hold down the Home button.
- Step 7. Press and hold both Side and Home buttons at the same time for 10 seconds. Note that if the Apple logo appears in this steps, it means you've hold the two buttons for too long, just try again.
- Step 8. Release the Side button but continue holding the Volume Down button for 5 seconds.
Part 3: How to Fix When iPad Stuck in DFU Mode?
How to fix when an iPad gets stuck in DFU mode and won't turn on? There are three ways to get iPad out of DFU mode.
Way 1. Exit iPad DFU Mode Manually
The most obvious method to exit the DFU mode is to do it manually. Simply press the Home button and Power button together and hold it for few seconds. The iPad will display the Apple logo and then you can let go the buttons. This will exit the DFU mode and you will be able to use your device again.
Way 2. Using iTunes to Exit iPad DFU Mode
- You can fix iPad stuck in DFU mode using iTunes.
- Start iTunes on computer.
- Connect your iPad to computer.
- Press and hold Home button and Sleep/Wake button at the same time for 10 seconds.
- Release both buttons.
- Press shortly the Sleep/Wake button.
Way 3. iPad Stuck in DFU Mode and Won't Restore? Repair iOS System to Fix It
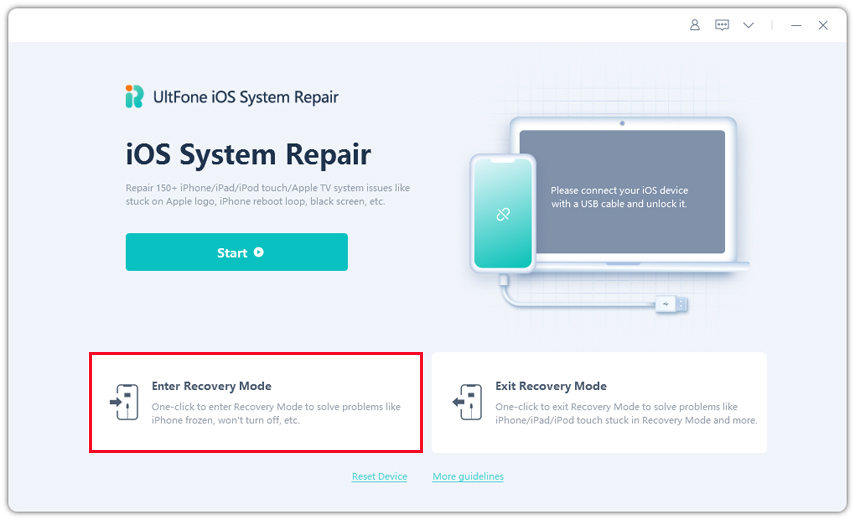
Does your iPad Mini stuck in DFU mode black screen and you can't fix it using iTunes? Here is the solution by using iOS System Repair. It can fix 50+ iOS problems, including iPad black screen and won't turn on, iPad stuck in recovery mode, Apple logo, etc. without data loss. Let's see how to fix iPad DFU mode without iTunes.
Step 1. Download the iOS system repair software and run it on your computer. When the software is launching, connect your iPad with the computer. Then from the main interface, choose the Fix All iOS Stuck option.
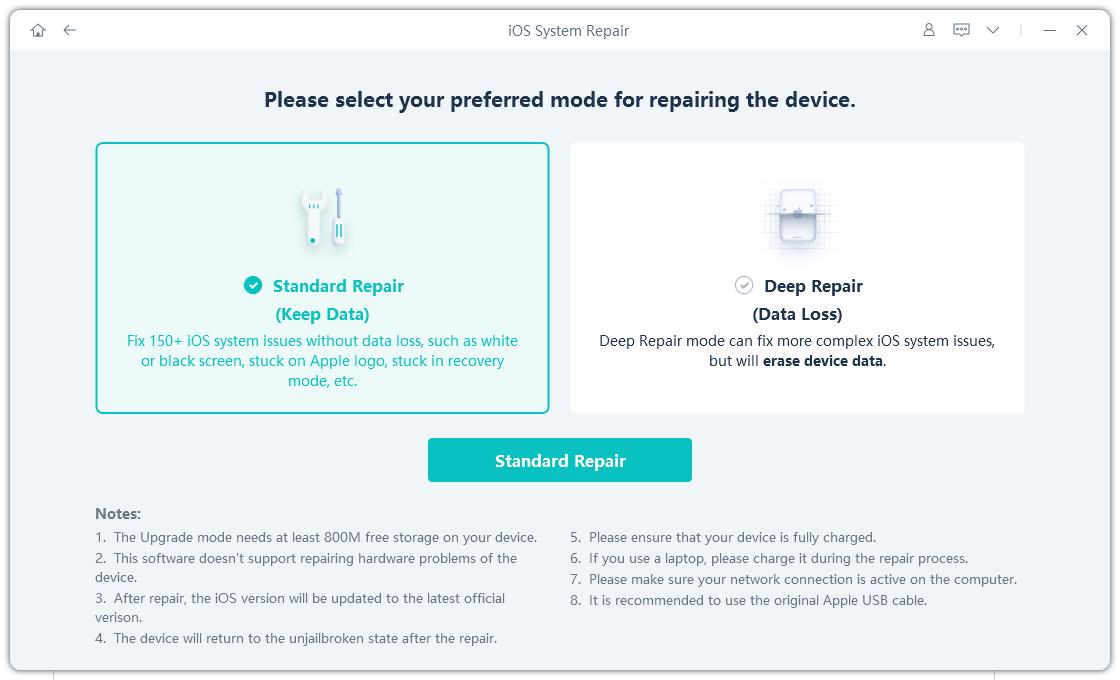
Step 2. Then tap on the Start Repair option to start the process.
Step 3. In the next screen, you will be prompted to download the firmware package. Tap on the Download button to download the package and wait for it to finish.
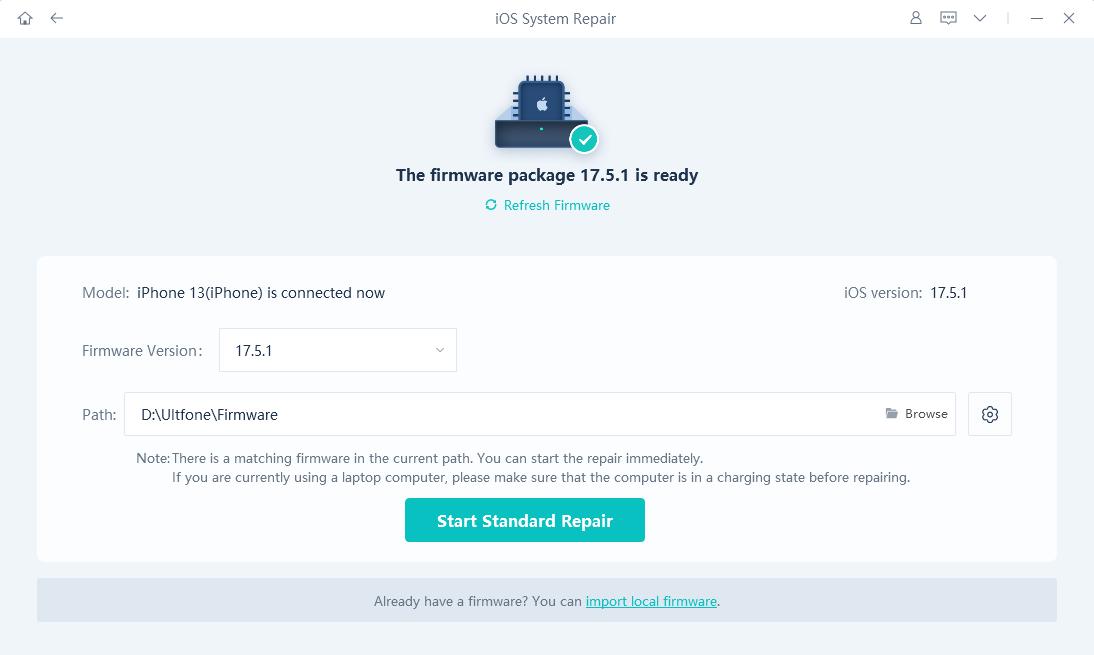
Step 4. When the firmware package is downloaded successfully, tap on the Repair Now option to begin the process. The software will start to fix the issue in your iPad and when the process completes, your iPad will reboot.
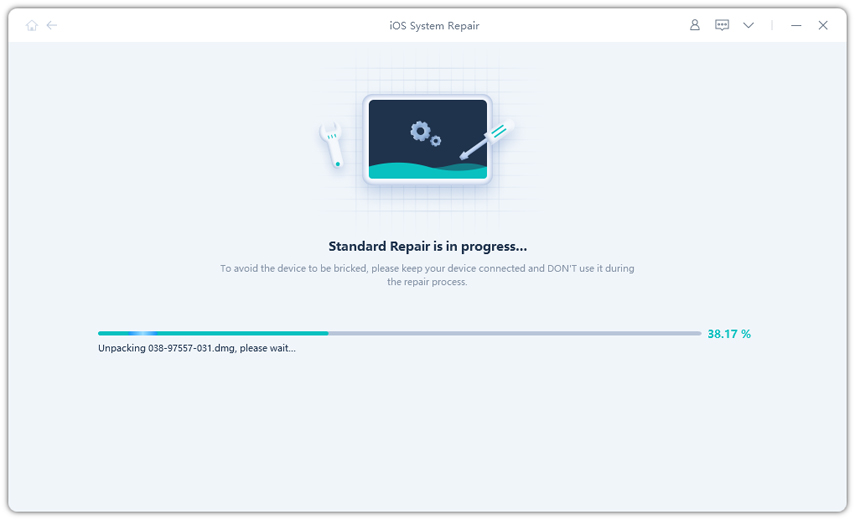
In the end, your iPad will be fixed and none of its data will be lost. The iPad will get back to its normal state and you will be free to use it.
The Bottom Line
Hopefully, now you know everything about the process how to put iPad into DFU mode and also how to fix iPad DFU mode. But be careful with the mode as you won't be able to restore your device if it gets stuck. Luckily an iPad System Repair tool is here for your rescue and can fix over 50+ issue sin iOS devices.

