How to Fix iPhone Software Update Server Could Not be Contacted Error 2025
 Jerry Cook
- Updated on 2024-01-09 to iOS Update
If you are a loyal iPhone user for some years, then chances are that you have already faced this problem that your iPhone stuck with an annoying message telling you that you cannot proceed with the update as iPhone update server cannot be contacted. So, today in this article, we’ll discuss all about what does the iPhone software update could not be contacted mean and how can you solve the issue. Stick with this article, so next time you don’t miss out on being the first one to get the update.
- Part 1. What Does it Mean When the iPhone Software Update Server Could Not be Contacted?
- Part 2. Why the iPhone Software Update Server Could Not be Contacted (1671)/(-23) Happens?
- Part 3. How Do I Fix the Software Update Error on My iPhone?
- Method 1. Update or Restore Your iOS Device without Using iTunes
- Method 2. Quit and Relaunch iTunes to Try Again
- Method 3. Check Your Network Connection
- Method 4. Update Your iOS Device Over the Air
- Method 5. Update your iOS Device Manually
- Part 4. People Also Ask About iPhone Software Update Server Could Not Be Contacted
Part 1. What Does it Mean When the iPhone Software Update Server Could Not be Contacted?
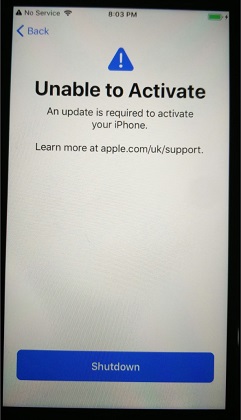
Here’s a screenshot from a user who faces a similar problem:
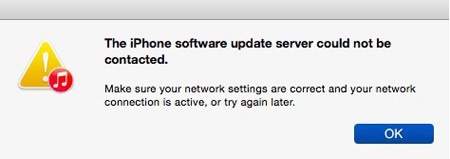
Seems familiar with what you got? You can also see a few variations like, Apple server could not be contacted, iPhone software update server that could not be contacted. an unknown error occurred (1671),the iphone software update server could not be contacted. an unknown error occurred (-23), etc. but they are all the same.
The worst part about this message is that it comes with only one “Ok” button so there’s not much exploration you can do to find a solution.
Actually this problem is basically due to your device error. Your device is not allowing you to contact the Apple server for the update and that’s why you cannot update. This problem first appeared with the iOS13.6 update. But the good news is, most of the time, it has nothing to do with your Apple ID, so it’s not a big problem. Now we will provide you with 5 verified ways to get rid of such can’t connect to Apple update center problem.
Part 2. Why the iPhone Software Update Server Could Not be Contacted (1671)/(-23) Happens?
Another reason behind this server could not be contacted (1671) error can be that your mobile network is glitching. Make sure that you are on a good quality Wi-Fi connection before you proceed with an update.
Also, when new updates arrive, millions of people around the globe are in line to get their hands on the new update. This can also burden the server. So, that can also be one of the reasons why you are getting this error message.

Part 3. How Do I Fix the Software Update Error on My iPhone?
Here are the 5 easiest and working methods to solve the iPhone software update server that could not be contacted issue.
Method 1. Update or Restore Your iOS Device without Using iTunes
You can also update your iPhone without iTunes with help of our specially designed software. For such errors like the iPhone software update server could not be contacted, you can use UltFone iOS System Repair software to help you update your iOS without requiring iTunes.
This is the best and most powerful method to get rid of the iPhone server connection error and many other errors that you might face while updating your iOS.
It is user-friendly software, easy and convenient to use, and loaded with tons of powerful and useful features:
- Fix 150+ iPhone and iTunes errors including software update cannot be found, Apple logo stuck, and etc.
- Reset all iOS devices without password/iTunes/Finder.
- Downgrade from iOS 17 without iTunes.
- Support all iPhone models and iOS versions.
Here is Video Guide on How to Use UltFone iOS System Repair to Fix the iPhone Software Server Cannot be Contacted
After watching the video, click the button right now to fix the iphone software could not be contacted issues.
The best thing about UltFone iOS System Repair is that anyone can use it like a pro as it is made with a special goal in mind to be user-friendly. Here's how to use UltFone iOS System Repair:
-
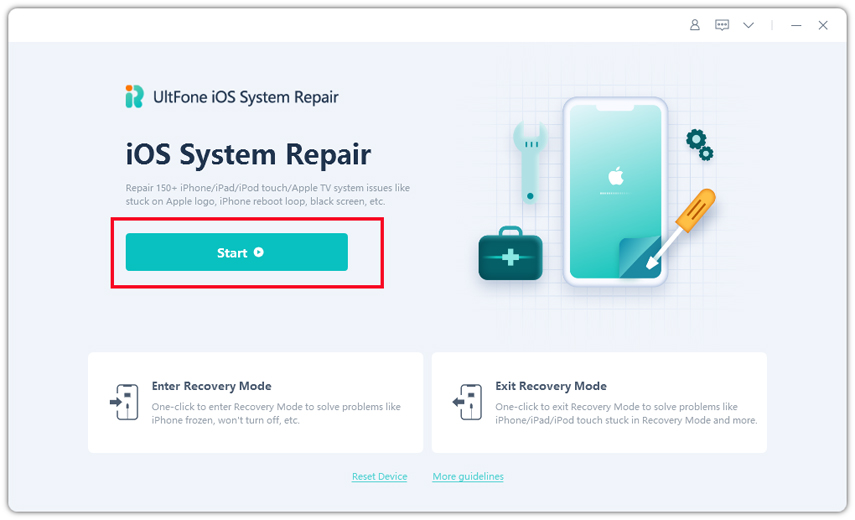
Step 1 Launch UltFone iOS System Repair on your computer and connect your device to the computer with a lightning cable. Click Start button in the main interface.

-
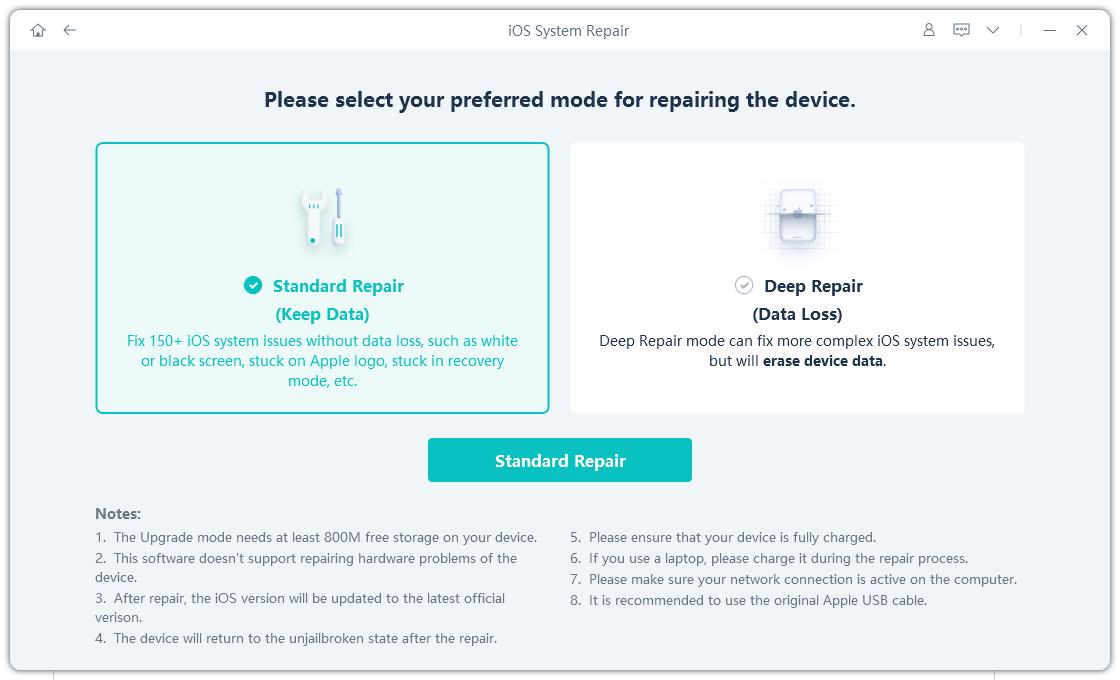
Step 2 Select Standard Repair.

-
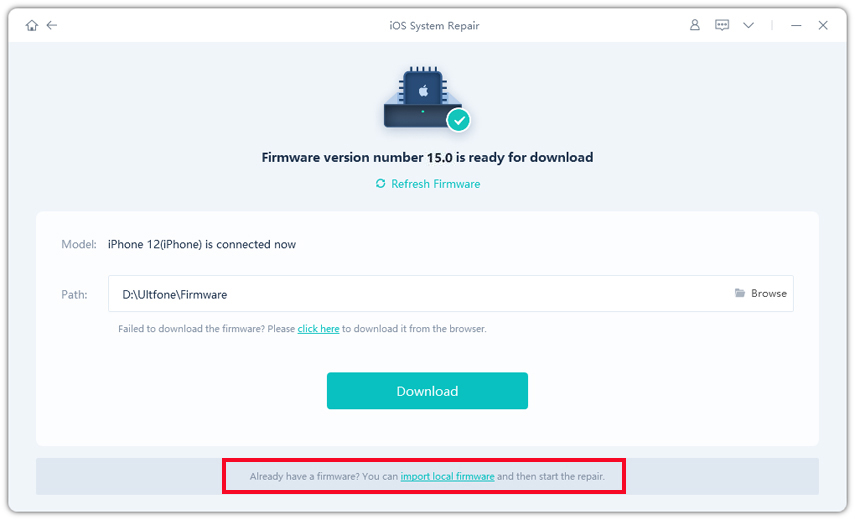
Step 3 Next, download the automatically matched firmware package for your device. If you have already downloaded it, you can click import from local at the bottom of the screen.

-
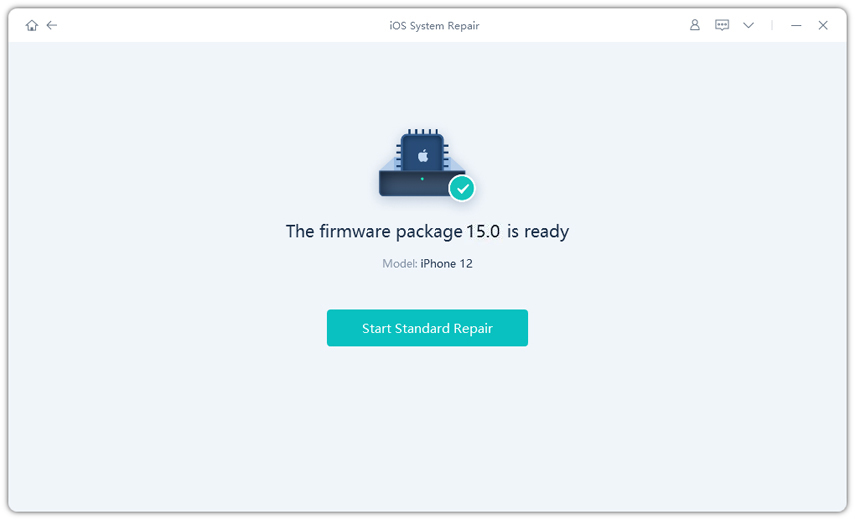
Step 4 After the download, click Start Standard Repair to start to update your iPhone/iPad.

-
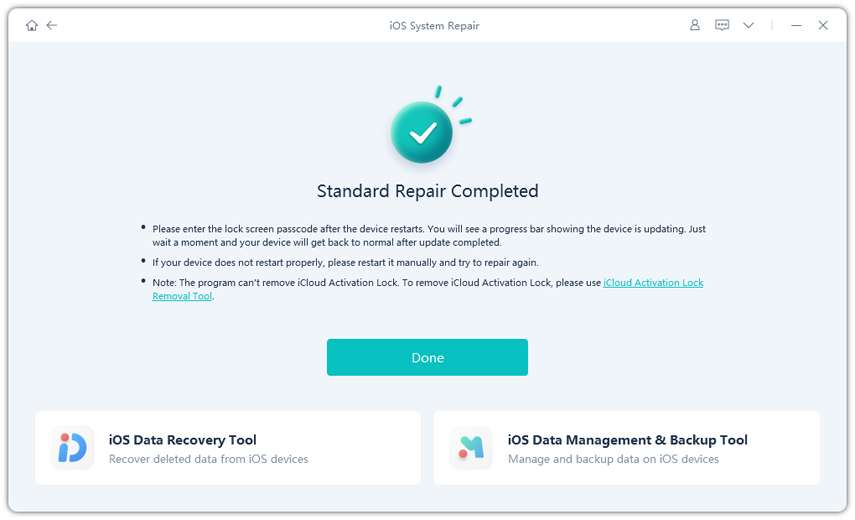
Step 5 Now your iPhone will be updated to the latest version of iOS that’s available for your device.

Method 2. Quit and Relaunch iTunes to Try Again
This couldn’t connect to the iPhone server error can be due to some glitch on your phone. Sometimes if your iOS 15 is running so many background apps, it may interfere with iTunes. iTunes can also stop responding due to tons of other reasons.
So, the first thing that you should try is to quit iTunes and then try again. This can help solve the software update problem you are facing.
It is also recommended to close all the background apps or even restart your iPhone too before you start the update on your iPhone.
Also, make sure that you have the latest version of iTunes on your iPhone. If not, you can update your iTunes first and then try the update.
Method 3. Check Your Network Connection
The main reason behind all this messy situation is that your phone is unable to connect to the server. This can very likely be due to a connectivity problem. Thus we recommend using a fast reliable Wi-Fi connection for updating. Data connections are not that reliable and most of the time they cannot provide a stable connection. That can be the reason why your phone will show the message about Apple software update cannot be found or connected to.

Here are the things you can do in such a case.
Restart your Wi-Fi
First off, go to your Wi-Fi modem and press the restart button. If there is no restart button by default, just turn off the Wi-Fi and then turn it back on after 10-20 secs. After that, connect your iPhone to the Wi-Fi again.
Check Connectivity
This is to make sure that your Wi-Fi network can provide you internet. You can open some other app or website on your phone to test that. The best way is to start a speed test and see if your Wi-Fi network is stable with low ping or not.
Refresh Your Connection
One thing that we regularly notice with people's Wi-Fi connection is that there are glitches. Their Wi-Fi is working fine but due to some error, one particular device is unable to access the internet through it.
To solve this problem, you can forget the Wi-Fi on your iPhone and then connect it back using the password. This helps in many cases.
Connect to a Different Network
This is the last resort option and a way to be 100% sure about the connectivity problem with your phone. It will be best that you connect to a different network and then try to update. This might probably help you get rid of connecting errors to the iPhone server.
Method 4. Update Your iOS Device Over the Air
If these solutions do not work for you, it means that the problem is not in your network connectivity but some other reasons.
You should try updating your iOS through Over the Air (OTA) update without using iTunes.
It is a very simple process and we will explain how you can do that.
First, go to Settings> General> Software Update.
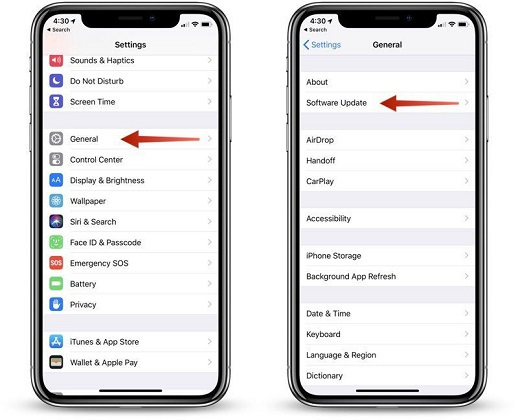
If there are any iOS updates available for your device, you will be able to spot them here.
If you see any update available as shown in the screenshot, press Download and Install.
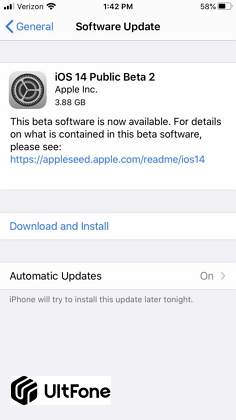
After the update is done, you will need to restart your device and your iOS will be updated.
Method 5. Update your iOS Device Manually
This is another solution if you find your phone giving the error message, the iPhone software update server could not be contacted you do not have permission.
This is a little complex method, but we will explain it step by step so you can easily update your iOS manually using this technique.
- Step 1: First, you need an IPSW file to proceed with this method. You can download the file according to your device here.
- Step 2: Now connect your iPhone to your PC and launch iTunes on your PC.
- Step 3: Now go to Summary, and press Shift Key (for Windows) or Options Key (for Mac). Then click Restore iPhone.
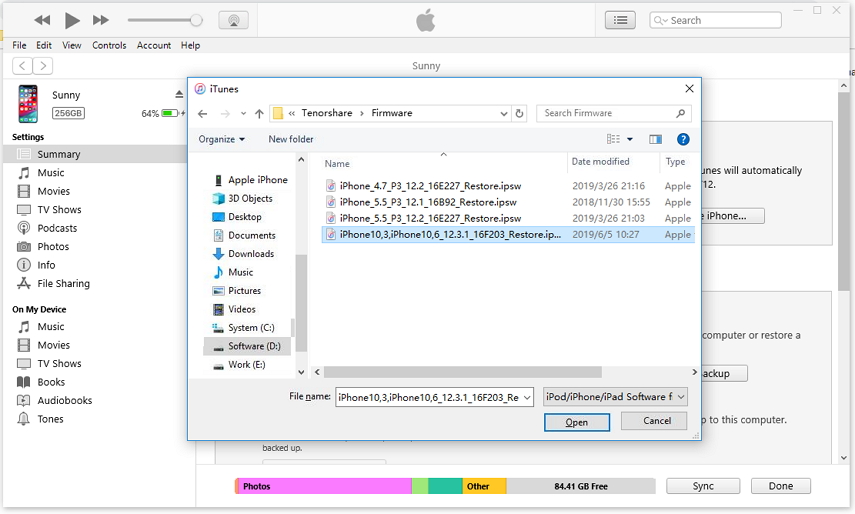
Step 4: A pop-up window will pop out and now you have to select the IPSW file that you have already downloaded.

- Step 5: A message will pop up saying that iTunes will erase and restore your iPhone. Press Restore and proceed.
Wait till it updates iOS 15 and then you can enjoy newly updated iOS on your iPhone.
People Also Ask About iPhone Software Update Server Could Not Be Contacted
Here are some of the most google searched questions asked by users related to iPhone software updates.
1. What does it mean when it says cannot connect to the Apple ID server?
As we already discussed in the above section. It simply means that due to some problems your Phone is not allowing iTunes to connect to the Apple server. This can be due to a glitch, network error, or some other reasons.
2. What does it mean when it says "The Apple Software Update Server could not be found, check your internet settings and try again."?
This error can be due to some problems in your network settings. Here’s a solution you can try for this error.
Go to Control Panel> Network and Internet Options> Internet Options. Here under the Advanced tab, scroll down to Security and uncheck Do not save encrypted pages to disk.
Conclusion
iPhone software update server could not be contacted is a common problem and can be caused by many reasons. Here we provided all the simple and easy ways you can try and get rid of this error. It is always recommended to have software like UltFone iOS System Repair for all such problems. If you have any questions or need some help, feel free to leave a comment below. Have a great day!


