Top 13 Solutions to Instagram Notifications Not Working on iPhone 12/11/X...
 Jerry Cook
- Updated on 2022-08-31 to iOS 14
Are you a fan of Robert jr. Drowney or Cristiano Ronaldo? Well, then you would love to have a look at the best of their pictures and have an update about their lives. Instagram is a fantastic source that fulfils your purpose. It is not only home to various celebrities but also serves as a great mode of entertainment for everyone.
As Instagram is used by a massive number of audience, you would always wish to stay notified after every update of your followings. Hence, you catch up with what’s latest. But what if your Instagram notifications are not working on your iPhone 11 or iPhone 6s? This article will help you out of this problem with 13 methods!
- Why is Instagram Notifications not Working?
- Common Fixes for Instagram Notifications Not Working on iOS 16/15/14/13/12/11
- [High Success Rate] One-Stop Fix for Instagram Notifications Not Working iOS 16/15/14/13/12/11
Why is Instagram Notifications not Working?
At certain times, your Instagram notifications might stop showing up, the most common reasons are listed below.
Using an older version of Instagram might prevent notifications from showing up. As the version isn't the latest one, it has trouble syncing in with other updated devices. Hence, you might suffer from Instagram notifications not working on iPhone 12/11/XS/XR/8.
Another reason might be related to the version of your device. Users using older iOS versions have often experienced multiple system lags in their iPhones, one of which is Instagram notifications not working.
"Do not disturb" mode enabled prevents any notifications from showing up and disturbing you while you are asleep or in a meeting. But there is a fair chance of you forgetting to turn off the mode and set it to normal. This might be one particular reason for Instagram notifications not working on iOS 16/15/14.
Unknown system crash, software glitches or incorrect settings.
Common Fixes for Instagram Notifications Not Working on iOS 16/15/14/13/12/11
Method 1. Restart Your iPhone
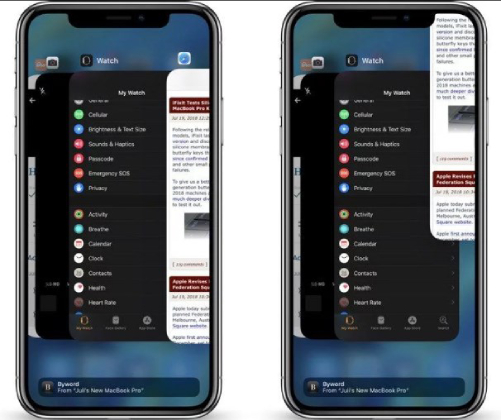
This is one of the most straightforward ways to correct any system lag in your phone. Restarting phone shall reset all processes and start them again, allowing you to fix any minor problems. Here's how to restart your iPhone according to differnet iPhone models.
As said earlier, this is one easy method, but to be honest, this way of fixing Instagram notifications not working on iOS 14/15/16 may not always work. But it would be best if you weren't disappointed as we have got you far better ways.
Method 2. Upgrade Your iPhone to the Latest Version
An older version of the iPhone can be a valid reason for Instagram notifications not working iPhone 11. And if this is the case, you shall not be worried as the phone can be upgraded easily from settings, all you need is a good internet connection and a charge for your iPhone.
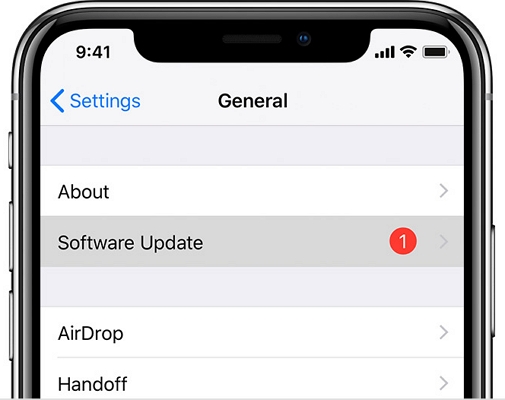
Step 1. Go to Settings and head to General.
-
Step 2. Click on "Software Update".

Step 3. A prompt shall appear after the click, now press "Download and Install".
-
Step 4. Once the update is downloaded, you may install it as per your ease.
This method shall resolve your issue if it is based on the reason as we assumed, but there is a vivid possibility that you might have made the wrong guess.
Method 3. Upgrade Instagram App to the Latest Version
As discussed above, the application might not function the best at its former version, and you might need to upgrade it to overcome your problem of Instagram notifications not working on iPhone 11/XS/XR/8. Following the procedure shall fix you trouble:
Step 1. Open the App Store.
-
Step 2. On the bottom, you may find "today". Click on it
Step 3. At the top, you shall have your profile icon, tap it.
Step 4. A list of apps that need to get upgraded shall appear.
Step 5. Scroll down for Instagram, and click on "Update".

Method 4. Check and Disable Do Not Disturb Feature
With Do Not Disturb feature set as on, it would display a crescent sign on the top of your screen. However, there might be instances when the feature might be on, but a sign may not be displayed. Well, it is one of the common reasons for Instagram notifications not working. Hence, it is advisable to have a check at the "Do Not Disturb” toggle and make sure that it is off.
Step 1. Head to Settings.
Step 2. Scroll down to find "Do Not Disturb".
-
Step 3. Enter the section and set the toggle off.

Any prevention to the notifications due to the system would be nullified, and you shall have all your notifications promptly.
Method 5. Check Instagram Notifications
Every iPhone allows you to make an adjustment to notifications settings, and this is quite a possibility that you might have turned the notifications off. You can correct the problem by simply following the steps below.
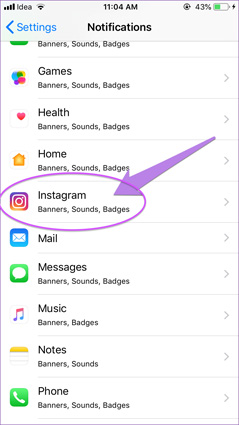
Step 1. Open Settings and enter Notifications tab.
Step 2. Look out for Instagram.

-
Step 3. Make sure to allow any notifications from the app if they are denied.
Step 4. Click on "show on the lock screen".
It is advisable to change the notification tone, so you are alerted at every update, following the above steps shall fix Instagram notifications not working.
Method 6. Reset Network Settings
While the trouble of Instagram notifications not working on iOS 16/15/14/13/12/11 may be taking over you, you might have forgotten to have a look at the most fundamental reason, which is your network connectivity. Because Instagram is an app based over the Internet, it requires a smooth connection to function correctly. Make sure to have a look at your network settings.
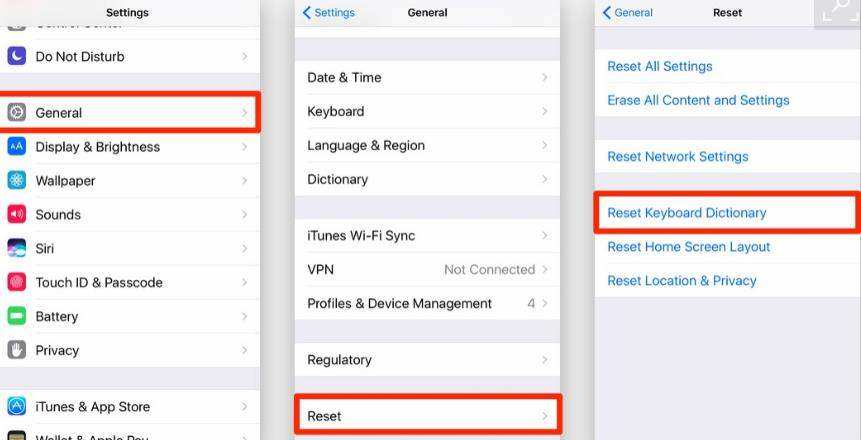
Step 1. Go to settings and head to general.
Step 2. Look out of "Reset" option.
-
Step 3. Scroll down to "Reset Network Settings" and begin the process.

Following the steps shall reset your network settings to default and fix your network issues.
Method 7. Reinstall Instagram and Allow Notifications
Deleting and reinstalling has been one of the most effective ways of correcting any bugs in the application. We shall try the same for Instagram notifications not working.
Step 1. Touch and hold the Instagram icon on the main screen.
Step 2. Tap remove app.
Step 3. Press delete app and then confirm your decision.
Step 4. Once the app is deleted, install it again from the app store and make sure to turn the notifications on by the process discussed above.
Method 8. Factory Reset Your iPhone
If the problem still exists, try resetting your iPhone. Before you begin to reset the device, make sure you have created a backup so that you don't lose the data. Here is the method you need to follow:
Step 1. Go to "Setting" from the home screen of your iPhone.
Step 2. Scroll down and tap on "General".
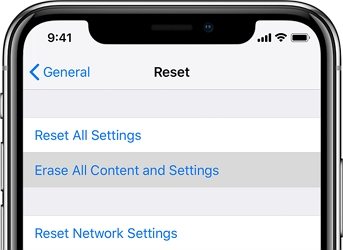
Step 3. Now tap "Reset".
Step 4. Tap "Erase All Content and Setting".

Step 5. Now Confirm the action by tapping on "Erase Everything".
Method 9. Enable Background Refresh
Background Refresh features allow the application to check for updates and new content. Enabling Background Feature shall help you to fix the issue. Here is the Guide to Enable Background Refresh on your iPhone.
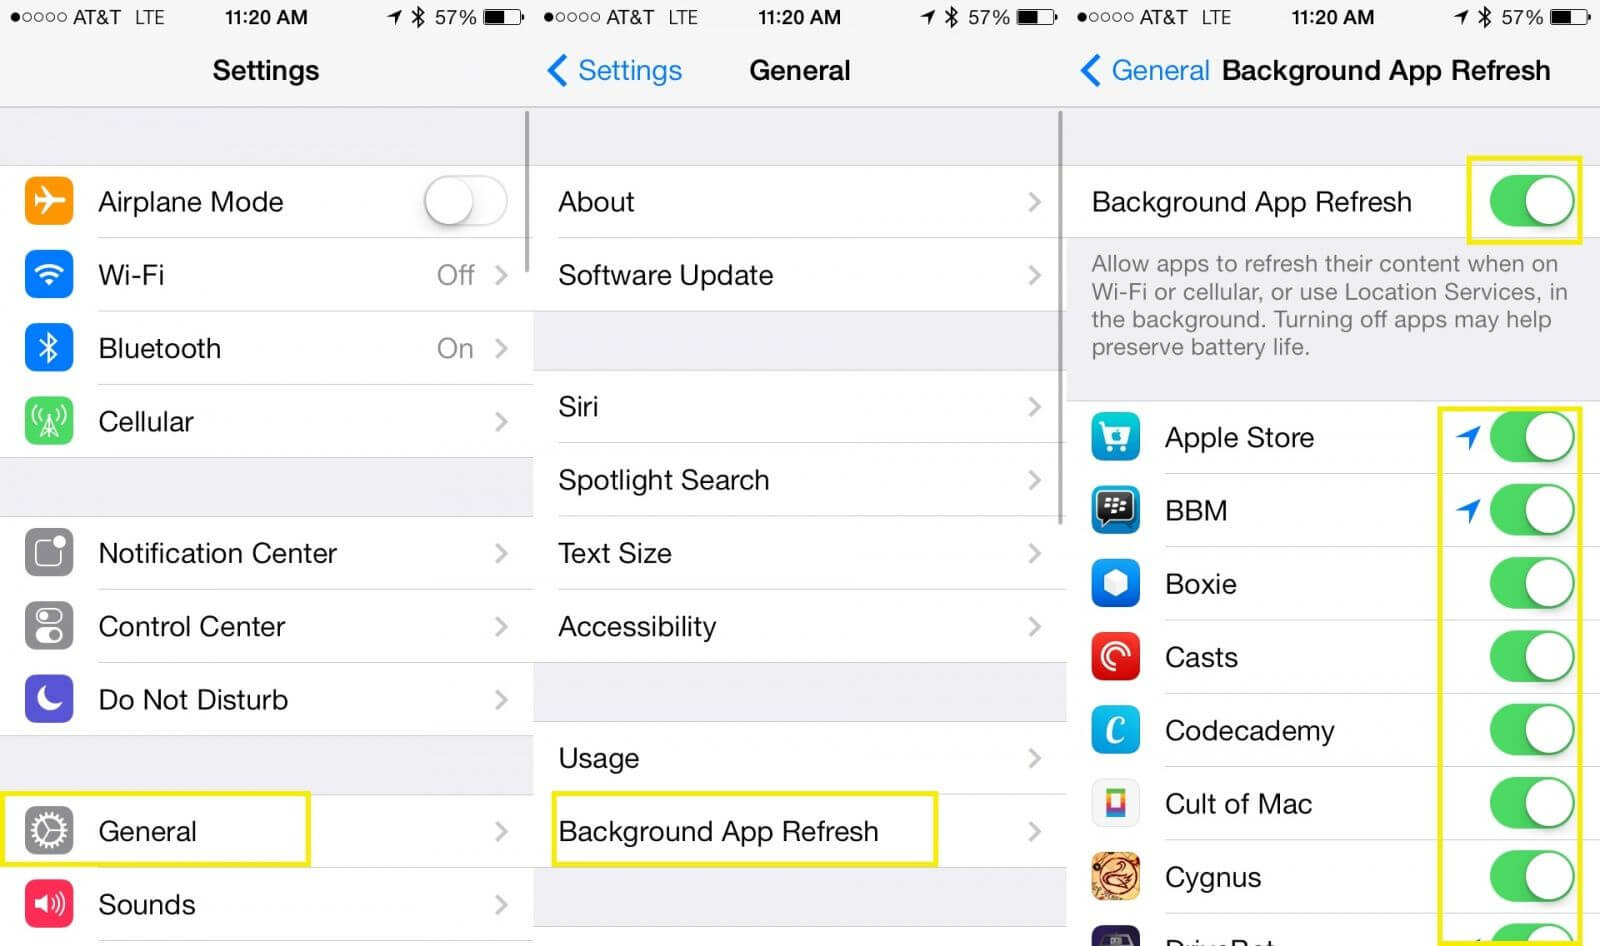
Step 1. Launch "Setting" on your iPhone.
Step 2. Tap on "General".
Step 3. Now, click on "Background APP Refresh" option.
Step 4. Enable "Background APP Refresh" for Instagram.

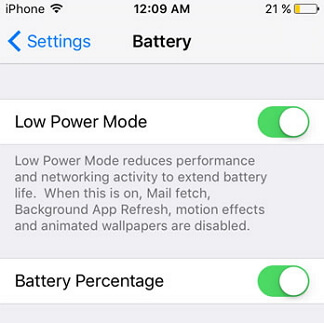
Method 10. Disable Low Power Mode
Usually, when the low power mode is activated, it blocks the notification, whether its Instagram's notification or WhatsApp alerts. Follow the procedure to disable Low Power Mode:
Step 1. Launch Setting from your iOS device.
Step 2. Click on "Battery" Option.
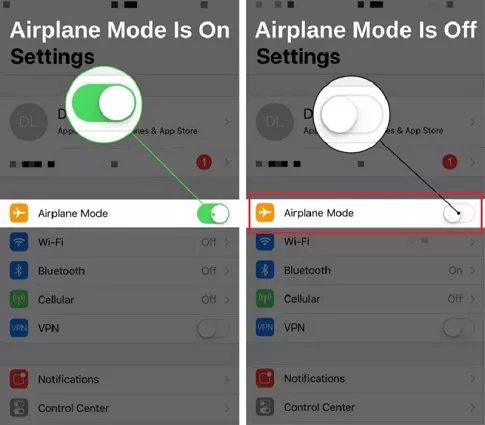
Step 3. Toggle "Low Power Mode" switch to the left to disable it. The switch will become greyed-out when toggled off.

Method 11. Log out and Login Your Instagram Account Again
If any of the above methods didn't work, Just logout from Instagram, and then login again to your Instagram account. This method shall help you to address the problem. This method is quite straightforward, let's learn how to do it:
Step 1. Launch the Instagram Application on iPhone.
Step 2. Now Go to your Profile and Tap on "More" option.
Step 3. Click on "Setting".
Step 4. Scroll down to the bottom and tap on Log out.
Step 5. Now, Instagram would sign out your account.
Step 6. Close the Instagram Application and Relaunch it again.
Step 7. Enter your credentials and login again.
Method 12. Restore Your Device from iTunes
Step 1. Launch iTunes on your computer.
Step 2. Connect your iPhone with Computer via a USB cable.
Step 3. Select your iPhone when it appears in the iTunes window.
Step 4. Click on "Restore Backup" Option.

Step 5. Select the most recent backup by looking at the date.
Step 6. Now Click on Restore. Keep your device connected to the computer until the restore process is completed.
Well, if you don't want to restore the whole backup, take a look at UltFone iOS Data Manager, a third-party tool that supports to selectively backup and restore any data type on your iOS devices.
[High Success Rate] One-Stop Fix for Instagram Notifications Not Working iOS 16/15/14/13/12/11
Have you tried all the above method and none of them was effective to fix Instagram not showing notifications? Don't Panic, the last method using a third-party application UltFone iOS System Repair, which is the best method with highest success rate and takes only a few minutes to fix the problem. Other significant options available in Ultfone iOS System repair are:
- Update to the latest iOS 16 version.
- 1-Click to enter and exit recovery mode on iPhone/iPad/iPod.
- Factory reset iPhone without password.
- Fix 150+ iOS system and software issues without data loss.
Here's how it works:
-
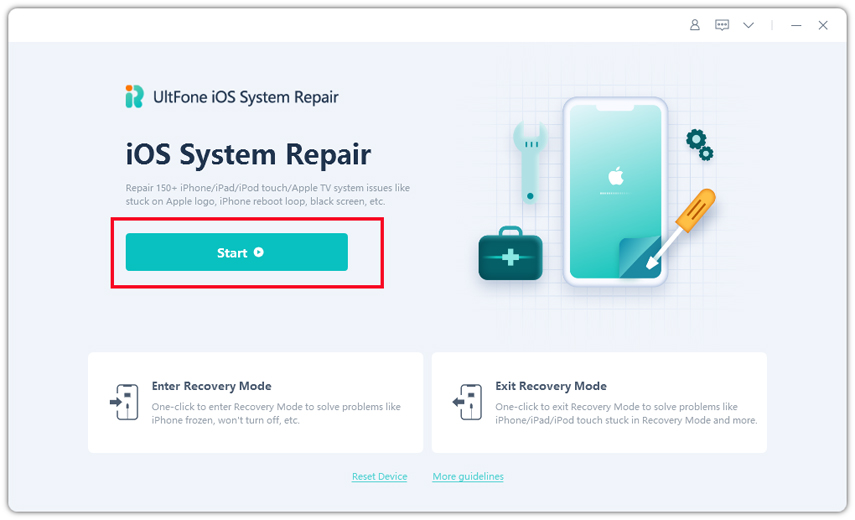
Step 1 Launch UltFone iOS System Repair on your computer. Connect your device to it and Click on "Start".

-
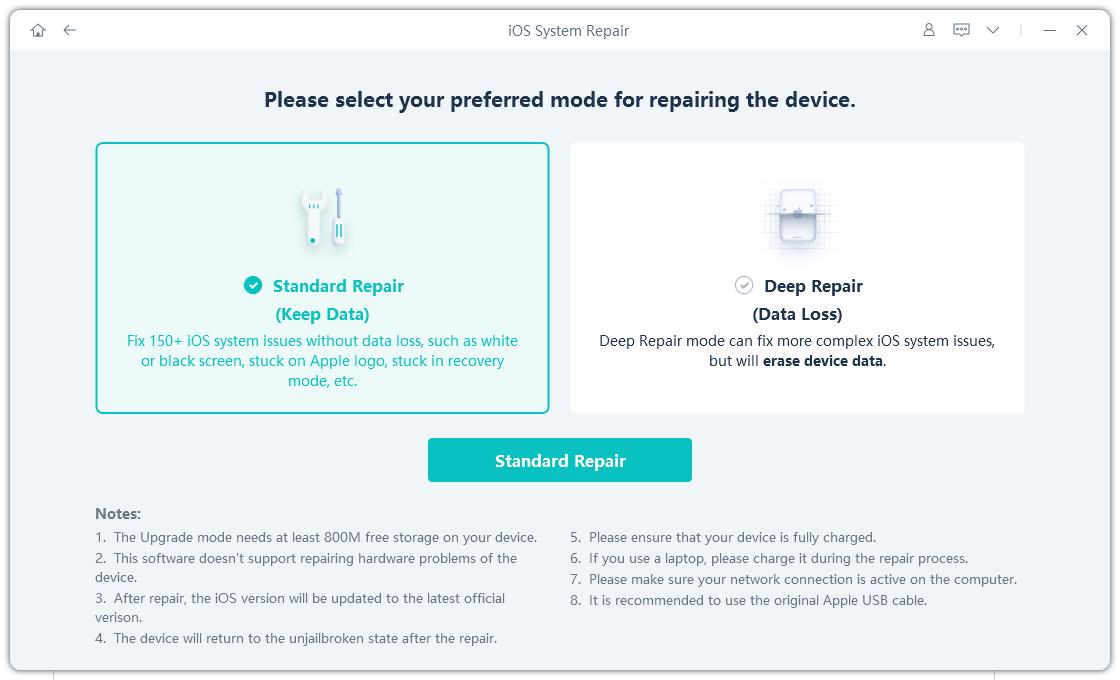
Step 2 In the next screen, click on "Standar Repair", which won't wipe out any data.

-
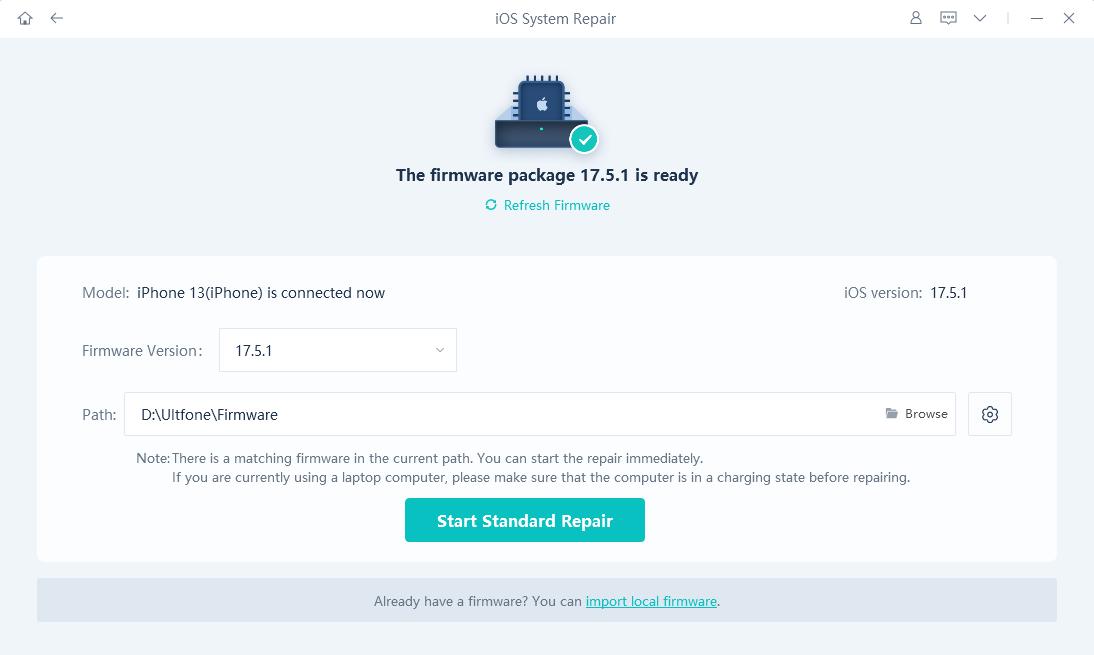
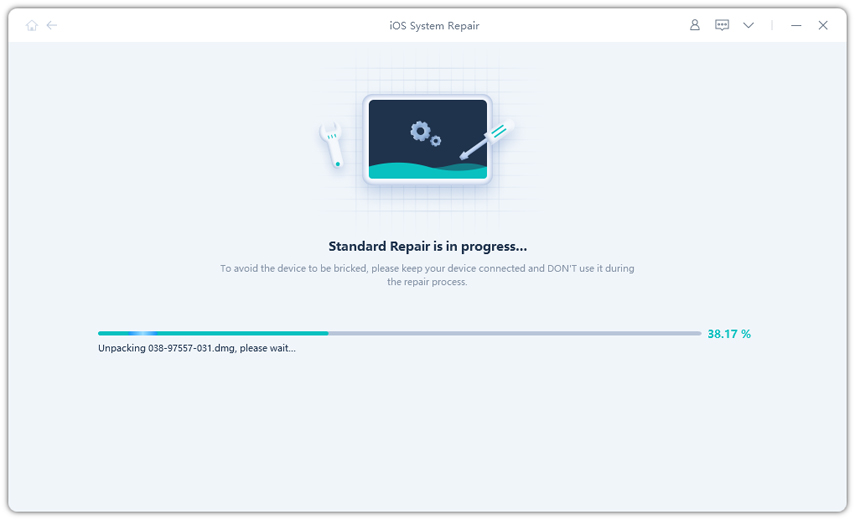
Step 3 Before the system repair begins, you have to download the firmware package for your device.

-
Step 4 Upon successful completion of the download, Click on “Start Standard Repair” to fix the issue.

The Bottom Line
Here in the post, we presented numerous ways to fix Instagram notifications not working on iPhone issue, but we highly recommend you the last one-using the UltFone iOS System Repair, cause it is faster, and more efficient than the other methods. Last but not least, if you think this article helpful or have encountered any other problem, feel free to let us know in the comment section.

