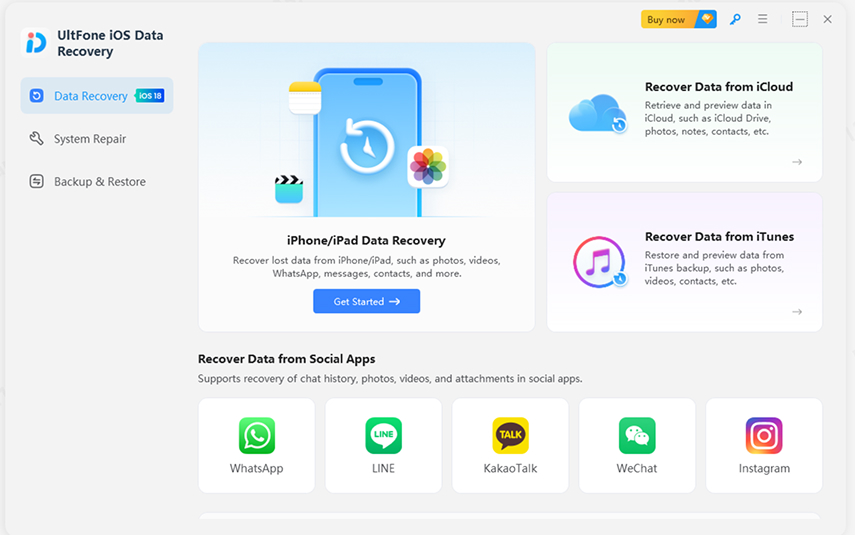
UltFone iOS Data Recovery is currently the best data recovery solution for iPhone/iPad/iPod users with the utmost success rate. 3 recovery modes are provided: recover from iOS devices, recover from iTunes backup and recover from iCloud backup, which can meet your various requirements. Besides, by using this amazing tool, you can also save your iOS devices from various system stuck or crash issues.
Now, read the detailed guide below and learn how to use UltFone iOS Data Recovery. Before that, download the software on your PC/Mac.
Note: It's recommended to stop using iOS device after data loss to avoid lost data being overwritten.
Part 1: Recover from iOS Devices
This way you can directly scan iPhone/iPad and get back lost photos, SMS, contacts, WhatsApp, voice memos, etc. without having iTunes/iCloud backup.
Step 1: Launch the software on your computer and select "Recover Data from iOS Devices".
Step 2: Connect your device and computer with a USB cable and trust the computer on your device.

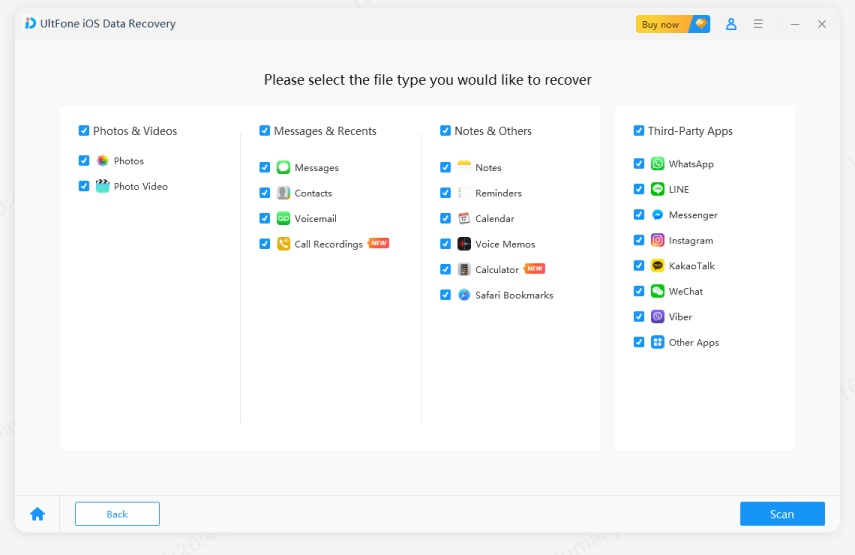
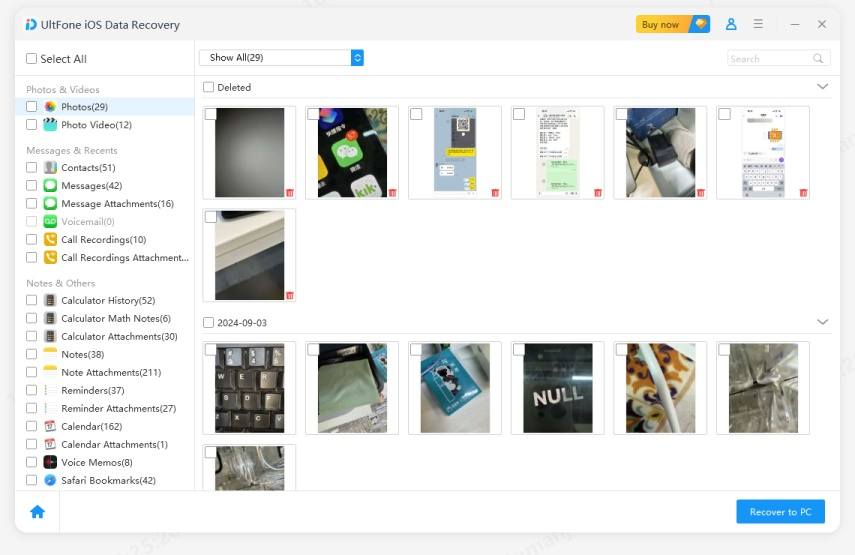
Step 3: When your device is detected, choose the file types you want to scan and click on the "Scan" button to proceed.
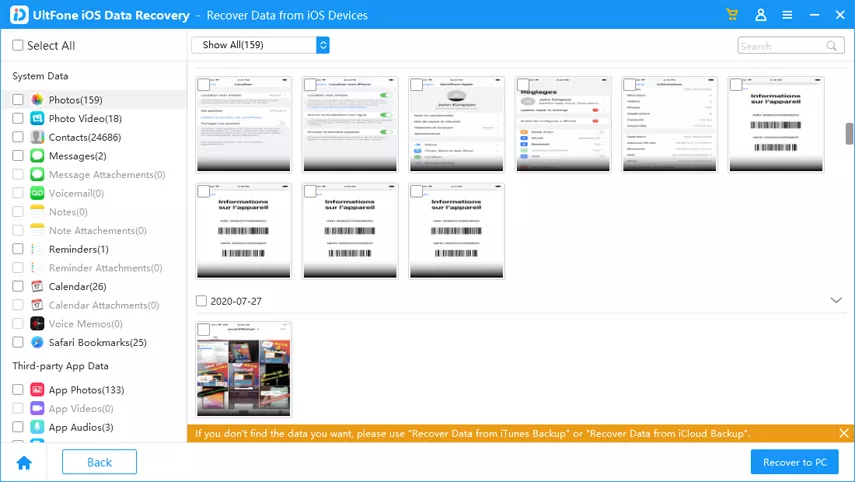
Step 4: After the scan, choose the data you want to recover and click on the "Recover to PC" button to finish. The save location is selectable.
Part 2: Recover from iTunes Backup File
You can also use UltFone iOS Data Recovery to restore iTunes backup. It can automatically find the iTunes backup files on your computer and extract the data.
Step 1: Select "Recover Data from iTunes Backup" from the main interface and all the backup files found on your computer will be listed out. Select a backup file that contains your lost data and click on the "Next" button to continue.

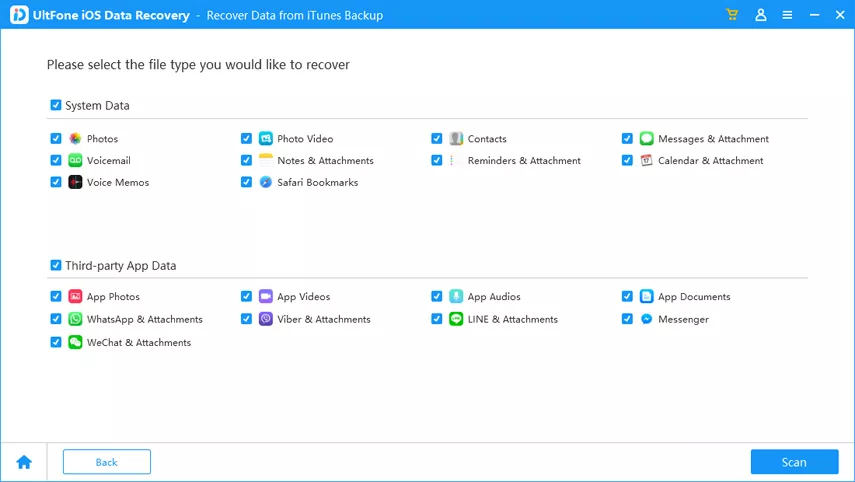
Step 2: Specify the file types you want to scan and click on the "Scan" button.
Step 3: Click on the "Recover to PC" button to define the save location and save all your target files
Part 3: Recover from iCloud Backup File
If you've backed up your iPhone/iPad with iCloud, you can restore data from iCloud backup as well.
Step 1: Select "Recover Data from iCloud" from the main interface. Enter your iCloud account and password (Apple ID) and click the arrow icon to log in.

Step 2: Select the file types that you want to recover, then click on the Download button.
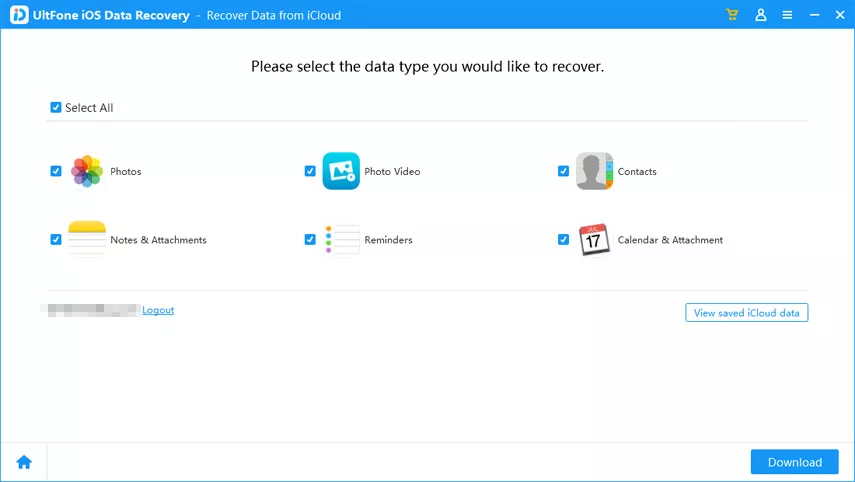
Step 3: After downloading the data from your iCloud backup, preview and tick the data you want to recover.

Step 4: Click Recover to PC and now you're done with the data recovery process.

Part 4: Repair Operating System
If your device is stuck or disabled and cannot be detected by the software, you can fix the operating system first and then recover lost data.
Step 1: Connect your device and select "Repair Operating System" from the main interface. Click on the "Start Repair" button to move on.

Step 2: Before repair, you need to download the firmware. Click on the "Download" button to start.

Step 3: Once the firmware is ready, this program will start to repair your device. Don't disconnect your device during this process. After that, your iPhone/iPad will reboot and be restored to normal. Then, you could follow the above steps to recover lost data.

Part 5: Backup & Restore WhatsApp, LINE, Kik, Viber, Wechat
Step 1: After you download and install UltFone iOS Data Recovery on your Computer, please launch the program and select the feature option "Backup & Restore Social App".

Step 2: In this page, you can select the social app you want to backup and restore, the social App includes WhatsApp, LINE, Kik, Viber, Wechat.

Step 3: Now you need to connect your iOS device on Computer. After your device is successfully connected, please click the button "Backup" to start backing up.

Step 4: Just wait for a while, and you can see the backup process is complete. It means that your backup is successful. Now you need to view the backup files by click button "To view backup files" or "To view backup list" that you backed up before via the backup of UltFone iOS Data Recovery or iTunes backup.

Step 5: To check the Social App Backup files, you can go to "To view backup list" to view and choose the one you want to restore.

Step 6: Click button "Restore" to scan the backup files. When you finish scanning, you can preview all data, including attachment on your social App backup file.

Step 7: You can preview the social App data that you've backed up before via iTunes backup or UltFone iOS Data Recovery backup. Now you click "Restore to Device" or "Recover to Computer", and please note that the attachment data can only be restored to Computer.
