Full Solutions to Fix Wi-Fi Not Working on iPhone/iPad on iOS 16.6
 Jerry Cook
- Updated on 2023-09-15 to Fix iPhone
Every iOS version update comes with a variety of new features. That's why the users rush to update their iOS version. But the unfortunate thing is that the updates also cause working issues in idevices. Many users have recently reported that their iPhone is not connecting to Wi-Fi or iPhone keeps disconnecting from Wi-Fi along with various other problems including Wi-Fi slow.
So, if you are stuck in such kind of situation and your iPhone Wi-Fi grayed out, then don't worry, we have gathered the most common Wi-Fi problems and their respective solutions to resolve this issue.
Part 1: iPhone Wi-Fi Connected But Not Working
This might be the most common issue that Wi-Fi is connected but not working. The reason for this is the slow internet. There are various situations when iPhone connects to Wi-Fi but no internet access and therefore the users think that there is some problem with the Wi-Fi.
Quick Fixes:
1. Check how many devices are connected to the Wi-Fi. If the number of devices is more than 8, then disconnect some of them.
2. Test the Wi-Fi speed online and you will know that it is the internet that's not working due to low bandwidth.
3. Check whether the Wi-Fi has internet access or not.
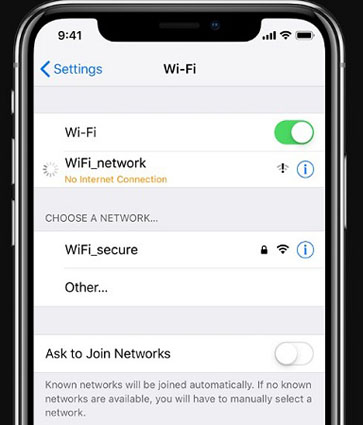
4. See if the other devices connected to Wi-Fi exhibit the same issue.
5. Turn off the Wi-Fi modem along with Router and restart them after few seconds.
6. Try restarting your iPhone by pressing the Lock button until the slider appears. For iPhone X and above model, you have to press either of the volume buttons to turn your device off. Drag the slider to right and your device will shut down. Then turn on your iPhone/iPad and see if the problem still persists.
Part 2: iPhone Not Connecting to Wi-Fi
If the iPhone is not connecting to Wi-Fi or simply not picking up the Wi-Fi connection, then there is an entire list of solutions that can be tried out.
Quick Fixes:
1. Check Wi-Fi Router by connecting other devices. If the other devices also have these problems then restart the router.
2. Make sure Wi-Fi is On and you are trying to connect with the right network. You can check the network connection in the Device menu of the Settings app.
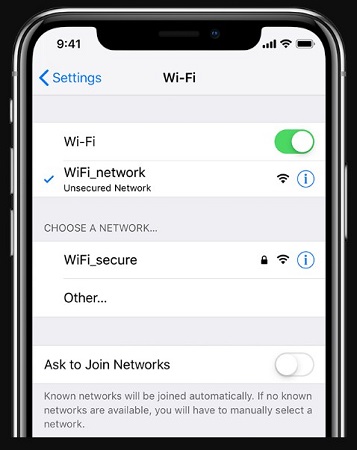
3. Disconnect and re-connect to Wi-Fi by entering the passwor.d
4. Check that all the cables and connectors are properly working and connected.
5. Restart your iPhone/iPad, modem, and router.
6. Reset Network Settings by launching the Settings app. Go to General> Reset> Reset Network Settings. This will erase all the network and passwords and hopefully, you will be able to connect to your device.
Part 3: iPhone Wi-Fi Grayed Out
The iPhone Wi-Fi grayed out is another common issue that arises after the iOS update or in case your device needs an iOS update. Luckily there are some simple methods that can be tried to fix this:
Quick Fixes:
1. Make sure that the Airplane Mode isn't ON.
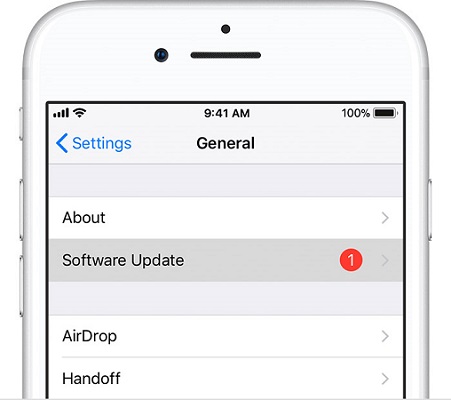
2. Update the iOS version by visiting Settings>General>Software Update and downloading and installing the update.
3. Reset network settings from Settings>General>Reset menu and input device password to reset the network settings of your device.
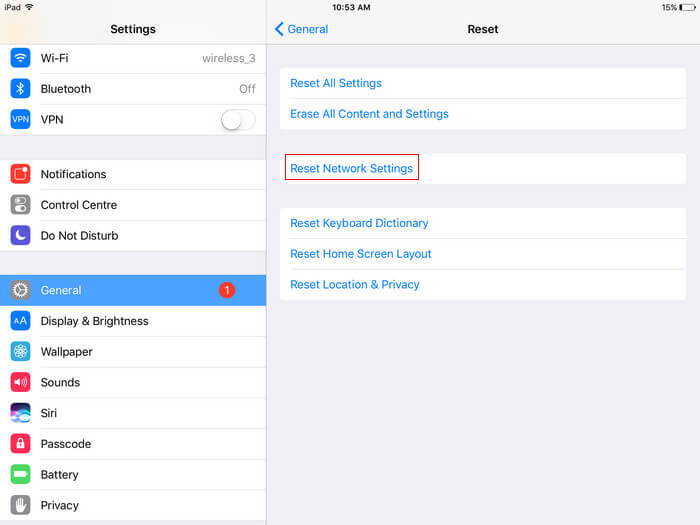
4. Reset All Settings if the network setting reset didn't work out. From the same menu, select the Reset All Settings option and confirm the action. Then see if the problem is fixed or not.
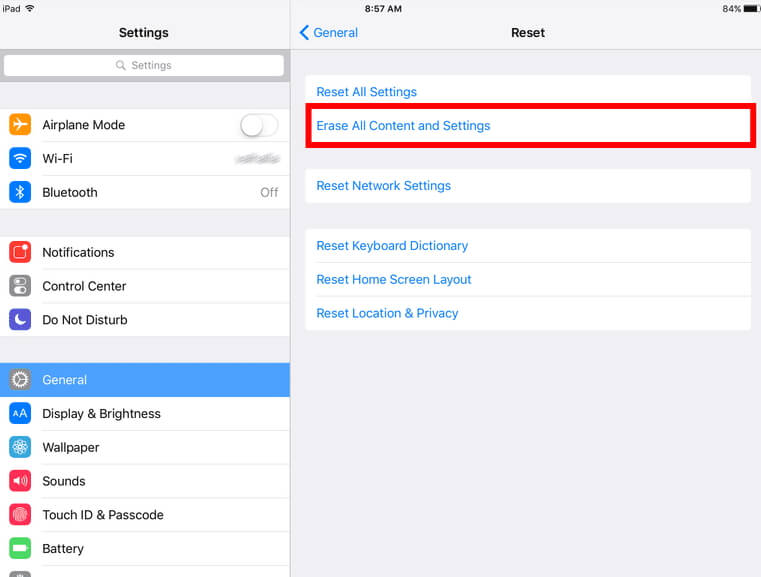
5. Restore device using iTunes or from the same "Reset" menu and select the Erase All Content and Settings option to restore the device to factory settings.
6. You can also try consulting the Apple Tech Support if none of the methods worked out.
Part 4: iPhone Wi-Fi Keeps Disconnecting
Sometimes, when you are not in the Wi-Fi range, the iPhone keeps disconnecting from Wi-Fi. So, the first thing you need to do is to get in the range. Some other fixes that can be tried out are listed:
Quick Fixes:
1. Check your Wi-Fi network and ensure that it is working fine.
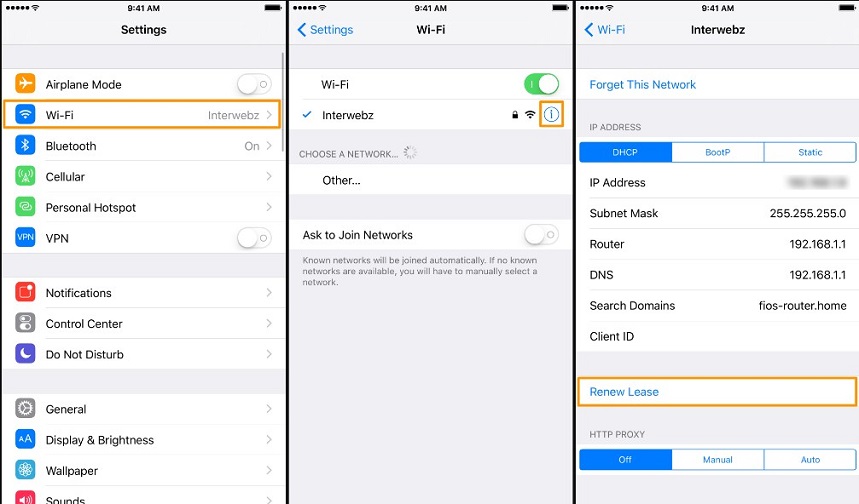
2. Renew Lease from Settings>Wi-Fi> Find your Wi-Fi network. Tap on the Info icon and select the Renew Lease option in the DHCP tab.
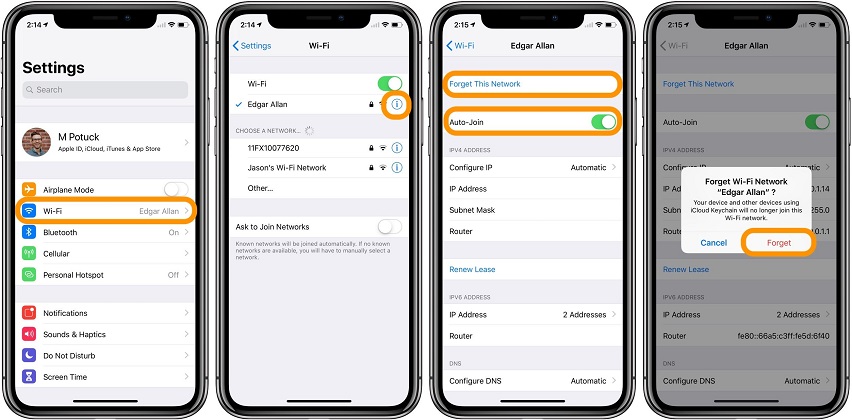
3. Forget Network and Reconnect. To do this, open Wi-Fi settings and find your Wi-Fi network. Then tap on the Info icon and click on the Forget this network option. Close the Wi-Fi and turn it back on and then try reconnecting to the Wi-Fi network.
4. Reset Network Settings in the Reset menu. This will remove the settings and password and allow you to connect to your network as new.
Part 5: iPhone Can't Find Wi-Fi
This is the most frustrating situation when the iPhone can't even find Wi-Fi. This would ultimately mean that you will be unable to join the network. Some potential solutions if the Wi-Fi won't connect to Wi-Fi.
Quick Fixes:
1. Check the Wi-Fi button at first to see if it is On or Off.
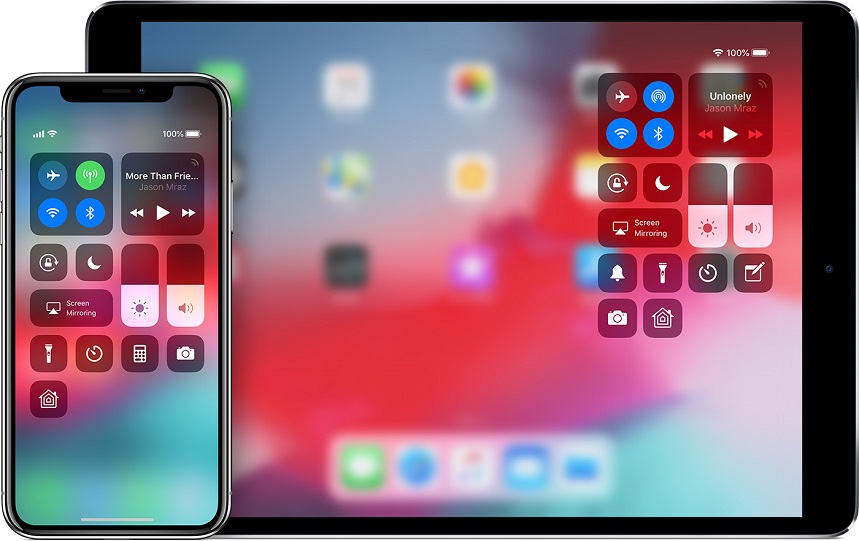
2. Turn Off the Router and Start it again after a few minutes.
3. Try restarting the iPhone and iPad.
4. Reset the Network Settings by following the steps as (i) Settings>General> Reset and from the options, choose the Reset Network Settings option. Input password and confirm the reset and then try searching for the Wi-Fi network.
Part 6: All-inclusive Solution to Fix Any iPhone Wi-Fi Problems without Data Loss
If you have tried all the possible methods and still Wi-Fi won't work on iPhone XR/XS/X/8/7/6s/6/5s/5c/5, then you need to repair the iOS. For this, we have perfect iOS system repair software for you. The software is developed to fix many iPhone problems including Wi-Fi problem, freezing up, iPhone stuck on Apple logo, and many others without causing data loss.
You can download the software on your computer and use it whenever you can't fix some working issue in your device.
Step 1: Launch the software and connect your device with the system. From the interface, you have to select the Repair Operating System mode.
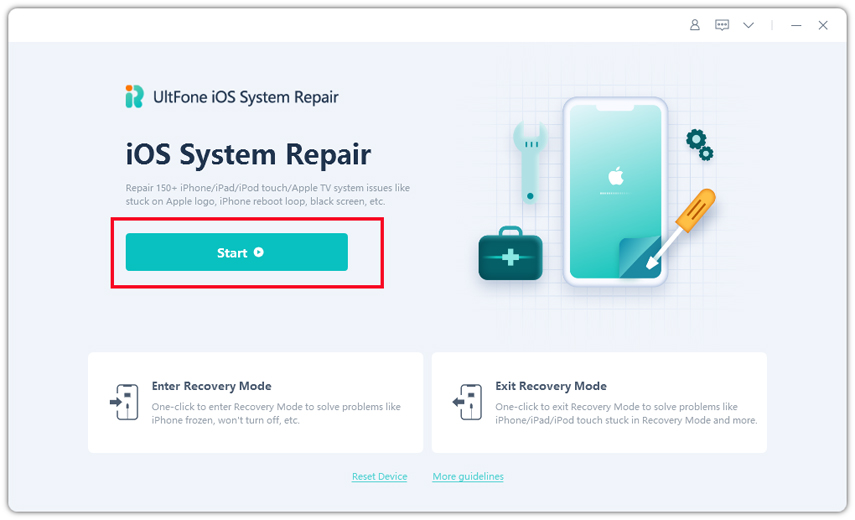
Step 2: Now tap on the Fix Now option.
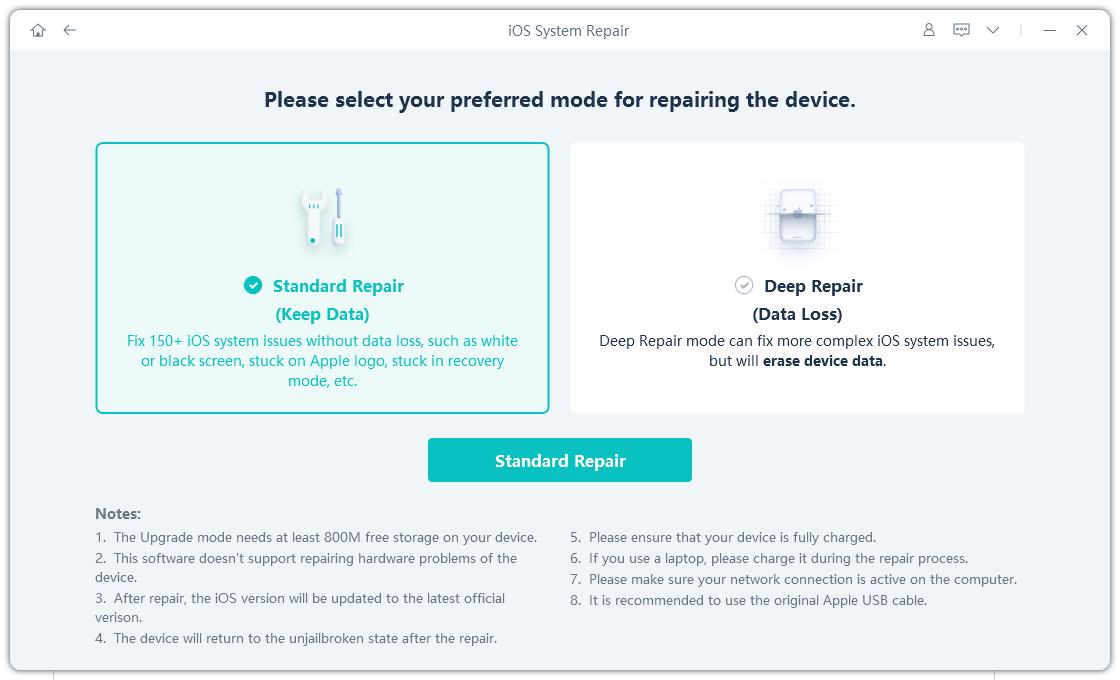
Step 3: Before you start the repair, the software will ask you to either download or import the firmware package file to repair your device.
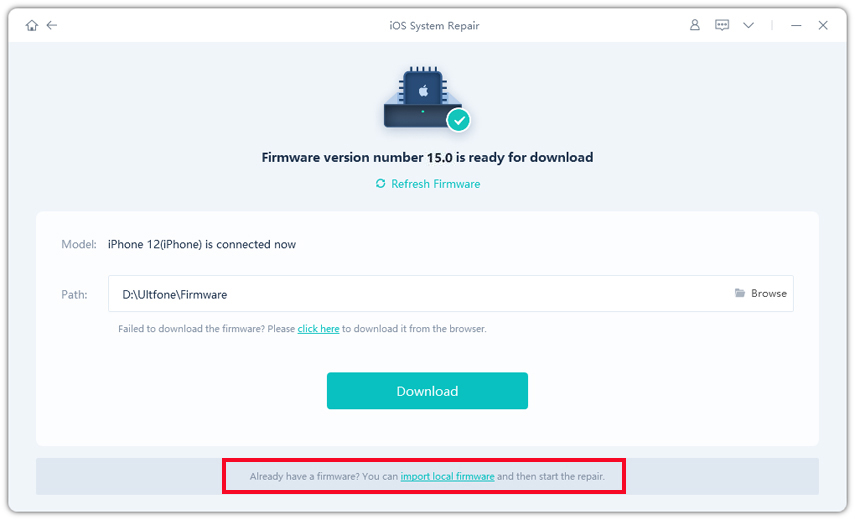
You can download the file at the same time and in case you already have the file, then copy in the software interface.
Step 4: After the firmware package is imported, click on the Repair Now button and the system repair will be initiated. It will take a while to fix the issue.
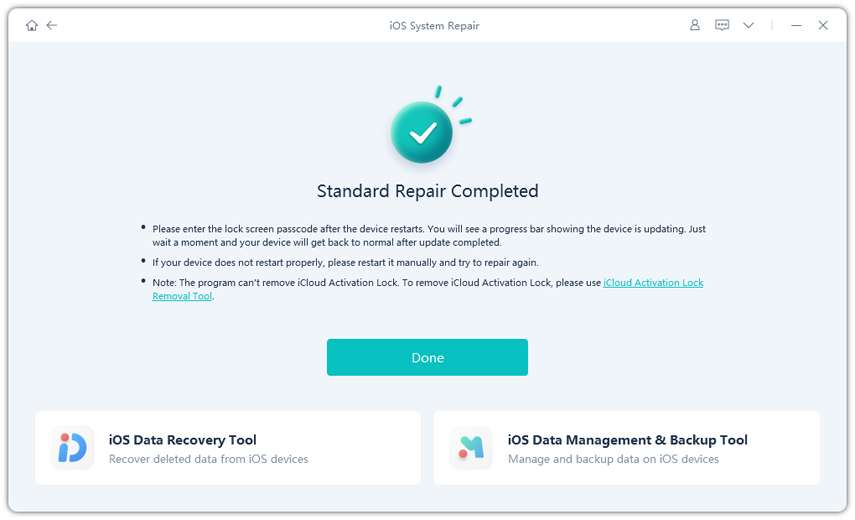
Once the process is complete, your device will reboot and it will work normally. The best thing about using ReiBoot is that it will keep your data safe so you don't have to worry about losing your data.
The Bottom Line
Now you know that whether the iPhone Wi-Fi not working or iPhone Wi-Fi keeps disconnecting, there are some common solutions that would work for various issues. And if the simple solutions don't work, then you still have iPhone system repair which can efficiently fix over 50 different kinds of working issues in iOS devices.

