6 Methods to Fix iPhone Green Line
 Jerry Cook
- Updated on 2022-03-28 to Fix iPhone
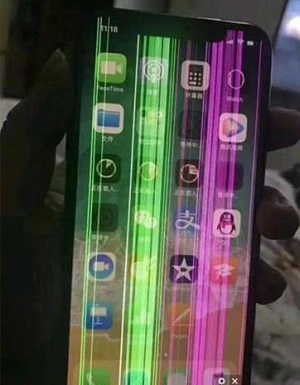
Anyone been faced with the vertical green line on their IPhone X?
Sad day for my iPhone when I noticed a bright green line going down the left hand side of the screen. Doesn’t seem to be affecting anything else just yet. Just started today. I bough this phone on release day so of course all warranties are expired. I reached out to Apple support and they gave me some 3rd party authorized technical centers that can diagnose the problem and provide me the next action. All the Apple stores are closed at this present time and they are saying the carrier stores, like AT&T would probably just send me back to Apple.
Suppose you wake up one bright and early morning, only to discover a vertical green line on your iPhone X? A lot of iPhone users have been left feeling devastated on seeing this green line on their smartphones. It becomes even worse when such users try to reach out to Apple support for help and get nothing in return. Are you currently experiencing the iPhone green line issue and it’s almost becoming a nightmare for you? No need to press the panic button just yet. This comprehensive guide will be letting you in on what you need to know about this problem. From its causes to how you can fix it, everything will be discussed here.
- Part 1: The Reason for iPhone Green Line
- Part 2: 6 Methods to Fix iPhone Green Line
- Method 1: Restart Your iPhone
- Method 2: Erase All Content and Settings on iPhone
- Method 3: Fix iOS without Data Loss
- Method 4: Put iPhone in Recovery Mode and Update it via iTunes
- Method 5: Check iPhone is Wet or Not
- Method 6: Contact Apple Support
- Bonus Tips: How to Back up Some/All iPhone Data in One Click
Part 1: The Reason for iPhone Green Line
The iPhone green line of death is something that can make any iPhone user worried. That said, I’d like you to take consolation in the fact that the problem is not unique to your phone. Countless iPhone users have equally experienced this problem. From all indications, this problem seems to be common with iPhone7 and iPhone X.
The exact cause of the problem is still unknown. But, according to highly experienced tech enthusiasts, this problem could be attributed to both software and hardware problems. Having said that, it has also been noticed that iPhone X, iPhone 11/12 pro, and other iPhones with OLED screen seem to experience this issue more. Below are a couple of the reasons that could trigger this problem.
- A faulty screen display
- Glitches on the iOS system
- Application bugs and conflicts
- Physical driver circuit damages
Part 2: 6 Methods to Fix iPhone Green Line
Before you start considering a possible screen replacement because of Apple iPhone green line on screen, here are some tips to help you fix the problem.
Method 1: Restart Your iPhone
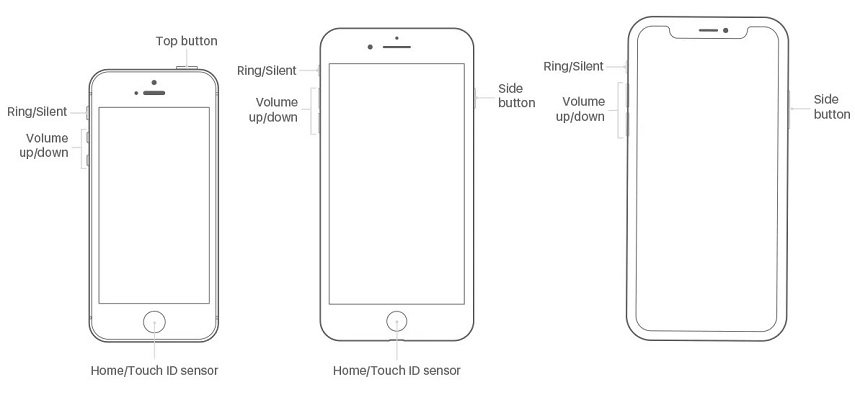
Although this may look too easy, it has proven to work most of the time. As a matter of fact, this is a common way to fix many iTunes and iPhones problems. Whenever you restart your iPhone, application bugs and conflicts are eliminated. If the iPhone green line through screen was caused by app bugs & conflicts, then you can be sure it will be gone after you restart your phone. Here is how to do a forced restart on your iPhone.
- For iPhone 8 and above, press & release the volume (+) button. Followed by pressing volume (-) button. After that, long press the side button until you see Apple’s logo.
- For iPhone 7 & iPhone 7+, long press the volume (-) button together with the wake button at the same time until Apple’s logo comes up on the screen.
- For iPhone 6 and older models, press & hold down the wake as well as home button simultaneously until you see Apple’s logo on your screen.
Method 2: Erase All Content and Settings on iPhone
A lot of people asking, how do I fix the green Line on my iPhone? - have surprisingly fixed the issue through this method. However, this shouldn’t come as a surprise to anybody because resetting your iPhone back to factory settings erases all data. Anyways, before you get started, ensure you have a backup of your iPhone. That way, you can easily do a restore when you are through with the reset. iTunes or iCloud can be used for backing up what you have in your phone. Outlined below are the steps to reset your iPhone.
- Step 1: Go to Settings on your iPhone. Tap General and then tap Reset
- Step 2: Tap Erase All Content & Settings
- Step 3: You would be greeted with a prompt requesting you to have your iCloud updated before proceeding with the reset. Tap Back up. Then Erase.
- Step 4: It might require you to enter your passcode
- Step 5: Commence reset by tapping Erase iPhone. Wait patiently for the process to complete.
Step 6: Upon successfully resetting your iPhone, restore the data you backed up to your device.

Method 3: Fix iOS without Data Loss
If you dislike the above methods, you can resort to fixing iOS without the fear of losing your data. Are you scared about this? Please, don’t be because you can do that with the UltFone iOS System Repair. This tool will enable you to fix your iOS system problems like a pro. UltFone iOS System Repair has got some exciting features, such as
- Enter and exit recovery mode on iPod/iPad/iPhones with a single click.
- Repair over 150 iOS system anomalies like reboot loop, Apple logo, as well as black screen without losing your data.
- Reset iPod/iPad/iPhone Touch without Finder/iTunes/password
- Compatible with all iPhone models and iOS versions
Steps on how to fix iOS without data loss with UltFone iOS System Repair
-
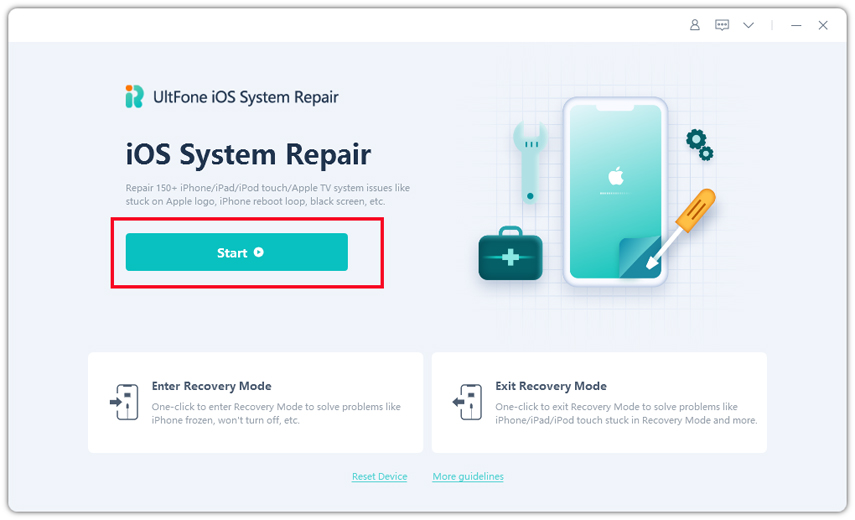
Step 1 Download & open UltFone iOS System Repair
Download the UltFone iOS System Repair and install it to your Mac/PC. Open the program when you are done, and connect your iPod/iPad/iPhone to the computer. Click on Start and select the iOS system repair.
-
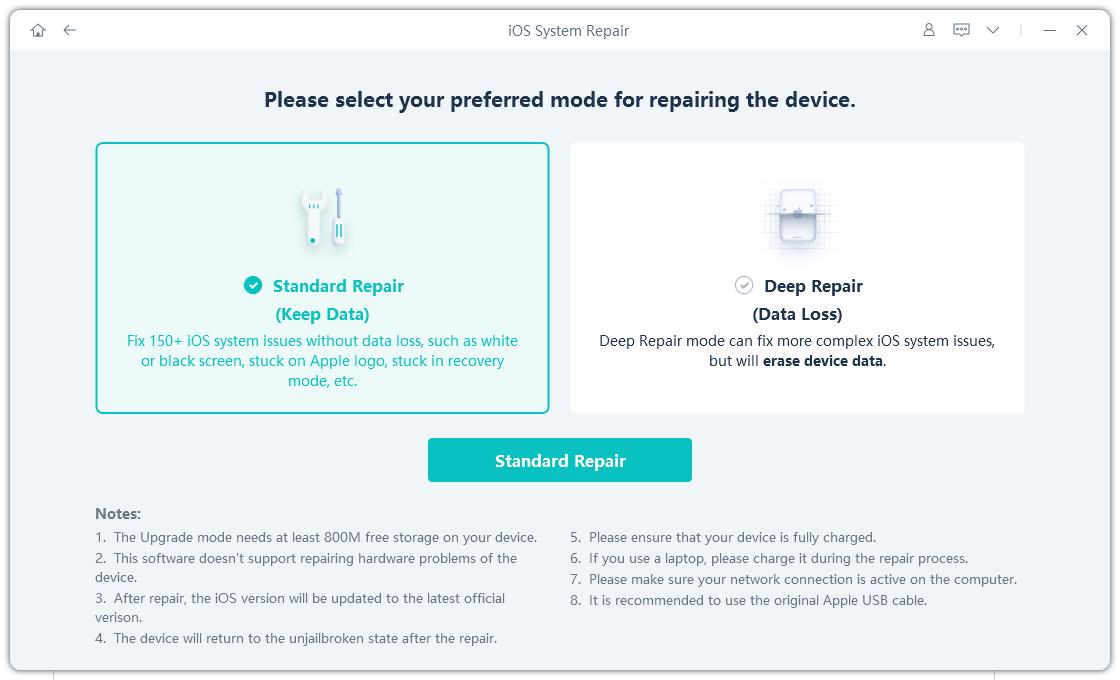
Step 2 Choose Standard Repair
A Standard Repair option is on the next screen. Click it to continue.
-
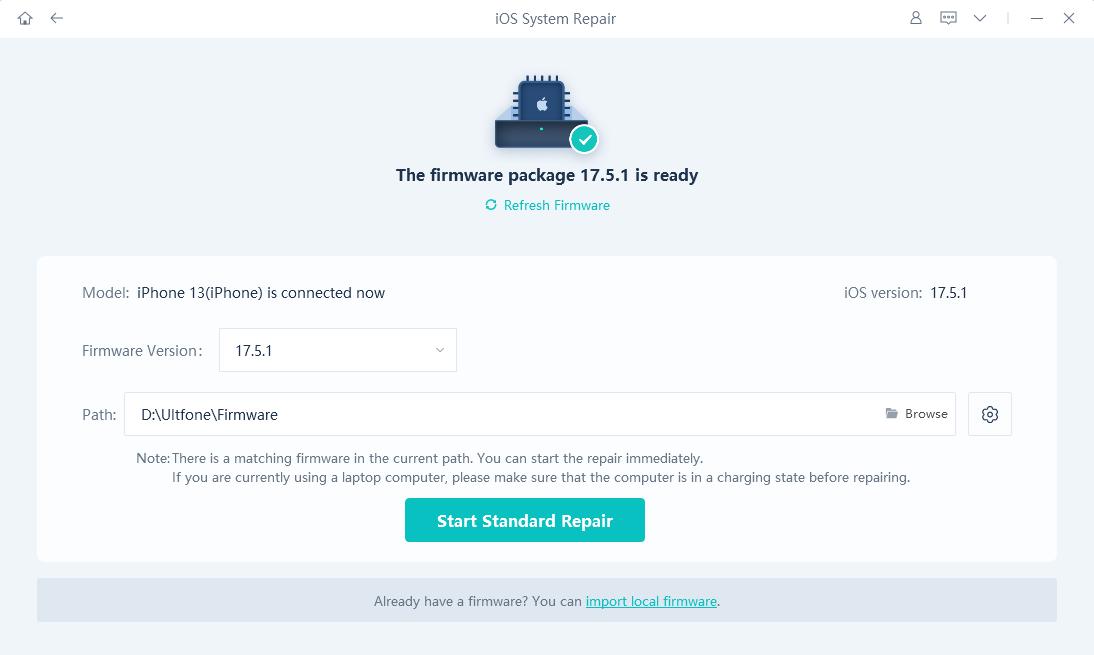
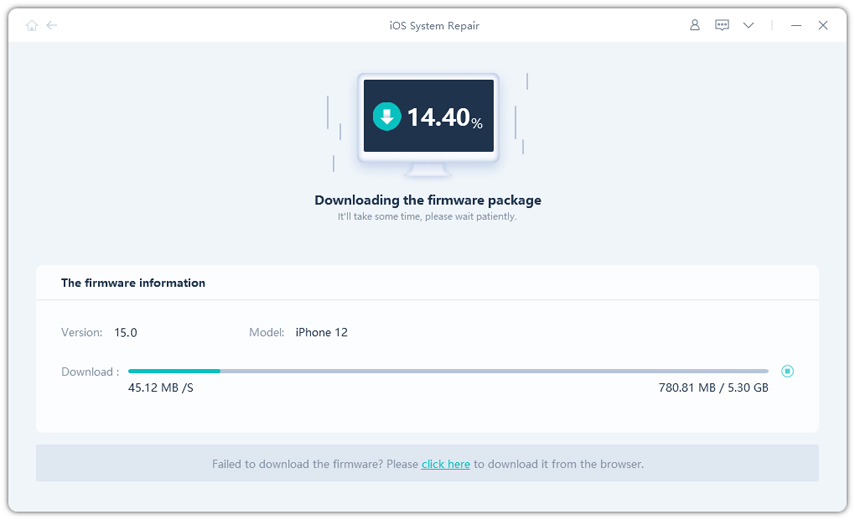
Step 3 Download the Firmware
Before you perform the system repair, it is essentially important that you download the firmware that matches your iPhone. To do this, click the download button, and click browse if you want to save it to another path. Note:
Note:
1. Please, if you already have a copy of your firmware, you don’t need to download it again. In that case, you can import local firmware when you click import local firmware. It’s right beneath the download button.
2. The size of the firmware is approximately 2.5G. This may take a while, and you also need a good internet connection to ensure the process is not interrupted or slowed down.
-
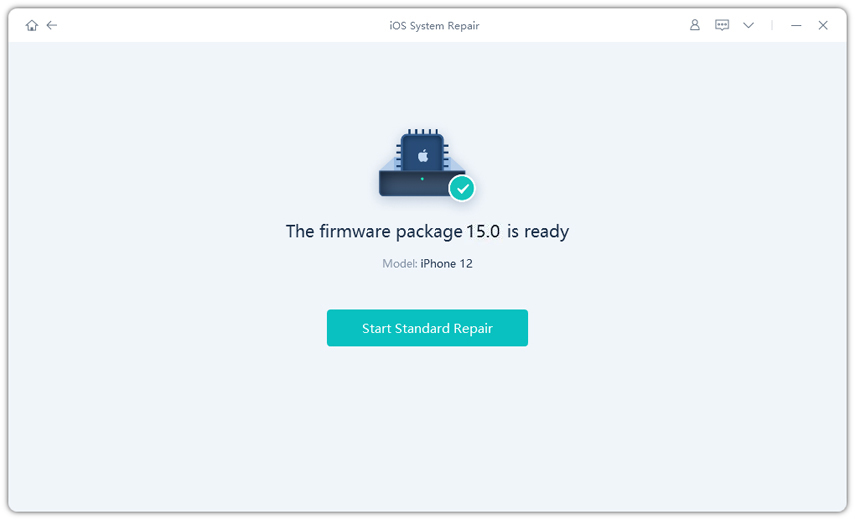
Step 4 Start Repair OS System
Upon successfully downloading the firmware, fix your iOS device’s problem by clicking on Start Standard Repair.
-
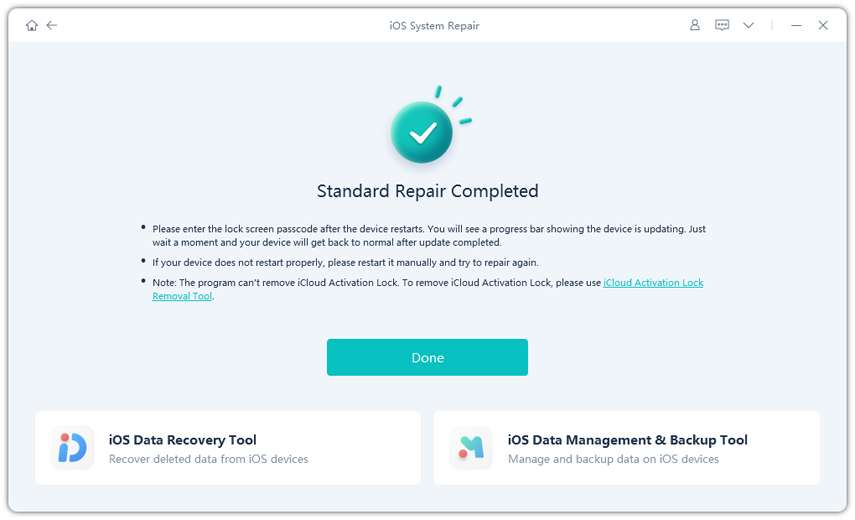
Step 5 iOS System Repair is complete
When the iOS system recovery process finishes, your iDevice will reboot itself and it can start working well again.
Method 4: Put iPhone in Recovery Mode and Update it via iTunes
If you don’t know how to go about fixing Apple iPhone green line on screen with the above methods, you can try this method. Be informed that you will not lose your iPhone data with this method. It’s just a way of re-installing the most current iOS version. Alternatively, you can do a backup just to be safe.
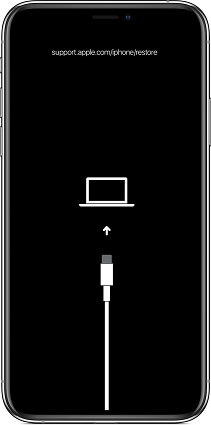
Here are the steps to run iPhone in recovery mode:
- Step 1: Have your device connected to your PC with a USB.
- Step 2: Open iTunes application.
- Step 3: Do a forced restart on your iDevice by pressing down the volume up button and then press the volume down button and press down the power button.
Step 4: A recovery mode will be seen on your screen.

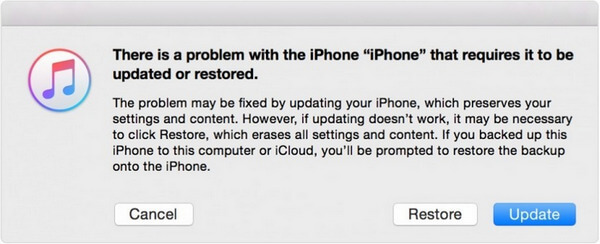
Step 5: You would be prompted by iTunes to choose “Restore or Update”.

- Step 6: Tap Update, to continue.
- Step 7: iTunes will practically reinstall the most current iOS version on your iDevice. Please, do not interrupt the installation process.
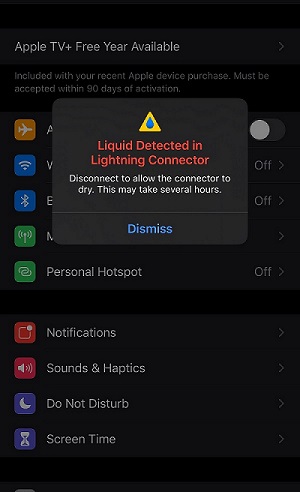
Method 5: Check iPhone is Wet or Not
Are you wondering how do I fix the green Line on my iPhone? Although you may not know it, a wet iPhone is bound to malfunction. If yours is wet, you should endeavor to dry your device. Turn the device off, take out all the accessories, before drying it with your vacuum cleaner or towel. Or bury the device in uncooked rice or any absorbent for some days. That should do it.
Method 6: Contact Apple Support
If you accidentally dropped your iPhone, you may experience the iPhone green line issue. Any possible hardware defect could also be responsible for this anomaly. You can reach out to Apple support so they can examine the device and ascertain how much damage has been done. After which, they may decide to do a screen replacement or change the unit entirely. Will Apple replace phone with green Line? Get in touch with support to find out.
Bonus Tips: How to Back up Some/All iPhone Data in One Click
iPhone may meet a lot of problems like this even if you have solved “iPhone green line” this time. Would you want to backup your iPhone in case such a situation happens again? The UltFone iOS Data Manager will always be your go-to solution for such a problem. This amazing solution allows you to back up, restore, manage, and transfer iOS data with great ease. UltFone iOS Data Manager stands out from other solutions in this regard due to the following features.
- Allows you to export pictures from your iDevice to your PC in one click.
- Back up, restore, manage, and transfer iOS data without iTunes sync.
- Transfer a limitless amount of media files between iPod/iPad/iPhone and iTunes
- Convert a max of 1000 photos from HEIC to jpeg in one click
- Run diagnostic tests easily and disable and enable accessibility yourself.
- Create a visual USB drive for managing iOS data.
- Supports the new iPhone 13 series as well as iOS and iPadOS15.
Conclusion
You do not have to be afraid of iPhone green line because the above methods can help you fix the problem. While all six methods can be used to resolve the issue, the UltFone iOS Data Manager and the UltFone iOS System Repair make the job a lot easier.


