[2025 Newest] How to Fix iOS 17 SOS Only on iPhone
 Jerry Cook
- Updated on 2024-02-28 to Fix iPhone
Seeing "SOS only" displayed in the top right corner of your iPhone can be frustrating. This issue, which restricts your iPhone's ability to make calls or access data, has affected various models over the years, including the iPhone 15, iPhone 14, iPhone 13, and iPhone 12. Also, many people claim that facing iOS 17.3.1 issue SOS only when updating.
In this 2024 guide, we'll walk through the latest solutions for how to fix iOS 17 SOS only on iPhone, from performing a software update to resetting network settings and more. With a few quick troubleshooting steps, you can get your iPhone fully working again and dismiss that pesky “SOS only” display for good. Read on as we detail the most up-to-date methods for resolving the SOS only issue on your iPhone.
- Part 1. Why does My iPhone Say SOS at the Top?
- Part 2. How to Fix iOS 17 SOS Only on iPhone? 7 Proven Ways
- Solution 1. Force Restart iPhone
- Solution 2. Check for a Carrier Settings Update
- Solution 3. Reset Network Settings
- Solution 4. Enable Roaming on iPhone
- Solution 5. Toggle Cellular Data Off and On
- Solution 6. Switch iPhone to 4G or LTE Mode
- Solution 7. Update iOS Software
- Part 3. Ultimate Solutions for Fixing iOS 17 SOS Only on iPhone
- Part 4. People Also Ask about How to Fix iOS 17 SOS Only on iPhone
Part 1. Why does My iPhone Say SOS at the Top?
When you see "SOS only" displayed at the top of your iPhone screen, it means your device has entered an emergency calling mode. This restricts your iPhone's normal cellular network connectivity and is enabled for a few potential reasons:
- Out of Normal Network Range: The most common trigger for SOS only mode is when your iPhone loses connection to your regular cellular network. For example, if you subscribe to AT&T but travel out of AT&T's coverage area into a region only covered by Verizon towers, your iPhone will lose its normal service.
- International Roaming Limitations: You may also see SOS only appear when traveling internationally. This occurs because your iPhone's normal cellular plan likely does not include international roaming.
- Carrier Outages: Occasional network outages can also sometimes trigger the SOS only mode, even if you haven't left your carrier's regular coverage area. In upcoming solution, we will take a look at SOS only on iPhone: how to fix it.
Part 2. How to Fix iOS 17 SOS Only on iPhone? 7 Proven Ways
Solution 1. Force Restart iPhone
Restarting your iPhone essentially clears temporary memory and refreshes all components. Since network issues can sometimes stem from software glitches, performing a forced reboot may establish connectivity again. This takes just seconds and requires no settings adjustments.
Here is how to fix SOS only on iPhone 11:
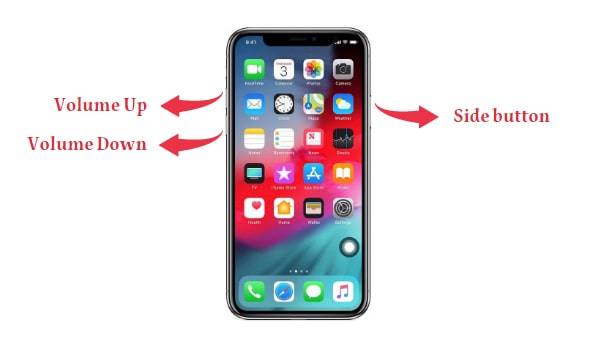
1. Press and quickly release the Volume Up button.
2. Press and quickly release the Volume Down button.
3. Finally, press and hold the Side button on the right side of your iPhone until you see the Apple logo, indicating the restart has completed.
Solution 2. Check for a Carrier Settings Update
Your iPhone periodically downloads new carrier update files in the background which can improve cellular compatibility. Sometimes SOS only errors simply indicate an outdated config file, so checking for a pending update is worthwhile.
Here is how to fix SOS only on my iPhone:
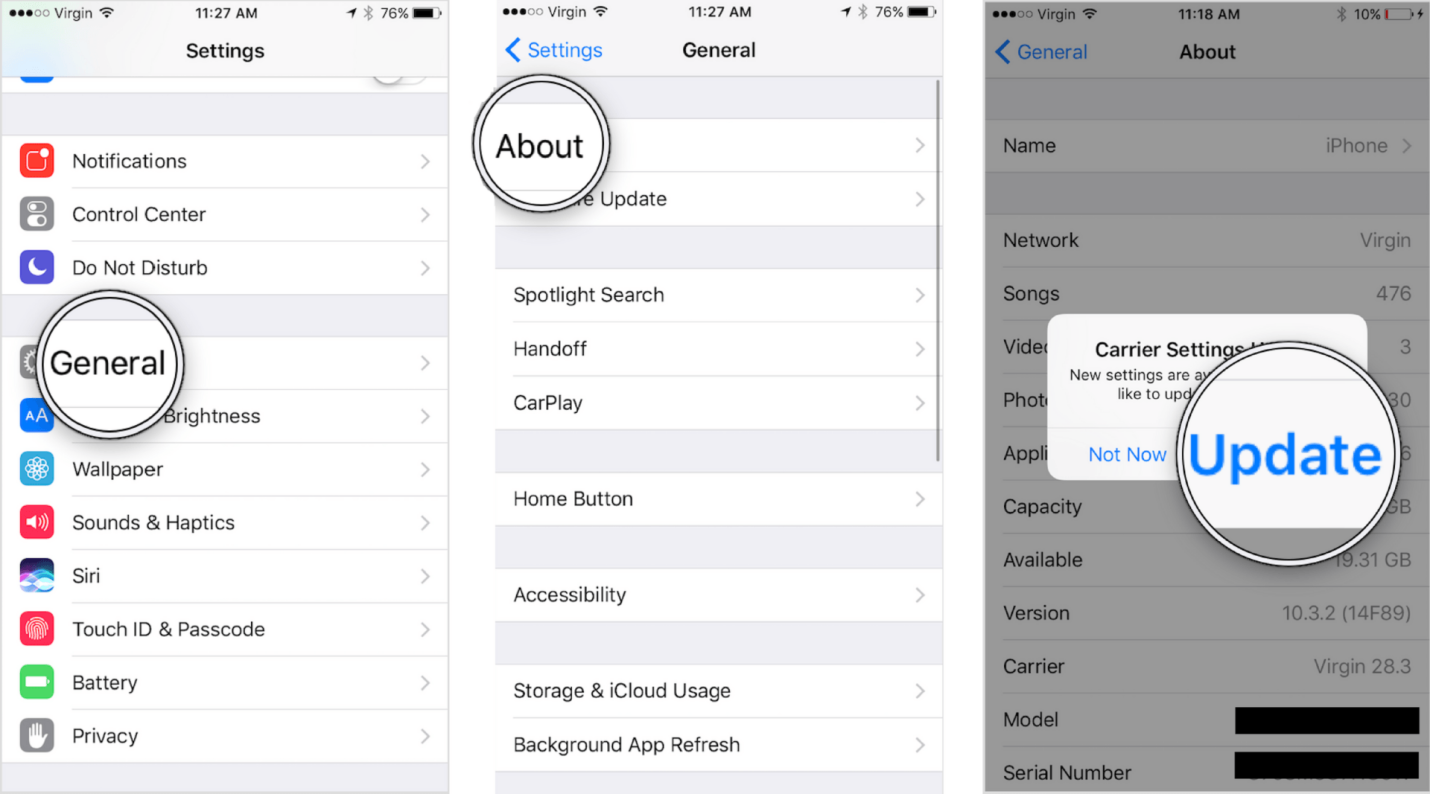
1. Go to Settings > General > About on your iPhone.
2. Wait for 30-60 seconds on the About screen. If an update is available, a prompt will appear.
3. Tap Download and Install to get new carrier settings sent directly to your device.
4. Wait for the update to be fully complete. Your iPhone may briefly lose service during the process.
Solution 3. Reset Network Settings
If your iPhone lacks cellular service despite having connectivity available, resetting all network settings often helps. This essentially erases previous WiFi passwords, cellular data apn configs, and other connection details. Upon rebooting, your iPhone will automatically re-establish ideal network settings from scratch.
Follow these steps for how to fix SOS only on iPhone Verizon:
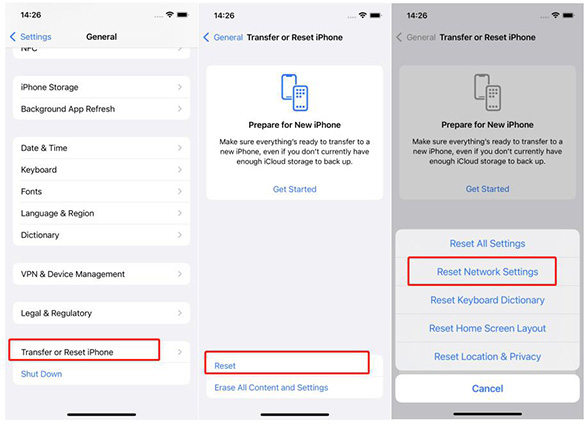
1. Go to Settings > General > Reset on your iPhone.
2. Tap Reset Network Settings.
3. If prompted, enter your passcode.
4. Allow a few minutes for the reset to fully complete. Your iPhone will reboot itself.
Solution 4. Enable Roaming on iPhone
If you're traveling domestically, allowing LTE roaming permits connections to alternate cellular carriers, which may resolve an SOS only error.
To enable roaming for how to fix iPhone showing SOS only:
1. Go to Settings > Cellular > Cellular Data Options on your iPhone.
2. Toggle the switch for Enable LTE Roaming to the ON position.
3. Disable roaming again if you notice extra roaming charges after testing.
Solution 5. Toggle Cellular Data Off and On
As a quick troubleshooting step, toggling cellular data off and back on forces your iPhone to re-establish a carrier connection.
Follow these instructions to know how to fix iPhone SOS only:
1. Go to Settings > Cellular.
2. Turn the Cellular Data switch off.
3. Wait 30 seconds then turn Cellular Data back on.
4. Give your iPhone a few minutes to reconnect.
Solution 6. Switch iPhone to 4G or LTE Mode
Selecting a consistent cellular network mode like 4G or LTE instead of automatic can improve connectivity in areas with spotty 5G.
To adjust the network mode and learn how to fix SOS only iPhone:
1. Go to Settings > Cellular > Cellular Data Options.
2. Tap Voice & Data.
3. Choose 4G or LTE instead of 5G Auto.
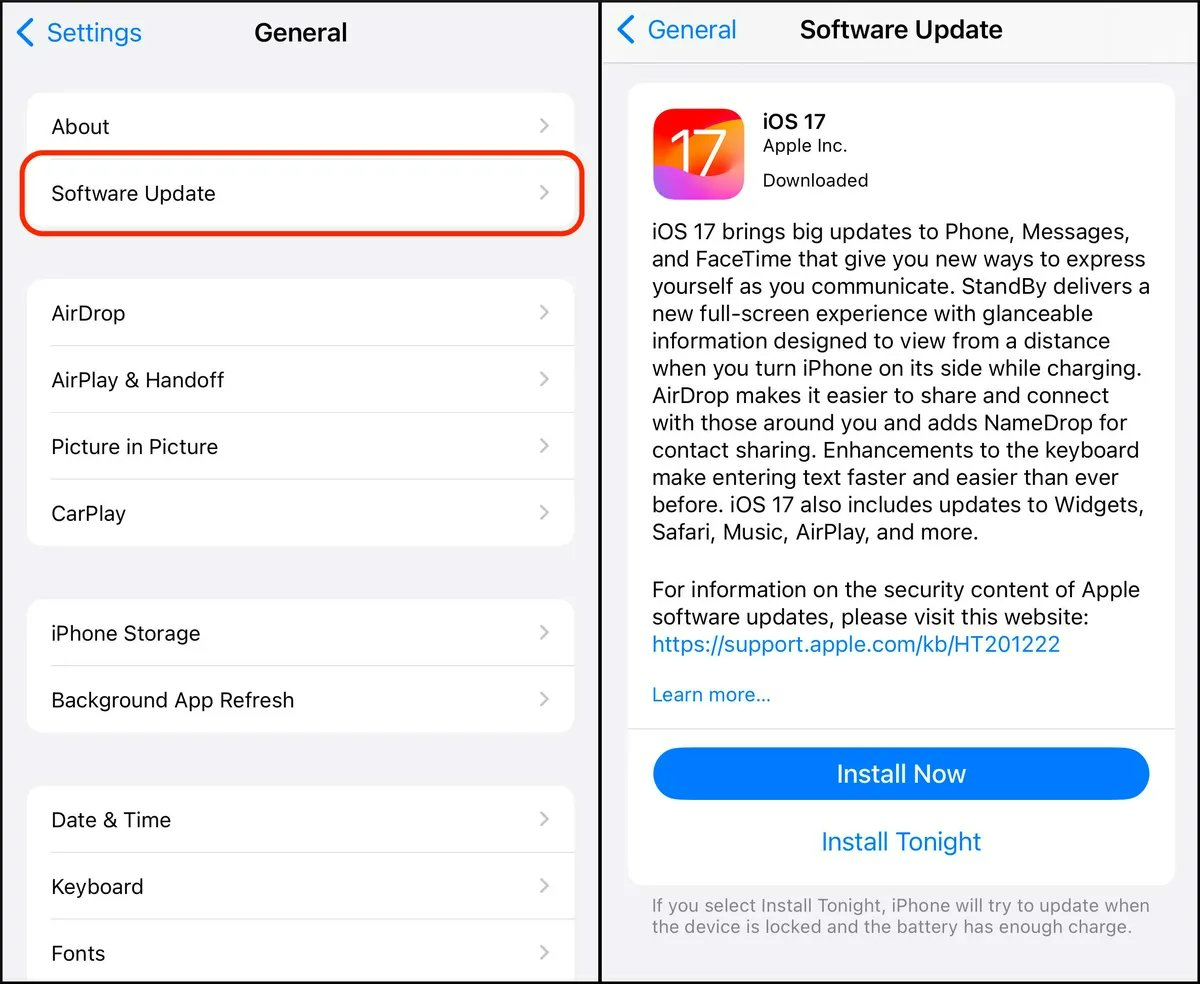
Solution 7. Update iOS Software
Apple periodically releases iOS bug fix and optimization updates that may address iPhone network issues. If your iPhone says SOS only how to fix, here is how:
1. Go to Settings > General > Software Update.
2. Download and install any iOS updates listed as available.
3. Perform a force restart after iOS updates install.
Part 3. Ultimate Solutions for Fixing iOS 17 SOS Only on iPhone
While the previous tips can all help troubleshoot SOS only errors, the most powerful fix is to use the UltFone iOS System Repair software. This specialized utility is designed specifically to resolve over 150 different iPhone software issues, including many that can cause SOS only connectivity problems.
Key Features of UltFone iOS System Repair
UltFone iOS System Repair provides these key benefits:
- Fixes SOS only errors along with 150+ other iOS system issues like the Apple logo, reboot looping, recovery mode, black screens, freezes, and more
- Repairs iPhone systems without ever losing your data
- Downgrades from latest iOS versions or upgrades devices to the newest iOS release
- Enters and exits recovery mode with one click
- Resets locked iPhones without needing the password, iTunes, or Finder
- Fully compatible to repair latest iPhone models on iOS 17
- Available for both Mac and Windows computers
In just a few clicks, UltFone iOS System Repair can deeply scan your iPhone to pinpoint and repair software faults causing SOS only displays. It's the easiest and most effective solution for overcoming this frustrating connectivity limitation.
Watch the Video Guide to See How to Fix SOS Only on iPhone
Steps on how to fix SOS only on iPhone using UltFone iOS System Repair:
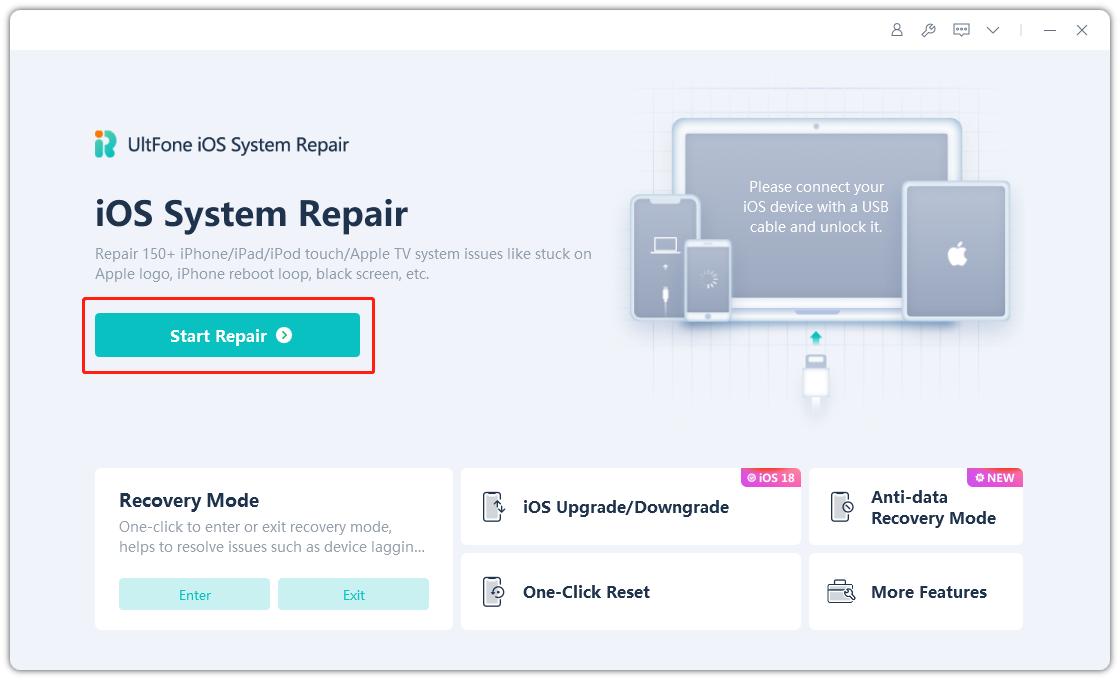
- Step 1 Download and install the UltFone software on your Windows or Mac computer. Connect your iPhone with a USB cable.

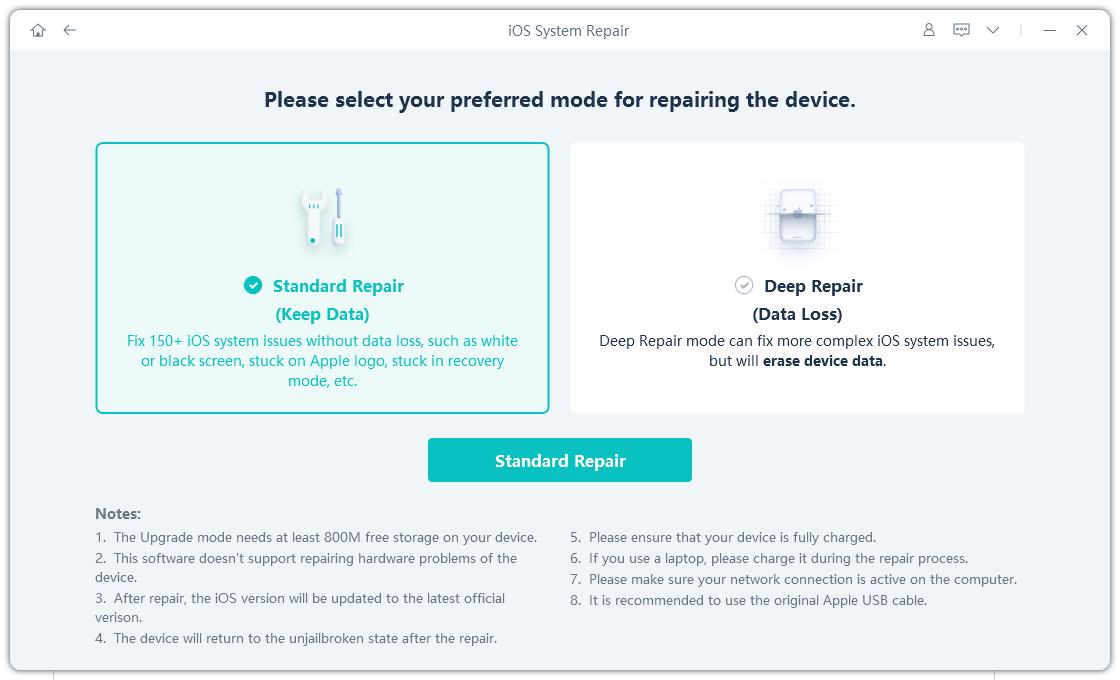
- Step 2Open UltFone and click "Start." Select "iOS System Repair" then choose "Standard Repair" for the SOS only issue.

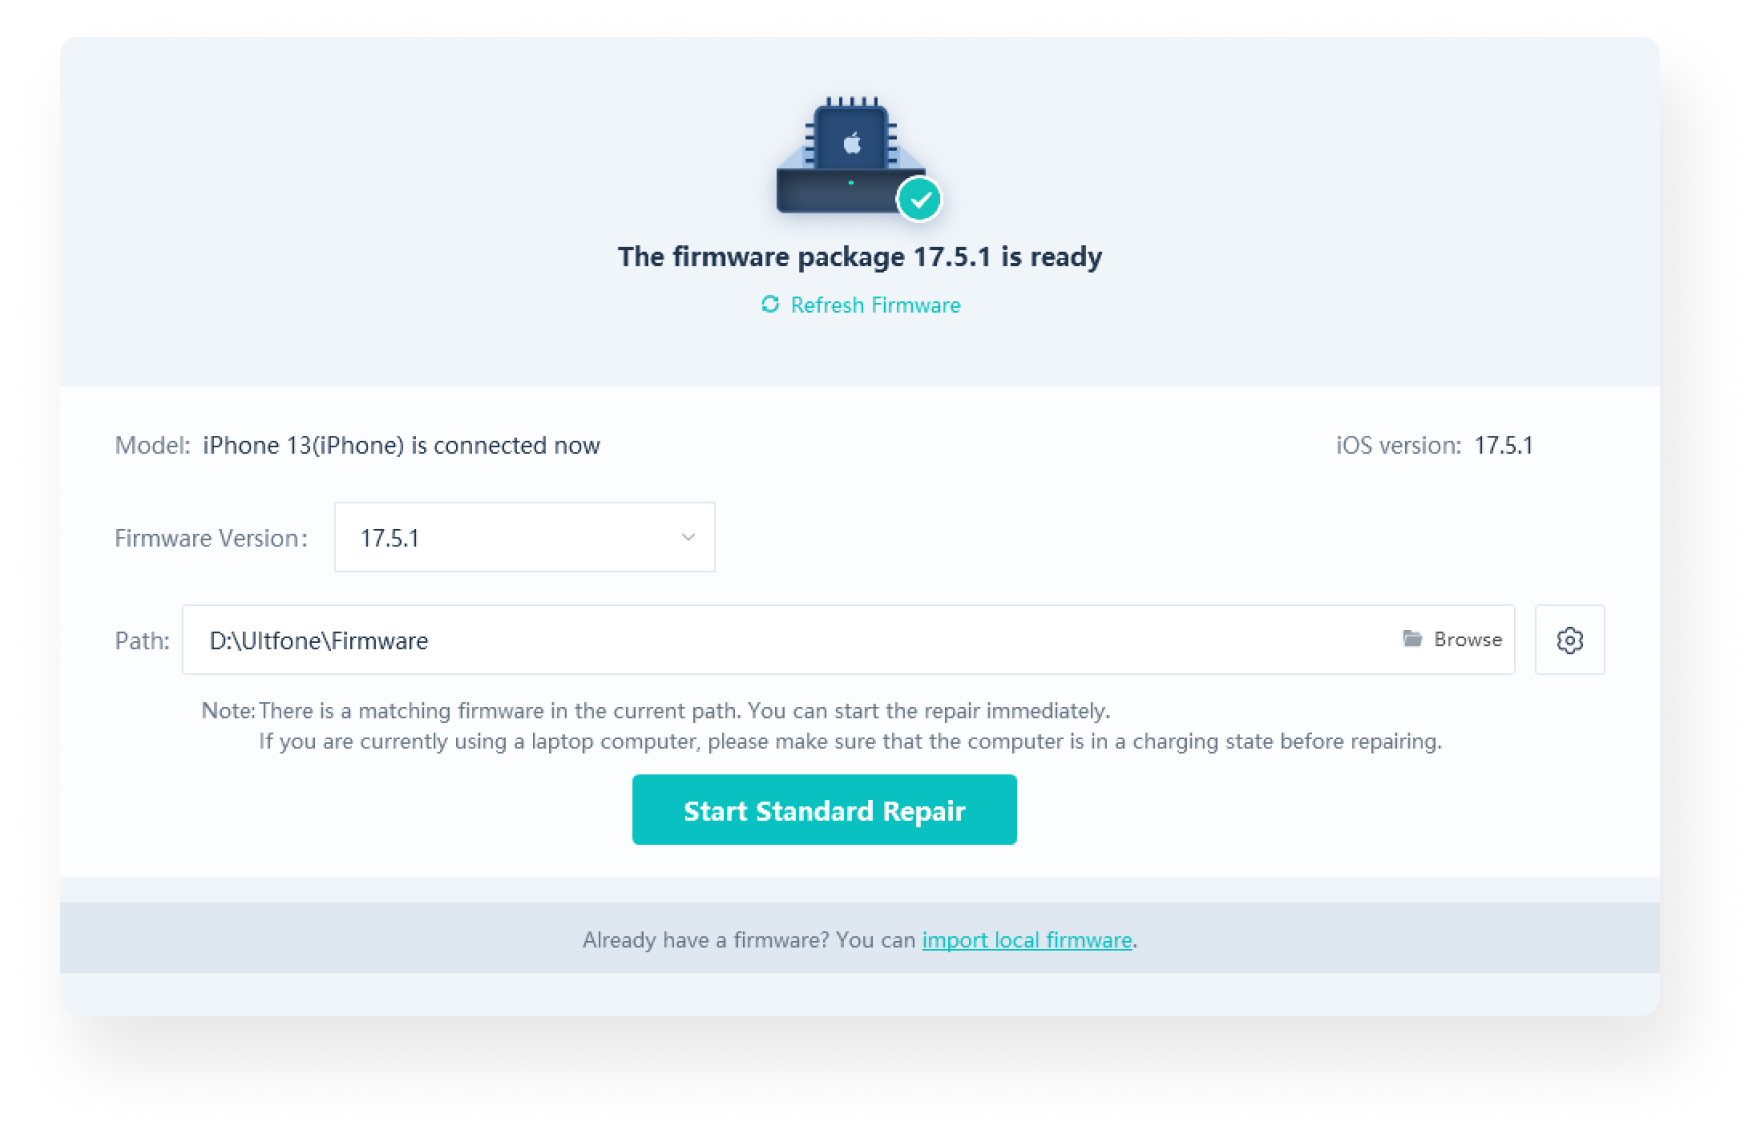
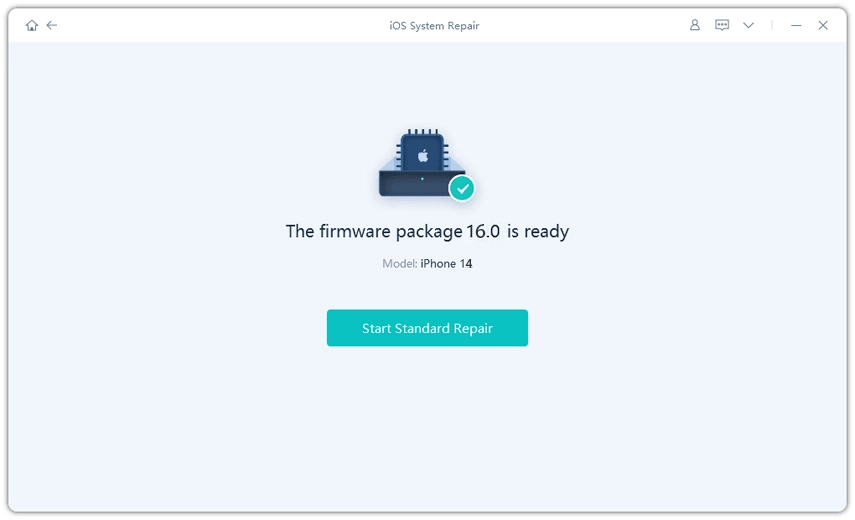
- Step 3It will automatically download the correct firmware for your iPhone model. Let this complete.

- Step 4 Click "Start Standard Repair" to begin. UltFone will thoroughly analyze your iPhone system files and network components to repair software faults behind the SOS only display.

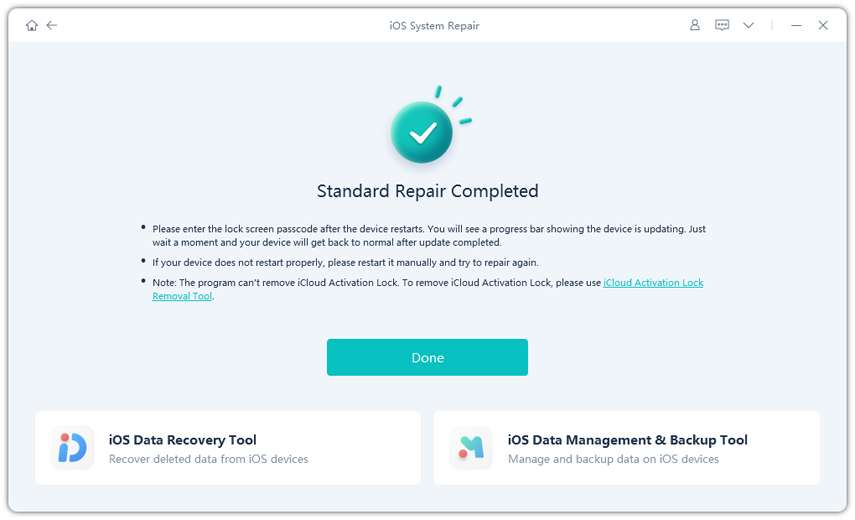
- Step 5 After several minutes, the repair will finish, and your iPhone will automatically reboot with normal network connectivity restored without SOS only errors.

Part 4. People Also Ask about How to Fix iOS 17 SOS Only on iPhone
Q1. How do I turn off SOS on my iPhone 14?
1. Go to Settings > Emergency SOS.
2. Toggle off the Auto Call switch.
This will disable Emergency SOS calls so your iPhone 14 won't default to the SOS only mode unnecessarily.
Q2. Why is my SIM card failing on my iPhone?
A SIM failure can randomly occur from software glitches, hardware faults or physical damage to the SIM card. Getting a new or replacement SIM from your carrier often resolves connectivity disruption issues, including SOS only errors.
Final Word
An iOS 17 SOS only display restricting your iPhone can certainly be frustrating. But as you've seen, this issue can typically be resolved through some simple troubleshooting techniques like network resets, carrier updates, iOS repairs using UltFone software, or asking your provider for a refreshed SIM card. With consistent signals and properly reestablished network settings, you can eliminate those SOS-only errors for good.
For optimal effectiveness across all iPhone models, the UltFone iOS System Repair stands out as the most powerful cure for any lingering software-related causes behind connectivity problems like iOS 17 update SOS only displays.

