How to Send and Receive iMessage on Android
 Jerry Cook
- Updated on 2020-09-28 to Android
Before we talk about how to send and receive iMessage on Android, let us tell you what the iMessage actually is?
iMessage is an instant messaging service that is primarily developed by Apple for iOS-based devices. Though, WhatsApp is one of the most famous messaging apps in the world, there are still many people who prefer iMessage. The real problem comes when you just switched from iPhone to Android, but still, there are few family members or friends who prefer iMessage. And, since you are on Android now, you cannot use iMessage on Android as it is not supported at all. So, that you cannot talk to them using this particular app.
That is the reason we come up with this article that is going to guide you to get iMessage on Android using some techniques. Before we go ahead, we would like to tell you that this requires some really technical stuff so read carefully if you are going to apply the method to use iMessage on Android.
weMessage is the app that makes it possible to use iMessage on your Android phone. The app is created to bring all the messaging platforms to Android. However, you have to use weServer to use its full features.
Let’s see how to go about it.
Step 1: Install Java SE Development Kit on Your Mac computer.
To use iMessage on Android, you need a Mac as you have to install WeServer and keep it running. It works as a server for weMessage. And, to install weServer on Mac, JDK should be installed on it.
Download JDK from Oracle’s website.
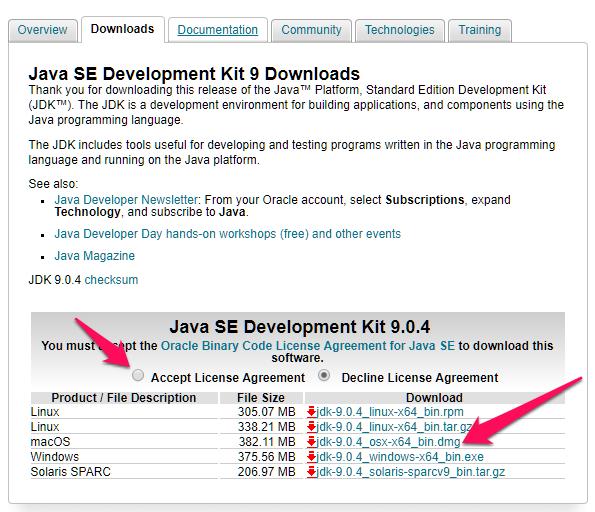
When you go to download page, then choose “Accept License Agreement”, and then click on .dmg file next to macOS to download it. Once downloaded, extract and install it.
Step 2: Allow Terminal Accessibility Permissions
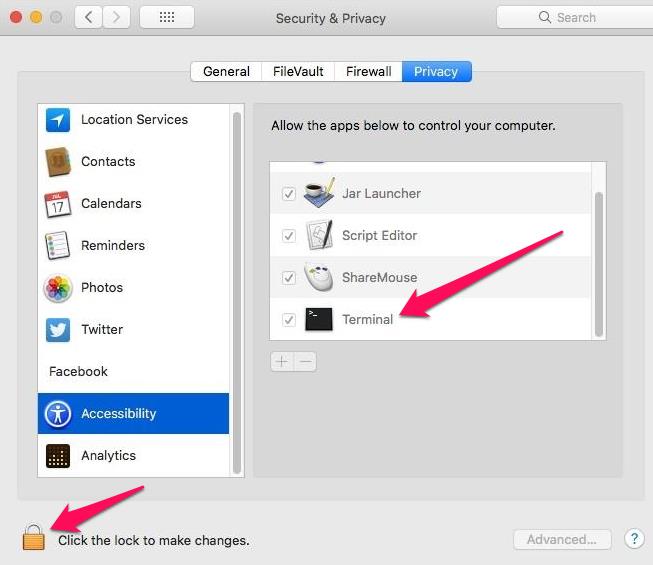
Since weServer works within the terminal, you need to allow the terminal access on your Mac. For this, go to System Preferences >> Security & Privacy on your Mac, then click Privacy tab. Then click Accessibility. You will see there “Terminal” is checked. By chance if it is not there, click the lock as shown in the below screenshot. It will ask for password, enter it. Check “Terminal” in the list.
Step 3: Install weServer on Your Mac to Get iMessage on Android
weServer is the one that manages sending and receiving the iMessage on the Mac and router them to weMessage that is installed on your Android phone. So, you need to install it on the Mac. Download it here. Once downloaded, extract the folder, and double-click run.command in order to start weServer in the terminal.
You will get this alert:
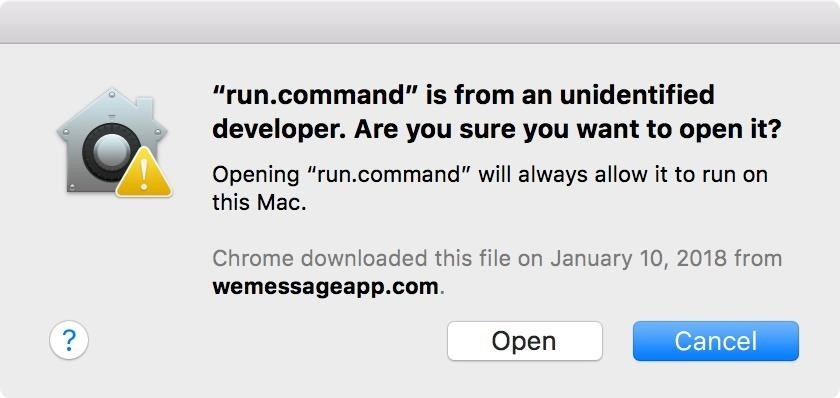
Click Open.

You will see this.
Step 4: Set up iMessage Account with weServer
This is the most important step to use iMessage on Android. As you open weServer in the terminal, it will ask for email and password to login. The email will be the same that you use for iMessage. The password can be different. Create a new one.
Now, when you enter email and password, weServer will be started
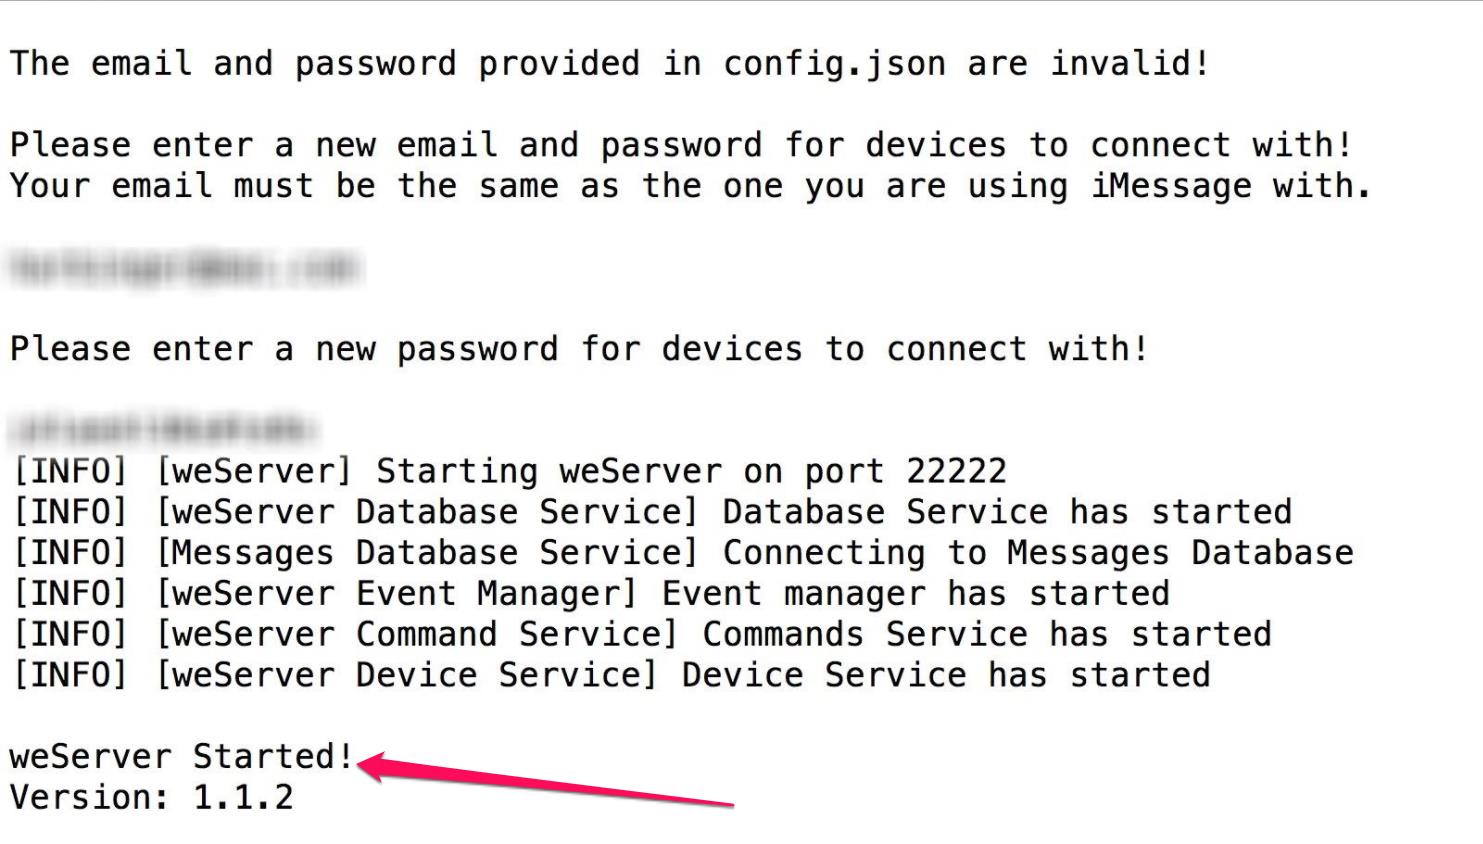
So now, we have set up the server for iMessage.
Step 5: Install weMessage on Your Android Phone
Now, go to this link to download weMessage on your Android phone. Once it is installed, it will ask for iMessage email and password which you can get from the Step 4, but it will also ask for weServer IP address which you need to get.
Step 6: Find Your Mac’s IP Address
If you want to use weMessage only at your home, you can use Private IP, but if you want to use it everywhere, you should use Public IP. Moreover, we would recommend using Public IP only so that it works great no matter where you are.
For using Public IP, you need to setup Port Forwarding from your router’s setting. To go to your router’s setting, you need to enter an IP address in the browser which is usually given by your ISP or the router company.
Once you find it, you can enter into its setting. There, you might find the Port Forwarding option in Advanced settings. However, in different routers, you may find it differently. Now, give a name to the connection, let’s say weserver, add your Mac’s private IP address which you can find by going to System Preferences >> Network
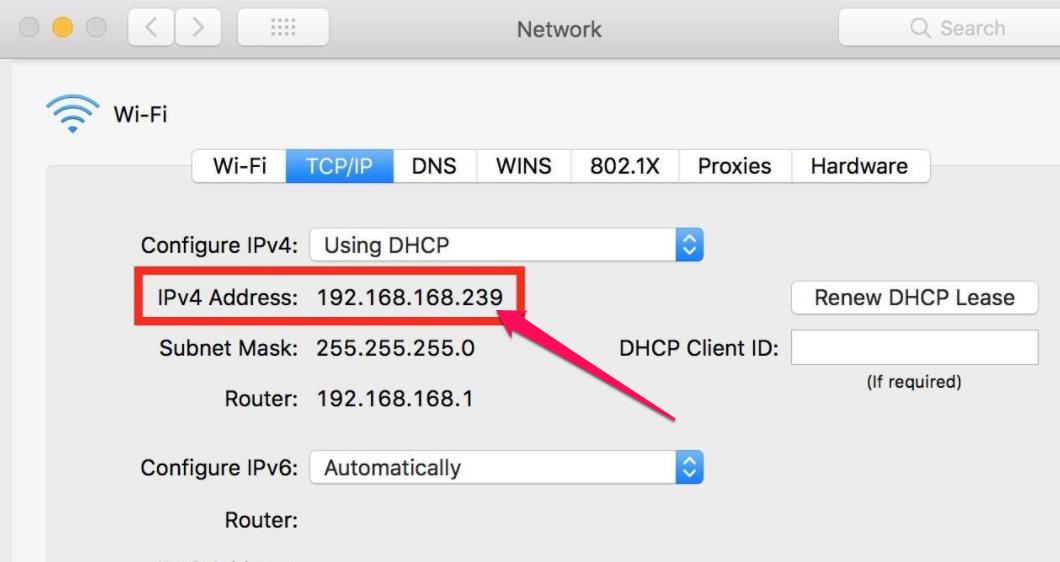
Now, enter source and destination ports. Use 22222 port for both. Also, select TCP/IP as the protocol. All set, now visit whatismyip.com and find your Mac’s IP address.
Step 7: Log in to weMessage to use iMessage on Android
Now, go to your Android phone, launch weMessage, and enter the details asked.
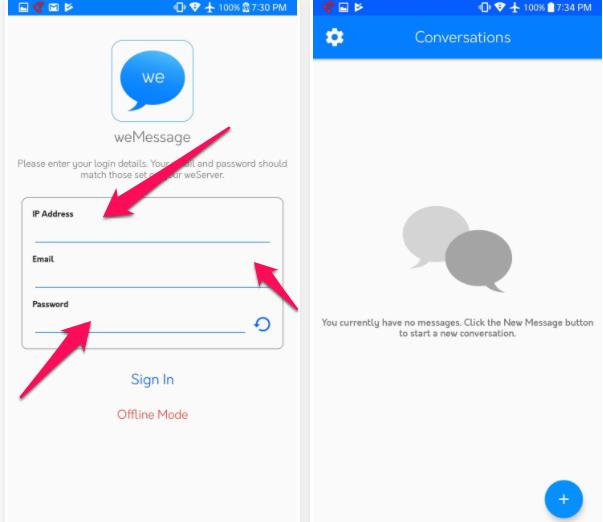
Now, all set but since you don’t have any iMessage contacts here. You have to sync your iMessage contacts with weMessage. To do this, go to Setting >> Sync Contacts >> START PROCESS.
On your Mac, you will get a prompt asking for access permission. Accept that.
You can see the iMesasge contacts within your weMessage app now. You can tap any contact, and start chatting.
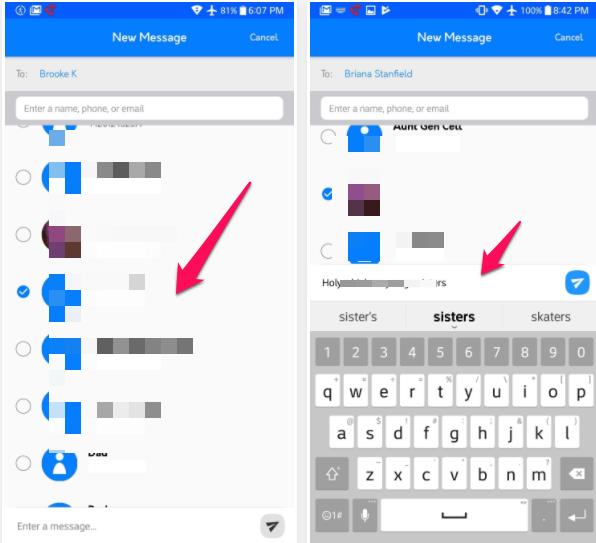
Since all these messages go through weServer you have to keep it on always then only you can use weMessage to send or receive iMessages on Android.
Though installing weMessage and setting up weServer won’t make any other changes to your Android phone other than enabling it to get iMessage on it, you should always have Android data recovery software which helps you recover data of your Android phone when there is data loss.
Conclusion
So, when you think of iMessage alternative for Android, do check out weMessage. However, it is not an alternative actually, but it couples with its weServer and uses techniques to use iMessage on Android through it. This way, you can easily use iMessage on Android to send or receive iMessages to or from Android.

