How to Empty Trash on Android Phone?
 Jerry Cook
- Updated on 2021-04-28 to Android
Determining your Android phone cannot install any new app updates or has become slow because it has run of storage capacity is quite maddening. But the good news is that simply getting rid of trash files on your Android phone can help you save a lot of storage space. This, in turn, makes your smartphone run smoothly. In this guide, we’ll focus on helping you learn how to delete trash on Android device. So, read on and get rid of useless data from your device.
- Part 1. Where Is the Trash Bin on Android?
- Part 2. How to Empty Trash on Android (Samsung/Huawei/LG/ Xiaomi) to Free Up Storage
- Part 3. How to Empty Trash on Android via Different Applications
- Part 4. How to Recover Deleted Android Files When Emptying Trash on Android?
Part 1. Where Is the Trash Bin on Android?
If you’re a computer user, you’re probably familiar with the Recycle Bin on the Windows PC or Trash bin on Mac. These folders store the data you erase. If you ever need the data back, you can easily restore it from these folders.
On Android phones or tablets, unfortunately, there is no Trash or Recycle bin. That’s simply because most Android devices come with limited storage capacity, ranging from 8 to 265 GB. Therefore, having a dedicated folder for trash is merely not feasible. This implies that if you want to erase junk files on your Android phone, you’ll have to search for the useless data on different apps and erase it one by one.
However, some applications such as Photos come with a separate folder (for instance, Recently Deleted Photos) that stores the deleted data for a particular duration.
Part 2. How to Empty Trash on Android (Samsung/Huawei/LG/ Xiaomi) to Free Up Storage
One of the primary reasons to learn how to empty trash on Android tablet or phone is to free up storage on the device. For that, you can follow the below tips.
Step 1. Clear Your Cached Data
Cached data is an intermediary data that apps store to deliver a customized and faster experience. Though it would boost your app experience, it might consume space on your device that you can utilize for other purposes. Therefore, you should clear the cache of your device every once in a while, to free up space.
1. How to Clear the Cache for a Specific App
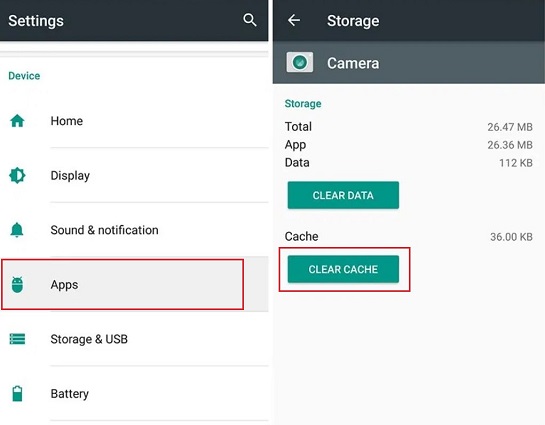
Follow the below steps to get rid of a cache for a specific app on your Android device:
- Open “Settings”>” Apps.”
- Choose any application from the list.
- Go to the app storage settings and tap “Clear Cache” for that particular app.
- Follow the same process to clear cache for other applications.
2. How to Clear All Cache Data on Samsung/LG/Huawei
You can also get rid of the entire cache on your Android device in one go, especially if you own Samsung, LG, or Huawei device. Here’s how to do that:
- Open your device’s storage settings
- Click the “Cached Data” option.
- Select the option to clear all cache data in one go.

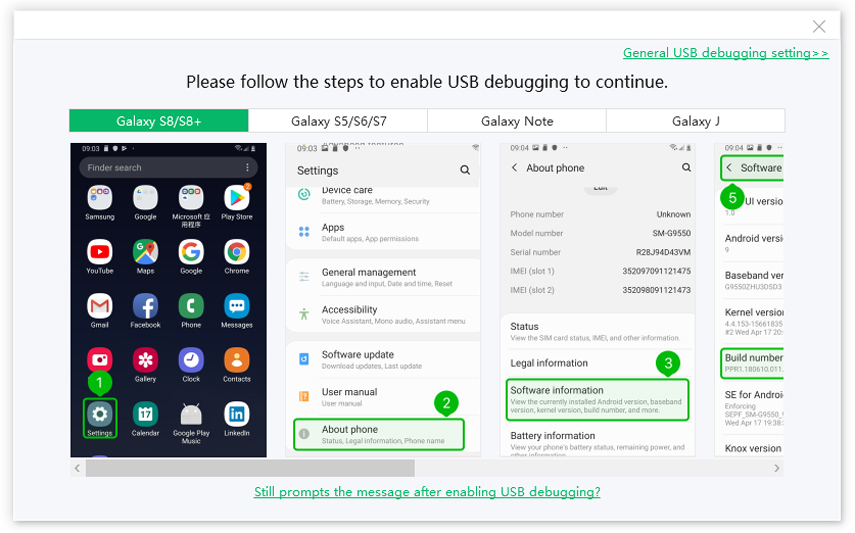
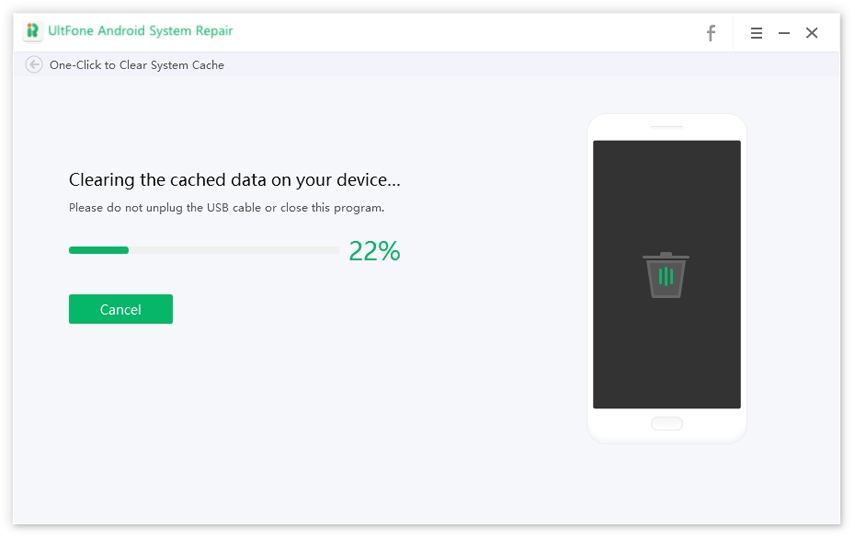
Install this program to PC and connect your device to computer with a USB cable. You need to turn on the USB debugging option on your device to make it recognized by the program.
Choose “One-Click to Clear System Cache” on the main interface.
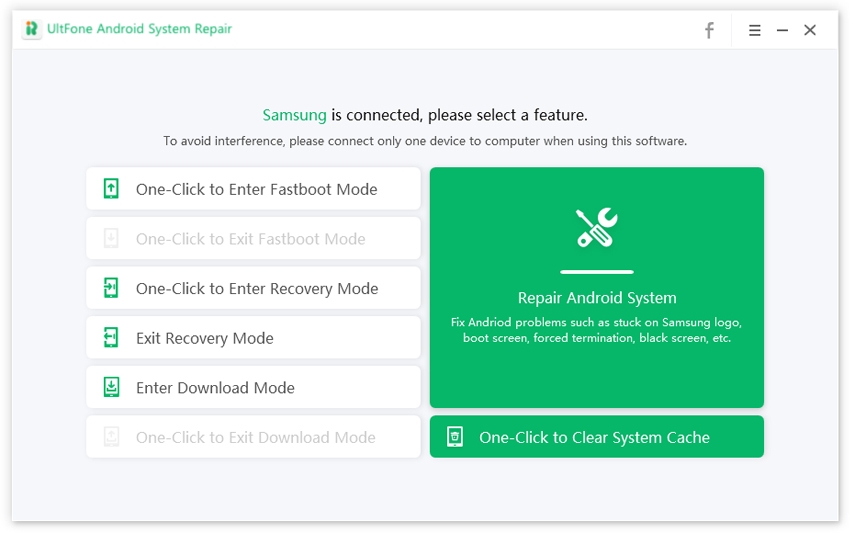
Then, you can wait for the program to clear all cached data on your device.
Step 2. Delete the Downloaded Files You Don't Need
We often download a lot of content from the internet that isn’t required afterward. Thus, when it comes to how to delete trash on Android phone or getting rid of junk files, you should consider deleting downloaded files you don’t need anymore.
Here’s how to get rid of unwanted downloaded files:
- Open File Manager on your device.
- Go to the “Downloads” folder or Download History.”
- Erase the files that you don’t need.

Step 3. Uninstall the Unused Apps
Deleting the apps that you don’t use at all can help you save a lot of storage space on your device. To delete unwanted apps on Android, there are several ways to get the job done.
- Long-press an app icon and tap the “Delete/Uninstall” button.
- Or go to “Settings”>” Apps”>” Choose the app you want to delete”>” Uninstall.”

Step 4. Take Advantage of Smart Storage
Initially introduced in Android 8, Smart Storage comes in handy to get rid of any duplicate and unwanted data from the device storage that’s already backed up to the cloud.
- Go to your device’s “Settings”>” Storage.”
- Enable the “Smart Storage” feature.

The feature will run in the background and automatically erase unwanted content.
Step 5. Use Android Oreo Storage Features
If you’re using an Android Oreo, then you can easily empty trash on your Android device. Follow the below steps to learn how to empty trash on an Android phone running on Android Oreo:
- Go to “Settings”>” Storage.”
- Click on the sections listed to view a list of applications and the storage space occupied by them.
- Click on each application. You will be able to use the “Free Storage” button to delete trash on your device.
Remember, using the Free Storage button will get rid of all the files being stored in the chosen app. Also, on Android Oreo’s Storage Manager, you can find the “Free Up Space” button. On using the button, it should assist you in clearing less useful data.
Step 6. Store Your Files on an SD Card
If your device’s internal storage is limited, you can take advantage of the SD card and expand its storage. Fortunately, almost every Android device comes with an SD card slot, making it easier to manage our files and data. After inserting an SD card, you can move your music, videos, photos, contacts, app data, and more from the device’s internal storage to the card.
Part 3. How to Empty Trash on Android via Different Applications
1. How to Delete Trash Files from Google Photos
Google Photos app comes in handy to manage all of your photos with ease. When you delete unwanted pictures from Google Photos, they move to the Trash folder within the app. Deleted photos stay there for 60 days and, after that, get deleted automatically. However, you can create space on your device by deleting items from the Trash folder.
Here’s how to delete Trash files from Google Photos:
- Launch the Google Photos app on your device.
- Tap the Menu icon.
- Choose “Trash” to access all the deleted items.
- Select the files you would like to delete permanently and hit “Delete.”

2. Remove Junk Files from Gmail
Yes, your Gmail contains a lot of junk files, and you can get rid of them to free up space on your Android phone. When you delete any email, it isn’t permanently deleted. Instead, it moves to the Trash folder within the app. Deleted emails stay there for 30 days in the Trash folder.
Here’s how to how to delete the trash in Gmail on Android:
- Launch the Gmail app on your Android phone.
- Click the Menu icon.
- Select the “Trash” option.
- Tap “Empty Trash Now/Empty Bin Now” to empty the trash folder.

3. Remove Unwanted Files from Dropbox
Dropbox is one of the popular cloud storage services to back up your important data and files. Unfortunately, the free version offers only 2 GB of storage, and that’s why getting rid of junk files from your Android device’s Dropbox app can help you save some space.
Here’s how to empty the trash on Android’s Dropbox app:
- Launch the Dropbox app on your device.
- LGo to the “Trash” folder and click on its icon.
- LYou’ll now see the deleted data, so select folders and files you want to delete.
- LHit “Delete.”
Part 4. How to Recover Deleted Android Files When Emptying Trash on Android?
When getting rid of trash and junk files from your Android device, it’s indeed possible that you end up deleted something important. But no worries!! You can use the UltFone Android Data Recovery tool and rescue your files. This tool is designed to help you recover deleted or lost data from your Android device under various data loss scenarios. This includes accidental deletion, a system crash, virus attack, software update, and more. Whether it’s about getting back photos, contacts, videos, or WhatsApp data, the tool can help you do that even without rooting the device.
Here’s a step-by-step guide on how to recover deleted Android files using UltFone Android Data Recovery:
-
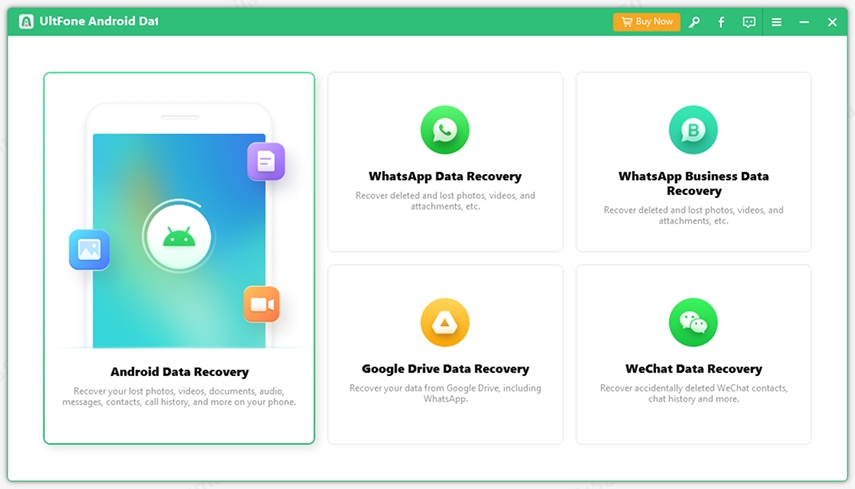
Step 1 Run the software and choose the “Recover Lost Data” option from the main interface.

-
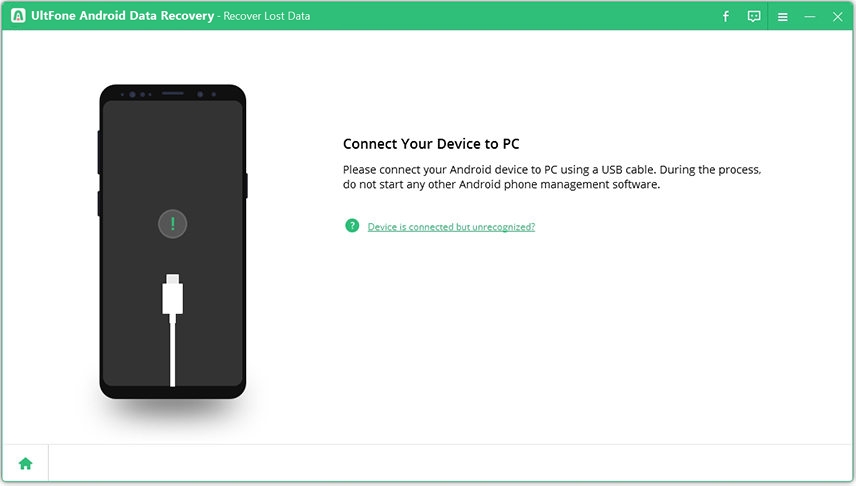
Step 2 Connect your Android device to the computer with the help of a digital cable.

-
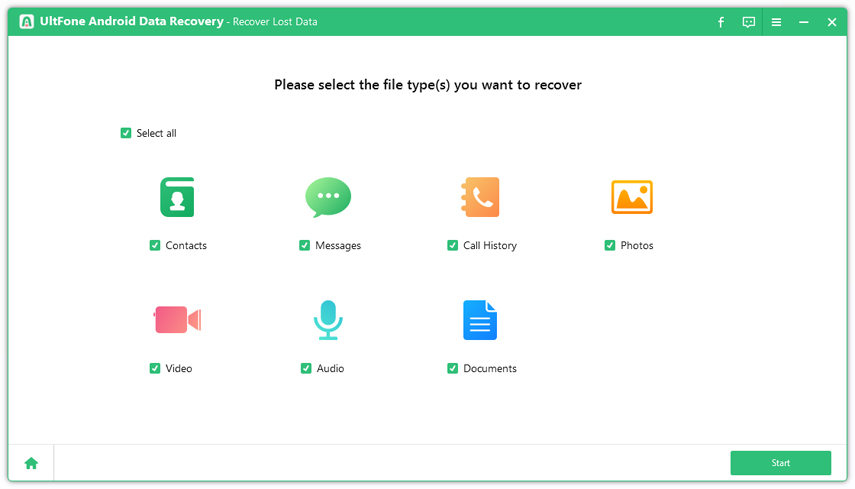
Step 3 Choose the file types you want to recover and hit the “Start” button to scan the deleted Android files.

-
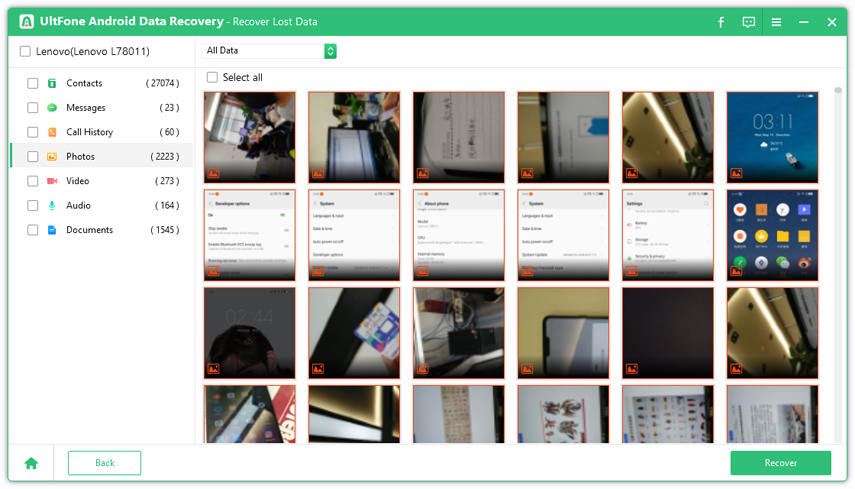
Step 4 After the scan, preview the recoverable files and choose the one you would like to get back. Finally, hit the “Recover” button, and that’s it.

Last Words
That’s all on how to empty trash on Android device. As you can now see that there are different ways to get rid of trash files on Android and free up storage. Moreover, if you ever end up deleting important data while clearing trash files on your Android phone, take the assistance of UltFone Android Data Recovery and get back your deleted files with ease.

